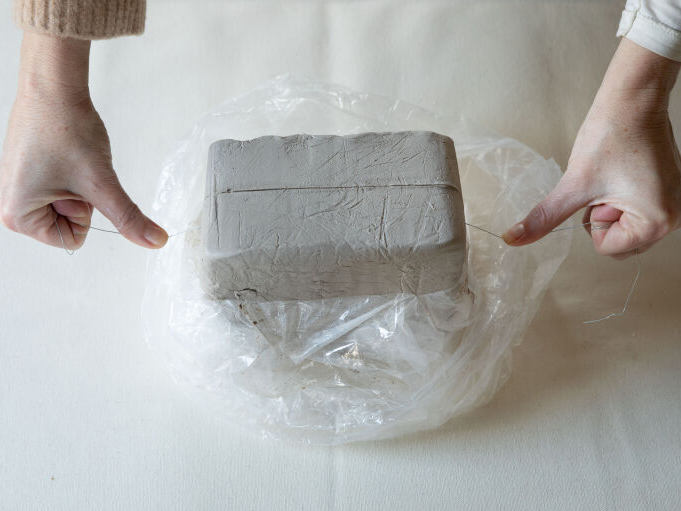
White air-dry modeling clay is the craft-room equivalent of a blank canvas, a fresh notebook, and a tiny sculpture studio all rolled into one squishy block. It does not ask for a kiln. It does not demand oven space. It simply waits for your hands, your imagination, and possibly your willingness to clean clay dust off the table later. Fair trade, honestly.
For beginners, teachers, hobbyists, parents, décor lovers, and anyone who has ever looked at a $42 handmade trinket dish and whispered, “I could probably make that,” white air-dry clay is one of the easiest materials to start with. It is soft enough to shape by hand, firm enough to hold simple details, and neutral enough to paint, stamp, carve, sand, or leave beautifully minimal.
This guide explores what white air-dry modeling clay is, why it is so popular, how to use it well, what projects it suits best, and how to avoid the classic beginner heartbreak known as “my cute clay mushroom cracked like a tiny earthquake.”
What Is White Air-dry Modeling Clay?
White air-dry modeling clay is a self-hardening craft clay that cures when exposed to air. Unlike ceramic clay, it does not need kiln firing. Unlike traditional polymer clay, it does not need oven baking. You shape it, let it dry, and finish it with paint, varnish, sealer, or decorative details.
The “white” part matters more than it sounds. White clay gives you a clean base for painting, makes stamped textures easier to see, and creates a modern handmade look even when left unpainted. It is especially popular for ornaments, jewelry dishes, wall hangings, mini sculptures, home décor, classroom projects, keepsakes, and seasonal crafts.
Most white air-dry clays are water-based. That means you can usually soften the surface with a little water while working, smooth seams with damp fingers, and clean tools before the clay hardens. It also means finished pieces should be protected from heavy moisture. In other words: wonderful for a ring dish, less wonderful for a soup bowl. Please do not make soup bowls. Soup deserves better.
Why White Air-dry Clay Is So Popular
No Kiln, No Oven, No Drama
The biggest reason people love air-dry clay is convenience. You do not need ceramic equipment, special ventilation, or a studio setup. A table, a rolling pin, a cup of water, and a few basic tools are enough to begin. This makes it ideal for apartments, classrooms, craft nights, kids’ activities, and small home businesses testing handmade product ideas.
A Clean Base for Any Style
White modeling clay works with almost every visual style. Leave it matte and natural for a Scandinavian-inspired look. Paint it with acrylics for bold color. Add gold leaf for a boutique feel. Press lace, leaves, stamps, shells, or fabric into the surface for texture. White clay politely steps aside and lets your design be the main character.
Beginner-Friendly but Not Boring
Air-dry clay is forgiving. If a seam looks rough, smooth it with water. If an edge is uneven after drying, sand it gently. If your first pinch pot looks like it survived a small emotional crisis, call it “organic.” Handmade charm is very forgiving, especially when photographed beside a candle.
Best Uses for Air-dry Modeling Clay in White
White air-dry clay is versatile, but it shines brightest in small to medium decorative projects. It is best used for items that will not be exposed to constant water, heavy impact, or outdoor weather.
Home Décor
Make minimalist candle plates, wall charms, decorative knots, faux ceramic vases, napkin rings, plant markers, drawer pulls, garlands, and small sculptural accents. White clay has that soft handmade look that fits modern, boho, coastal, farmhouse, and cottage-inspired interiors.
Jewelry and Accessories
Lightweight earrings, pendants, beads, keychains, brooches, and charms are great starter projects. Roll the clay evenly, cut clean shapes, pierce holes before drying, and sand the edges afterward. For wearables, sealing is especially important because skin oils, humidity, and daily handling can affect the finish.
Kids’ Crafts and Classroom Projects
White air-dry clay is excellent for school projects because it is easy to shape and does not require firing. Students can make fossils, animal figures, maps, ornaments, texture tiles, handprint keepsakes, and small sculptures. Teachers appreciate materials that do not require a kiln, and parents appreciate anything that keeps glitter out of the carpet. Clay is not mess-free, but compared with glitter, it is practically a polite houseguest.
Seasonal Decorations
White clay is perfect for holiday ornaments, gift tags, snowflakes, Easter decorations, Halloween ghosts, Valentine hearts, and handmade place cards. Use cookie cutters for simple shapes, stamps for names or patterns, and twine or ribbon for hanging.
How to Use White Air-dry Clay Successfully
1. Prepare Your Workspace
Work on a smooth, nonporous surface such as a plastic mat, acrylic sheet, ceramic tile, or clean cutting board. Air-dry clay can pick up crumbs, lint, and mysterious table specks with impressive enthusiasm. Since white clay shows everything, wipe the surface first.
2. Keep Unused Clay Sealed
Air-dry clay begins drying as soon as it meets air. Only remove the amount you need and keep the rest tightly wrapped in plastic, stored in an airtight container, or sealed in its original packaging. A damp paper towel can help cover clay temporarily while you work, but long-term storage needs an airtight barrier.
3. Knead Before Shaping
Kneading makes the clay more flexible and helps reduce small cracks during shaping. If the clay feels stiff, add a tiny amount of water to your hands and work it in gradually. Do not flood it. Clay needs moisture, not a spa day.
4. Build Thin, Even Forms
Very thick pieces dry slowly and are more likely to crack. For bowls, ornaments, tiles, tags, and jewelry pieces, aim for even thickness. If making a larger sculpture, consider building around a lightweight armature such as crumpled foil, cardboard, or wire, depending on the project.
5. Join Pieces Properly
For stronger joins, use the score-and-slip method. Scratch both surfaces lightly, add a small amount of water or clay slurry, press together, and smooth the seam. This is especially useful for handles, small attachments, animal ears, flower petals, and decorative raised details.
6. Let It Dry Slowly and Completely
Drying time depends on thickness, humidity, brand, and project size. Many small pieces become touch-dry within a day, but thicker pieces can take longer. Flip flat items occasionally so both sides dry evenly. Avoid placing projects in direct sun or near strong heat, because fast drying can cause warping and cracks.
Painting and Sealing White Air-dry Clay
Once fully dry, white air-dry clay can be painted with acrylic paint, tempera paint, watercolor effects, paint markers, metallic wax, or craft finishes. Acrylic paint is a favorite because it gives strong color, dries quickly, and adds a light protective layer.
For a smoother finish, sand the dry clay gently with fine-grit sandpaper before painting. Wipe away dust with a soft cloth. If you want richer color or a less absorbent surface, apply a primer or gesso first. This helps paint sit more evenly on the clay rather than soaking in patchy spots.
Sealing is highly recommended for pieces that will be handled often. A clear acrylic sealer, polyurethane varnish, or craft glaze can add protection and change the surface finish. Matte sealers preserve a natural ceramic look. Gloss sealers make colors pop and give a shiny glazed effect. However, sealing does not usually make air-dry clay fully waterproof. It makes it more water-resistant, not magically dishwasher-safe. The dishwasher is where handmade clay dreams go to become crumbs.
Common Problems and How to Fix Them
Cracking
Cracking often happens when clay dries too quickly, is too thick, or lacks enough moisture while being shaped. To prevent cracks, keep thickness even, smooth the surface with damp fingers, and let pieces dry slowly. Small cracks can often be repaired with a paste made from clay and water. Apply it, smooth it, let it dry, and sand lightly.
Warping
Flat pieces may curl if one side dries faster than the other. Flip them during drying and avoid leaving them on absorbent surfaces for too long. For thin ornaments or tags, drying between two pieces of parchment with light pressure nearby can help, but do not crush the design.
Rough Edges
Rough edges are normal, especially after cutting shapes. Let the clay dry completely, then sand carefully. A nail file also works for small jewelry pieces and ornaments.
Paint Looking Patchy
Patchy paint usually means the clay is absorbing moisture unevenly. Try a primer, gesso, or an extra base coat of acrylic paint. Let each layer dry before adding the next.
Project Ideas Using White Air-dry Modeling Clay
Minimalist Ring Dish
Roll clay into a small slab, place it gently inside a shallow bowl to form a curve, and let it dry. Sand the edge, paint the rim gold, and seal it. This project is simple, useful, and looks suspiciously expensive for something made beside a coffee mug.
Stamped Gift Tags
Cut circles, rectangles, stars, or hearts from rolled clay. Stamp initials, names, or short messages into the surface. Make a hole before drying, then finish with ribbon or twine. These tags work for weddings, birthdays, holidays, and gift wrapping that says, “Yes, I am the thoughtful one.”
Pressed Botanical Tiles
Press leaves, herbs, flowers, or fern stems into white clay to create natural impressions. After drying, add a watercolor wash or leave the clay plain. These tiles can become wall art, coasters for dry use, ornaments, or keepsake pieces.
Clay Beads and Charms
Roll small beads, pierce holes with a skewer, and let them dry fully. Paint with acrylics or create a marbled look by mixing a small amount of paint into the clay before shaping. Use finished beads for necklaces, garlands, keychains, or bag charms.
Decorative Mini Sculptures
Try mushrooms, houses, clouds, birds, cats, stars, tiny food, abstract shapes, or little ghosts. White clay is especially good for simple sculptural forms because it makes shadows and shapes easy to see.
Buying Tips: What to Look For
When choosing white air-dry clay, consider texture, drying time, package size, strength, and intended use. A smoother clay is better for jewelry, ornaments, and detail work. A stronger or fiber-reinforced clay may be better for larger sculptures. A resealable tub is useful for classrooms and families, while smaller blocks are better for occasional crafting.
For kids and classrooms, look for non-toxic labeling and easy cleanup. For adult craft projects, consider how well the clay sands, paints, and holds fine details. For decorative pieces, choose a clay that dries close to true white if you plan to leave it unpainted.
Care and Display Tips
Finished air-dry clay pieces should be kept indoors and away from heavy moisture. Dust them with a soft cloth. Avoid soaking, scrubbing, or using them for food unless the product and sealant are specifically rated for that purpose. Most handmade air-dry clay items are decorative, not functional ceramics.
Store delicate pieces in padded boxes if they are seasonal. Thin ornaments, small petals, and protruding details can chip if tossed into a storage bin with holiday lights, tape, and that one mystery ornament nobody remembers buying.
Personal Experience: What Working With White Air-dry Clay Feels Like
Working with white air-dry modeling clay is both calming and slightly chaotic in the best possible way. The first thing you notice is how approachable it feels. You open the package, pinch off a piece, and suddenly your table becomes a small studio. No countdown timer, no preheating oven, no complicated setup. It is just you, the clay, and the bold belief that this lump will soon become something charming.
One of the best experiences with white clay is making simple trinket dishes. They look elegant but do not require advanced sculpting skills. Roll out the clay, cut a circle, place it inside a small bowl, and smooth the edge. The trick is patience. The clay may look dry on the surface before the inside is ready, and if you rush the painting stage, it can feel slightly cool or damp underneath. Waiting an extra day often gives better results.
White clay is also excellent for texture experiments. Pressing lace, leaves, rubber stamps, woven fabric, or even the bottom of a glass into the surface creates instant detail. This is where the material becomes addictive. You start by making one ornament, then suddenly you are walking around the house asking, “Would this make a good texture?” A lemon zester? Maybe. A sweater sleeve? Surprisingly yes. The TV remote? Please do not.
The biggest lesson is that water is helpful only in small amounts. Damp fingers can smooth seams beautifully, but too much water turns the surface slippery and weak. The best approach is to add moisture gradually and let your fingers do most of the work. For cracks, a clay-and-water paste can rescue small flaws, but prevention is easier than repair. Even thickness, slow drying, and proper storage make a huge difference.
Painting white air-dry clay is especially satisfying because colors look bright on the pale surface. Acrylic paint gives the cleanest result for most projects. A thin base coat helps, followed by details once the first layer dries. Metallic accents on edges, stamped letters, or raised textures can make simple pieces look polished. Sealer is the final personality choice: matte for modern and soft, satin for subtle polish, gloss for “I bought this at a boutique and will not be taking questions.”
Another memorable part of using air-dry clay is learning to accept handmade imperfections. A slightly uneven rim, a thumbprint, or a tiny wobble can make the object feel warmer. Unlike mass-produced décor, handmade clay pieces carry evidence of the person who made them. That is the whole charm. You are not trying to beat a factory at being perfect. You are making something personal, useful, and a little bit alive.
For beginners, the best advice is to start small. Make tags, beads, ornaments, plant markers, or a small dish before attempting a large sculpture. Small projects dry faster, crack less, and teach the basics quickly. Once you understand how the clay behaves, larger and more detailed pieces become much easier. White air-dry clay rewards curiosity, and even the “failed” pieces often become test tiles for paint, texture, or sealing experiments.
In the end, white air-dry modeling clay is one of those materials that makes creativity feel possible. It lowers the barrier between idea and object. You can make gifts, décor, keepsakes, jewelry, and experiments without needing a ceramic studio. It is affordable, flexible, and surprisingly stylish. Just keep the package sealed, let pieces dry fully, seal finished work when needed, and remember: if your first sculpture looks weird, call it abstract and place it on a shelf with confidence.
Conclusion
Air-dry modeling clay in white is a practical, beginner-friendly, and endlessly customizable craft material. It gives makers the look of handmade ceramics without the kiln, the flexibility of sculpting without complex tools, and the creative freedom to paint, stamp, carve, sand, and seal finished pieces. From kids’ crafts to modern home décor, white air-dry clay adapts beautifully to different skill levels and styles.
The key to success is simple: keep unused clay airtight, work with even thickness, use water sparingly, dry pieces slowly, paint only when fully dry, and seal projects that will be handled often. Once you understand those basics, this humble white clay becomes a tiny factory for ornaments, dishes, charms, wall art, and “I made this!” moments. And really, few things beat the joy of turning a plain block of clay into something worth keeping.