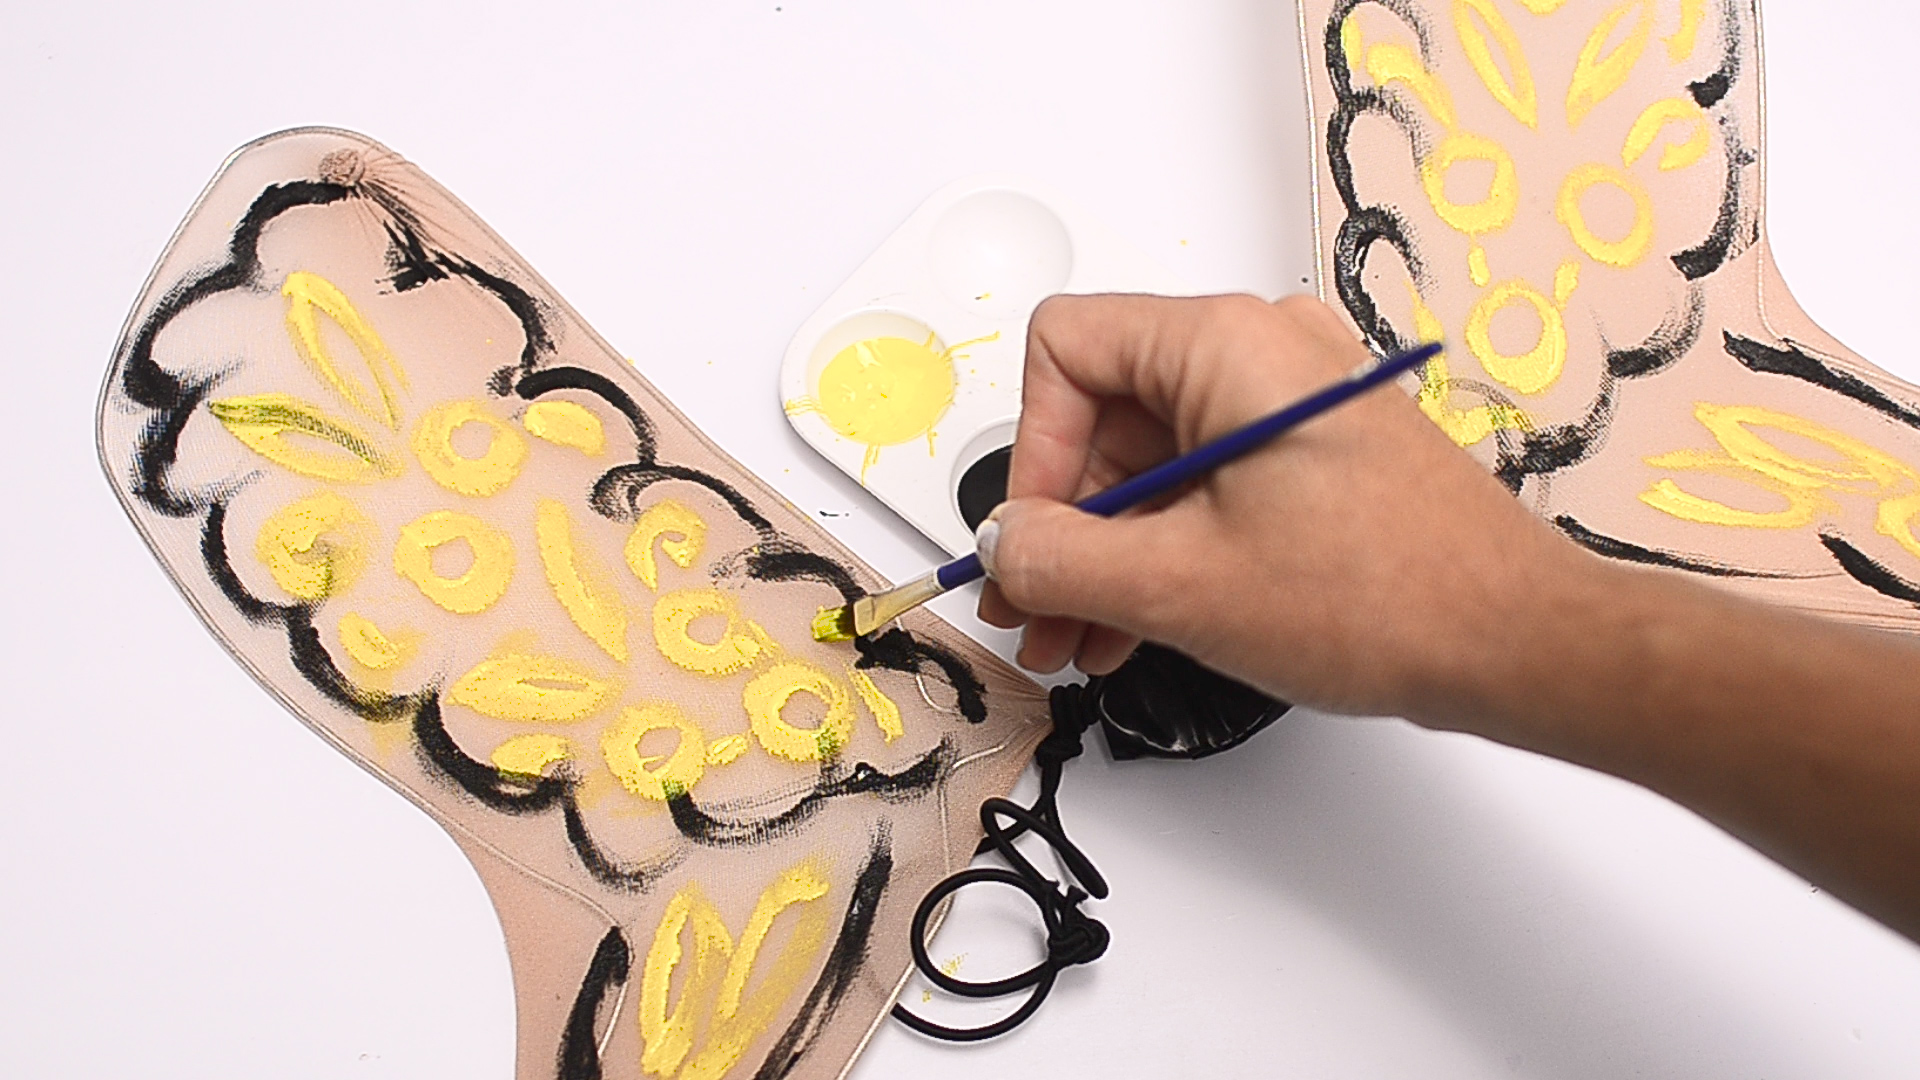
Butterfly wings are the rare craft project that can turn a plain outfit into a magical costume faster than you can say, “Where did I put the glue stick?” Whether you are making wings for Halloween, a school play, a spring festival, a birthday party, a photo shoot, or an afternoon of imaginative play, the goal is the same: lightweight wings that look beautiful, stay comfortable, and do not collapse dramatically the moment someone flutters across the room.
The good news is that you do not need professional costume-making skills to make butterfly wings at home. With cardboard, poster board, felt, fabric, wire, cellophane, elastic, paint, and a little patience, you can create wings that feel custom-made. This guide focuses on a practical, beginner-friendly method using cardboard or foam board as the main base, while also offering optional upgrades for wire, fabric, felt, and translucent cellophane styles.
Below, you will learn how to make butterfly wings in 15 clear steps, from choosing the design to adding straps and finishing details. The project is flexible enough for kids, adults, classrooms, cosplay beginners, and crafty people who swear they are “not crafty” while secretly owning seven types of glitter.
Materials You Need to Make Butterfly Wings
Before you start cutting, gather your supplies. A well-prepared craft table makes this project smoother, cleaner, and much less likely to end with someone using a cereal box as a panic template.
Basic Supplies
- Large cardboard sheet, foam board, or poster board
- Pencil or washable marker
- Scissors or craft knife
- Cutting mat or thick scrap cardboard for protecting the table
- Acrylic paint, tempera paint, markers, crayons, or paint pens
- Glue stick, craft glue, or low-temperature hot glue gun
- Elastic, ribbon, shoelaces, or soft fabric straps
- Hole punch or awl for strap holes
- Clear tape, duct tape, or painter’s tape
- Optional decorations: glitter glue, paper shapes, gems, felt, stickers, cellophane, sequins
Safety Notes Before You Begin
If children are helping, adults should handle craft knives, hot glue guns, and any cutting that requires pressure. Choose art supplies labeled non-toxic whenever possible, especially for younger children. If you use spray paint or spray adhesive, work outdoors or in a well-ventilated area and let everything dry completely before wearing the wings.
How to Make Butterfly Wings: 15 Steps
Step 1: Choose Your Butterfly Style
Start by deciding what kind of butterfly wings you want to make. A monarch butterfly design is classic, with orange panels, black borders, and white spots. A blue morpho design looks dramatic with deep blue wings and dark edges. A fantasy butterfly can be any color you love: pink, purple, gold, rainbow, neon green, or “my toddler chose every marker in the box.”
Look at real butterfly photos for inspiration. Notice that butterfly wings are usually symmetrical, but not perfectly plain. They often include veins, spots, scalloped edges, gradients, and bold borders. You do not have to copy nature exactly, but using real butterflies as a guide will make your homemade butterfly wings look more polished.
Step 2: Measure the Wearer
Measure from shoulder to shoulder and from the base of the neck to the lower back or hips. For kids, wings should be wide enough to look playful but not so large that they bump into doorways, chairs, siblings, pets, or innocent snack tables. For adults, measure across the back and decide whether you want compact wings, costume wings, or dramatic photo-shoot wings.
A good rule is to make the total wingspan slightly wider than the wearer’s shoulders for small children, or about arm-span width for a theatrical look. If the wings are for walking around at an event, keep them manageable. Beautiful wings are fun; accidentally sweeping cupcakes off a table is memorable for the wrong reason.
Step 3: Create a Paper Template
Fold a large piece of paper in half and draw one side of the butterfly wing. This helps you create a symmetrical shape. Draw one upper wing and one lower wing connected at the center. The upper wing can be rounded and wide, while the lower wing can curve inward and taper gently.
Cut out the folded template, open it, and check the shape. Hold it against the wearer’s back. If it looks too small, tape on extra paper and redraw. If it looks too large, trim the edges. This template stage saves materials and prevents the classic crafting mistake of cutting first and whispering, “Well, that’s modern art.”
Step 4: Trace the Template onto Cardboard or Foam Board
Place your template on cardboard, foam board, or poster board. Trace around it with a pencil or marker. Cardboard is budget-friendly and sturdy, foam board gives a cleaner finish, and poster board works well for very lightweight wings.
If you are using corrugated cardboard, pay attention to the direction of the corrugation. Vertical corrugation can add strength from top to bottom, while horizontal corrugation may bend more easily. For large wings, consider gluing two layers together with the corrugation running in opposite directions for extra strength.
Step 5: Cut Out the Wing Shape
Cut carefully along the outline. Scissors may work for poster board or thin cardboard, while a craft knife is better for thick cardboard or foam board. Always cut on a protected surface. Use slow, steady strokes rather than trying to carve the whole wing in one heroic swipe.
After cutting, smooth any rough edges. You can trim uneven areas with scissors or cover them later with tape, paint, felt, or paper edging. If the wings are for a child, make sure there are no sharp corners or rough cardboard bits that could scratch skin or snag clothing.
Step 6: Reinforce the Center Back Panel
The center of the wings is the stress point because it supports the straps and sits against the wearer’s back. Cut a small rectangle of cardboard or foam board and glue it vertically over the center seam on the back side of the wings. This panel works like a backbone.
For extra durability, add duct tape or strong packing tape around the center panel. If the wings will be worn outdoors or during a party, reinforcement is worth the few extra minutes. Nobody wants a butterfly transformation that turns into a cardboard landslide halfway through the event.
Step 7: Sketch the Wing Pattern
Lightly draw the internal wing design with pencil. Start with a border around the entire wing. Then add curved lines that imitate wing veins. Divide the wings into large sections rather than many tiny ones, especially if children will help paint.
For a monarch-inspired look, draw thick black borders, white dots around the edges, and orange or yellow interior panels. For a stained-glass style, draw vein lines that create colorful sections. For a fantasy design, add stars, swirls, hearts, flowers, moons, or abstract shapes. Symmetry helps, but small differences can make the wings feel handmade in a charming way.
Step 8: Paint the Base Color
Apply a base coat of paint to the front of the wings. Acrylic paint works well on cardboard and foam board because it has strong color and good coverage. Tempera paint is a washable option for kids, though it may need more coats. Let the paint dry fully before adding details.
If you want a soft gradient, blend colors while the paint is still slightly wet. For example, blend yellow into orange for monarch wings, turquoise into royal blue for blue butterfly wings, or pink into purple for fairy-style wings. Keep the paint layer thin enough that the cardboard does not warp.
Step 9: Add Borders, Veins, and Details
Once the base color is dry, paint the border and veins. Black creates a bold butterfly effect, while gold, white, or silver gives a fantasy look. Paint pens are useful for clean lines, especially on smaller wings. If you are working with kids, markers can be easier than brushes.
Add dots, dashes, scallops, or small circles around the edges. White dots on black borders instantly make butterfly wings look more realistic. You can also glue on paper shapes, felt spots, or foam stickers. Try to repeat similar details on both sides so the wings look balanced.
Step 10: Decorate with Optional Texture
This is where the wings gain personality. Add glitter glue for sparkle, tissue paper for a layered effect, felt for softness, or cellophane for a translucent shine. If you want a suncatcher look, cut holes in the cardboard wing panels and cover them from behind with colored cellophane.
For a no-mess classroom version, use construction paper shapes and glue sticks. For a dramatic costume version, use metallic paint, rhinestones, sequins, and iridescent film. Just remember that every decoration adds weight. Lightweight wings are easier to wear, especially for children.
Step 11: Seal the Design
After the paint and glue are dry, you can seal the front with a thin layer of clear craft sealer or decoupage medium. This helps protect the design from smudges and light moisture. If the wings are for one indoor event, sealing is optional. If they will be used repeatedly, sealing is a smart upgrade.
Do not seal wet paint, and do not overload cardboard with liquid sealer. Brush on a thin coat and let it dry flat. If your wings curl slightly, place clean books around the edges after they are dry to help flatten them.
Step 12: Make the Arm Straps
Cut two pieces of elastic, ribbon, or soft cord long enough to create shoulder loops. Elastic is comfortable because it stretches as the wearer moves. Ribbon looks pretty but should not be tied too tightly. Shoelaces are a sturdy, budget-friendly option.
Punch four holes in the reinforced center panel: two near the top and two near the lower middle. Thread one strap through the left pair of holes and one strap through the right pair. Tie knots on the back or inside of the panel. The loops should fit like backpack straps.
Step 13: Test the Fit
Have the wearer try on the wings. Check whether the straps sit comfortably on the shoulders and whether the wings rest flat against the back. The wings should not choke, pinch, slide down, or wobble wildly. Adjust the strap length as needed.
If the wings tilt backward, tighten the straps slightly or move the lower holes down. If the wings sit too high, loosen the straps. If the center panel rubs, glue a piece of felt or soft fabric over the back. Comfort matters because even the prettiest butterfly becomes grumpy when the straps feel like tiny shoulder traps.
Step 14: Add Movement Features
For simple wearable wings, you can stop after the straps. But if you want wings that move with the arms, add wrist loops. Punch small holes near the outer lower edges of the wings and tie a soft elastic loop on each side. The wearer slips the loops around their wrists so the wings lift when they raise their arms.
This option works especially well for fabric butterfly wings or flexible poster board wings. For stiff cardboard wings, keep wrist loops loose so they do not pull too hard. Test movement slowly. The wings should flutter, not wrestle the wearer.
Step 15: Finish, Dry, and Store Properly
Let the wings dry completely before wearing them. Check all glued areas, knots, and straps. Reinforce any weak spots with tape or extra glue. Take a few test steps, turns, and arm movements to make sure the wings are event-ready.
Store butterfly wings flat or hanging on a hook. Avoid crushing them under heavy items. If the wings are made of cardboard, keep them away from water. If you want to reuse them, write the wearer’s name and date on the back. Handmade costumes often become keepsakes, especially when the paint smudges and fingerprints tell half the story.
Alternative Butterfly Wing Methods
No-Sew Fabric Butterfly Wings
For soft, flowing wings, use lightweight fabric such as satin, chiffon, or cotton. Cut a semicircle or wing shape that stretches from wrist to wrist across the back. Paint or draw a butterfly pattern on the fabric, then attach wrist loops and a neck or shoulder tie. This version is excellent for dancing, performances, and children who love dramatic twirling.
Felt Monarch Butterfly Wings
Felt wings are durable, soft, and ideal for younger kids. Start with black felt as the base, then glue or sew orange, yellow, and white felt pieces on top. Felt does not fray, so it is forgiving for beginners. It also looks bright and costume-ready without needing much paint.
Wire and Cellophane Butterfly Wings
Wire and cellophane wings create a magical translucent effect. Shape sturdy wire into wing frames, cover them with iridescent cellophane, and secure the edges with tape or glue. Some makers use gentle heat to tighten cellophane, but this method requires caution and adult handling. It is best for older crafters, cosplay projects, or decorative wings rather than rough play.
Poster Board Wings for Quick Costumes
If you need a last-minute butterfly costume, poster board is your best friend. Fold it, cut a symmetrical wing shape, decorate with markers or paint, and add ribbon straps. This version is light, inexpensive, and easy to complete in under an hour if you keep the design simple.
Design Ideas for Butterfly Wings
Monarch Butterfly Wings
Paint the wings orange, add thick black borders, draw black veins, and finish with white dots. This is one of the most recognizable butterfly looks and works beautifully for Halloween or classroom nature projects.
Rainbow Butterfly Wings
Divide each wing into sections and paint each section a different color. Use black or white lines between colors for a stained-glass effect. Add glitter glue only after the paint dries to avoid muddy colors.
Blue Morpho Wings
Use a bright blue center, darker blue shading near the edges, and a black border. Add small white dots near the outer edge for contrast. Blue morpho wings look bold in photos and pair well with black clothing.
Garden Fairy Butterfly Wings
Use pastel colors, flower stickers, gold lines, and soft ribbon straps. This design is perfect for birthday parties, spring crafts, and dress-up play. Add tiny paper flowers near the center for a woodland effect.
Tips for Making Butterfly Wings Look Professional
Keep the wing shape symmetrical by using a folded template. Use a limited color palette if you want a clean design. Let every paint layer dry before adding another. Reinforce the center panel so the wings do not flop. Use elastic straps for comfort. Add details in repeated patterns so the wings look intentional.
Another helpful trick is outlining. Even simple designs look more finished when you add a clean border. Black outlines create a cartoon or monarch effect, while metallic outlines create a fantasy costume style. If your lines are not perfect, call it “organic butterfly energy” and keep going.
Common Mistakes to Avoid
Making the Wings Too Heavy
Heavy wings look impressive for about five minutes. After that, the wearer may start leaning backward like a tiny exhausted superhero. Use lightweight materials and avoid too many thick decorations.
Skipping the Fit Test
Never wait until the party starts to test the straps. Try the wings on early, adjust the loops, and make sure the wearer can sit, walk, and move comfortably.
Using Wet Paint Too Quickly
Paint needs time to dry. If you add tape, straps, or decorations too soon, the surface may peel or smear. Give each layer proper drying time for a cleaner finish.
Forgetting the Back Side
The back of the wings may show when the wearer turns around. You do not need to decorate it as heavily as the front, but a simple coat of paint or paper covering makes the whole project look more complete.
Experience Notes: What I Learned Making Butterfly Wings
The first thing you learn when making butterfly wings is that size matters more than you think. On the table, big wings look majestic. On a small child trying to walk through a hallway, they become a portable traffic incident. The best wings are not always the largest wings; they are the wings the wearer can actually enjoy. When planning a pair, I like to hold the template against the person’s back before cutting the final material. This one step prevents most problems.
Another experience-based tip is to keep the center panel strong. The painted wings may get all the applause, but the center support does the hard work. If that section bends, the wings sag. Adding a second layer of cardboard, duct tape, or a foam board rectangle makes the wings feel sturdier immediately. It is not glamorous, but neither is watching your butterfly wings fold like a taco.
Paint choice also changes the project. Acrylic paint gives rich color and covers cardboard well, but it can stain clothes and tables. Tempera paint is friendlier for kids, though it may look softer and need extra coats. Markers are the easiest option for quick projects, but they work best on poster board or light-colored cardboard. For a group activity, I would choose markers, crayons, paper shapes, and glue sticks. For a costume contest or photo shoot, I would choose acrylic paint, paint pens, and a little metallic detail.
Straps deserve more attention than most tutorials give them. Ribbon looks cute, but elastic usually feels better. If the wearer is active, backpack-style elastic loops are the most practical. For toddlers or younger children, soft fabric ties may be more comfortable, but they should always be loose enough to remove easily. I also like adding felt to the back panel because it prevents rubbing and makes the wings feel finished.
The most enjoyable part is decorating. Butterfly wings are forgiving because nature itself is full of patterns, spots, stripes, and unexpected colors. A slightly uneven dot or wobbly line does not ruin the project. In fact, handmade wings often look better when they are not too perfect. They have personality. They say, “Yes, I was made at the kitchen table, and yes, there is probably glitter under the chair.”
If I were making butterfly wings again for a child, I would choose cardboard, elastic straps, and paint pens. If I were making them for an adult costume, I would use foam board or fabric, add dramatic shading, and reinforce the center carefully. If I wanted magical photo wings, I would experiment with cellophane panels and sunlight. Each method has its charm, but the best version is the one that fits the wearer, matches the occasion, and survives at least one enthusiastic flutter.
Conclusion
Learning how to make butterfly wings is a simple, creative project with endless room for personalization. You can build them from cardboard for a quick costume, felt for a soft child-friendly version, fabric for graceful movement, or cellophane for a sparkling fantasy effect. The key steps are planning the size, cutting a symmetrical shape, reinforcing the center, decorating with a clear design, and attaching comfortable straps.
Whether you are preparing for Halloween, a school performance, a themed party, or just a rainy afternoon craft session, DIY butterfly wings are a rewarding project. They are affordable, customizable, and wonderfully fun. Best of all, they invite the wearer to move, imagine, and flutter around with confidence. And really, the world could use more people confidently fluttering around in handmade wings.