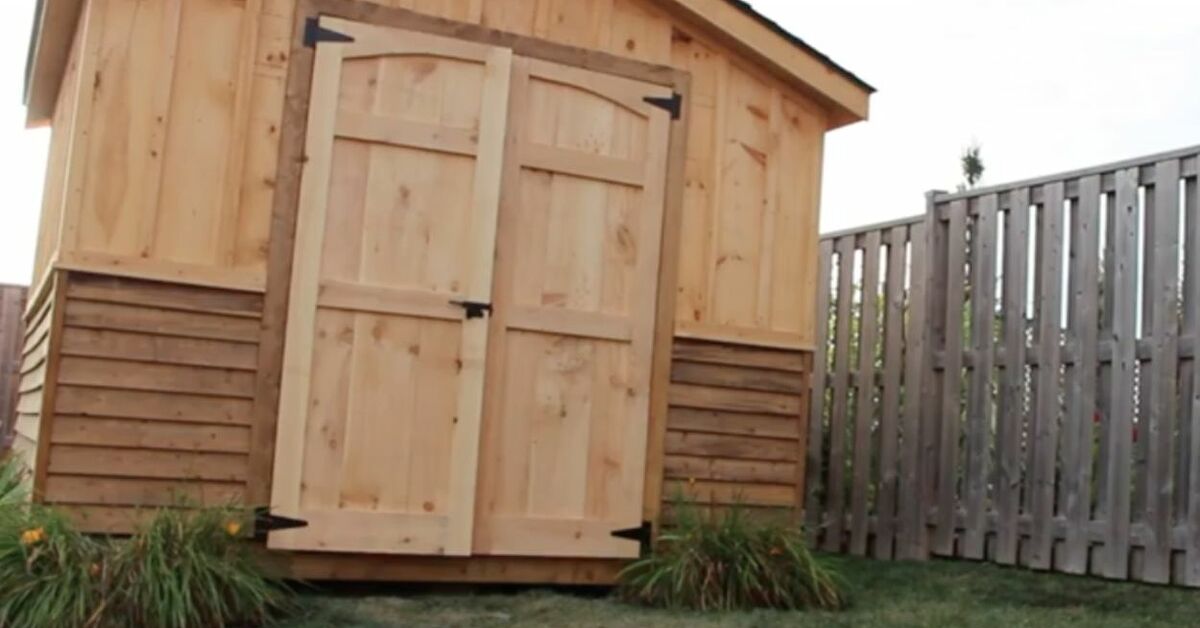
Building shed doors from scratch sounds like the kind of project that requires a tool belt, a heroic soundtrack, and at least one dramatic slow-motion sawdust moment. Good news: you can skip the drama. With basic lumber, exterior plywood or siding panels, strong hinges, weather-resistant screws, and a patient tape measure, you can create easy-build shed doors that look clean, swing smoothly, and keep your mower, garden tools, bicycles, and mysterious “I’ll use this someday” hardware collection safely inside.
The secret is not complicated joinery. It is smart measuring, square assembly, proper bracing, and weather protection. A shed door is basically a tough outdoor panel with a frame that refuses to sag. Treat it like a tiny gate with manners: it needs structure, alignment, clearance, and a good latch. This guide walks you through a beginner-friendly method for building single or double shed doors from scratch, using common materials and practical techniques that work for backyard storage sheds, garden sheds, workshops, and small utility buildings.
Why Build Shed Doors Yourself?
Store-bought replacement shed doors can be expensive, oddly sized, or designed for a shed that apparently lives in another dimension. Building your own gives you control over the size, style, strength, and finish. If your shed opening is a little crooked, your floor slopes slightly, or your old doors look like they lost a wrestling match with the weather, custom DIY shed doors are often the easiest solution.
Homemade shed doors are also surprisingly forgiving. Unlike a front entry door, they do not need to impress dinner guests or seal like a submarine hatch. They need to open, close, lock, and resist rain. If you can cut straight lines, drive screws, and check for square, you can build a shed door that performs well and looks far better than the floppy plywood flap many sheds end up with after a few hard seasons.
Choose the Right Door Style
Single Shed Door
A single shed door is best for small storage sheds, potting sheds, and narrow entries. A 30- to 36-inch-wide opening is usually enough for hand tools, storage bins, and push mowers. It is simpler to build and easier to align because you only have one panel, one latch side, and one hinge side to worry about.
Double Shed Doors
Double shed doors are ideal if you need to move large equipment, wheelbarrows, riding mowers, snow blowers, or bulky outdoor furniture. Many homeowners prefer an opening between 48 and 72 inches wide for double doors. Each leaf is lighter than one huge door, and the wide opening makes your shed feel less like a storage closet and more like a tiny hardworking garage.
Board-and-Batten Look
The easiest strong design is a plywood or siding-panel door with trim boards applied to the face. This gives you the classic board-and-batten look without needing to edge-glue individual boards. Plywood provides stability, while the trim adds strength, style, and a handy place for screws and hinges.
Tools and Materials You Will Need
| Category | Recommended Items |
|---|---|
| Door panel | Exterior-grade plywood, T1-11 siding, or engineered wood siding panel |
| Trim and frame | 1×4 boards, 1×3 boards, or 2×4 lumber for heavier doors |
| Fasteners | Exterior-rated screws, corrosion-resistant deck screws, or galvanized fasteners |
| Hardware | Heavy-duty strap hinges, T-hinges, barrel bolt, gate latch, handle, hasp, or lock |
| Weather protection | Primer, exterior paint, caulk, drip cap, weatherstripping, and optional door sweep |
| Tools | Tape measure, circular saw, miter saw, drill, level, square, clamps, pencil, safety glasses |
For most easy-build shed doors, 1/2-inch or 5/8-inch exterior plywood works well. If you want a sturdier door, use 3/4-inch material, but remember that weight increases quickly. A door that feels solid on sawhorses can feel like a barn door made of regret once you try to hang it by yourself.
Measure the Shed Opening Correctly
Before cutting anything, measure the rough opening in three places: top, middle, and bottom for width, then left, center, and right for height. Use the smallest width and smallest height as your working numbers. Shed openings are not always perfectly square, especially older sheds that have survived storms, humidity, and possibly a raccoon with ambition.
Leave clearance around the door so it can swing without scraping. A common target is about 1/8 inch on the hinge side and latch side, 1/8 to 1/4 inch at the top, and 1/2 inch or more at the bottom depending on the floor, threshold, and whether rain or leaves collect there. For double shed doors, leave a small gap between the two doors, usually around 1/8 inch to 1/4 inch, so they do not rub when humidity makes the wood swell.
Step-by-Step: How to Build Easy Shed Doors from Scratch
Step 1: Plan the Final Door Size
Write down the opening size, then subtract your planned clearances. For example, if your opening is 48 inches wide and 72 inches tall for double doors, each door might be about 23 7/8 inches wide, leaving a center gap and side clearance. If you are building one single door for a 36-inch opening, the door panel might be around 35 3/4 inches wide, depending on your frame and jamb.
Step 2: Cut the Door Panel
Place your plywood or siding panel on sawhorses. Mark the door size carefully using a straightedge or chalk line. Cut with a circular saw, keeping the good face down if your saw blade cuts upward. Support both sides of the cut so the offcut does not snap away and tear the edge. After cutting, lightly sand rough edges so primer and paint will stick better.
Step 3: Add the Outer Trim Frame
Lay the panel face up. Cut two vertical trim boards for the left and right edges, then cut top and bottom rails to fit between or over them depending on the look you prefer. Many DIY builders use 1×4 boards for a classic shed-door frame. Dry-fit everything first. Once the trim looks square and even, apply exterior wood glue if desired, clamp the boards, and fasten them from the front or back with exterior screws.
Do not overdrive screws until they crater the trim. The goal is snug, not “I am angry at this board.” Pre-drilling near board ends helps prevent splitting, especially with cedar, pine, or narrow trim.
Step 4: Install the Diagonal Brace
The diagonal brace is the unsung hero of shed door construction. It keeps the door from sagging over time. For a swinging door, the diagonal should usually run from the lower hinge side up toward the upper latch side. This transfers weight back toward the hinges and helps the door stay square.
Cut a 1×4 or 1×3 brace to fit between the top and bottom rails. You can mark the angle by laying the board across the door and tracing where it meets the frame. Cut the ends, dry-fit, then screw it securely. If you are building double shed doors, each door gets its own diagonal brace, mirrored so both braces support their own hinge sides.
Step 5: Reinforce the Back if Needed
For light doors, face trim and a diagonal brace may be enough. For wider or heavier doors, add a back frame with 1×3 or 1×4 boards. Another option is to use 2×4 framing on the back for extra strength, but that adds weight. If your door is over 36 inches wide, tall, or made from thick material, additional reinforcement is worth considering.
Step 6: Prime All Edges
This is the step many people skip, and it is also the step that prevents your beautiful new shed doors from turning into swollen potato chips after the first rainy month. Prime all six sides: front, back, top, bottom, left edge, and right edge. Pay extra attention to the bottom edge because it sees splashback, puddles, and general outdoor nonsense.
After primer dries, apply two coats of exterior paint. Paint before hanging if possible. It is easier to coat the bottom edge while the door is flat than while lying on the ground pretending you meant to become a yoga instructor.
How to Hang Shed Doors So They Actually Close
Use Strong Hinges
Choose heavy-duty exterior hinges sized for your door weight. Strap hinges and T-hinges are popular because they spread the load across the face of the door and look right on a shed. For tall doors, use three hinges instead of two: one near the top, one near the bottom, and one in the middle. This reduces twisting and helps the door stay aligned.
Set the Door with Shims
Place the door in the opening using wood shims to hold the gaps. Check that the hinge side is plumb and the top is level. For double doors, set the first door carefully, then align the second door to match it. Take your time here. A slightly crooked door is not charming; it is just future frustration wearing paint.
Fasten Hinges into Solid Framing
Drive hinge screws into the shed’s wall framing, not just thin siding. If the hinge screws only bite into sheathing, the door may sag or pull away. Use corrosion-resistant screws long enough to penetrate solid wood. If your shed frame is weak or damaged, add blocking behind the hinge area before hanging the door.
Test the Swing Before Final Tightening
Open and close the door several times before fully tightening every screw. Watch the gaps. If the latch side drops, adjust the hinges or add a shim behind the lower hinge. If the door rubs at the top, check whether the opening is square. Small adjustments now are much easier than planing a painted edge later while muttering words that would scare the garden gnomes.
Weatherproofing Your DIY Shed Doors
Shed doors live a hard life. They face rain, sun, wind, bugs, humidity, and the occasional soccer ball. Weatherproofing is what separates a weekend project from a door that lasts for years.
Add a Drip Cap
A drip cap above the door helps direct water away from the top gap. You can use metal flashing or a simple sloped trim detail. The idea is to stop water from sitting at the top edge and sneaking behind the door.
Use Exterior Caulk Wisely
Caulk the top and side trim joints where water could enter, but avoid sealing areas that need drainage. Do not trap moisture inside the door assembly. Exterior paint and smart flashing should do most of the work.
Install Weatherstripping
Weatherstripping around the jamb can reduce drafts, dust, insects, and wind-driven rain. Adhesive foam is easy, but nail-on or more durable weatherstripping may last longer in harsh climates. For the bottom, a door sweep or rubber threshold seal can help, especially if your shed stores items that dislike moisture.
Common Mistakes to Avoid
Making the Door Too Heavy
A shed door should be strong, not ridiculously heavy. Thick plywood, 2×4 framing, decorative boards, and large hardware can turn a simple door into a gym membership. If you need a very wide opening, build double doors instead of one massive slab.
Skipping the Diagonal Brace
A flat panel without diagonal bracing may look fine on day one, but gravity is patient. Over time, the latch side can sag, causing rubbing and misalignment. The diagonal brace is cheap insurance.
Using Interior Screws Outdoors
Interior drywall screws are not made for outdoor moisture. Use exterior-rated screws or galvanized fasteners. Rusty fasteners weaken the door and leave ugly stains, which is not the rustic charm anyone asked for.
Forgetting Clearance
Wood expands and contracts. Paint adds thickness. Shed floors shift. Leave enough clearance so the door still works after weather changes. A perfect hairline gap in the garage may become a stuck door after one humid summer week.
Simple Design Upgrade Ideas
Once the basic door is built, you can customize it without making the project complicated. Add vertical battens for a farmhouse look, paint the doors a contrasting color, install black strap hinges for a barn-style finish, or add a small window panel near the top for natural light. If security matters, use a hasp with a padlock, a keyed gate latch, or interior barrel bolts for double doors.
For double shed doors, install a cane bolt or barrel bolt on the inactive door so it stays fixed when you open the main door. This makes daily use easier and prevents both doors from flapping around in the wind like they are auditioning for a weather report.
Maintenance Tips for Long-Lasting Shed Doors
Inspect the doors every spring and fall. Tighten hinge screws, touch up chipped paint, check caulk lines, and make sure the bottom edge is not soaking up water. Lubricate hinges if they squeak. Clean leaves and dirt away from the threshold so moisture does not sit against the wood.
If the door begins to sag, do not panic. First, tighten hinge screws. If screws spin without grabbing, replace them with longer exterior screws that bite into framing. If the diagonal brace was installed backward or has loosened, correct it. If the door has swollen, let it dry, sand the tight edge, then repaint exposed wood.
Real-World Experience: What Building Shed Doors Teaches You
The first thing you learn when building shed doors from scratch is that the tape measure is not just a tool; it is the referee. Measure once and you may get lucky. Measure twice and you may look competent. Measure three times when building double doors, because the tiny center gap has a way of becoming the star of the show. A shed opening that appears square from six feet away can be off by enough to make your doors rub, swing unevenly, or close with the grace of a shopping cart with one bad wheel.
Another lesson is that flat ground matters. Assembling doors on a twisted surface can build the twist right into the door. Use sawhorses, a workbench, or a clean garage floor. Check the panel for square before attaching trim, then check again after adding the diagonal brace. If the two diagonal measurements match, the door is square. If they do not, adjust before you add more screws. Screws are wonderful, but they are not magic erasers.
Painting before installation also feels like a small luxury until you try to paint the bottom edge of a hanging door. That is when you discover new angles for your wrist and new opinions about gravity. Priming and painting the door flat gives better coverage, especially on edges. It also lets the finish cure before the hinges, latch, and weatherstripping go on.
The hardware stage teaches patience. Hinges should be aligned, screws should go into solid framing, and the door should be supported while you fasten it. A helper is useful here, even if the helper’s only job is to hold the door and say, “A little higher. No, the other higher.” If you work alone, stack scrap wood under the door to hold the bottom clearance while you attach hinges.
Finally, building shed doors reminds you that perfection is less important than function. The doors should swing freely, close securely, shed water, and look good from the yard. A tiny uneven gap will not ruin the project. A missing brace, unsealed edge, or weak hinge connection might. Focus on the fundamentals: square panel, strong frame, correct diagonal brace, exterior fasteners, sealed wood, and careful hanging. Do that, and your shed doors will not just look homemade in the best way; they will work like they belong there.
Conclusion
Creating easy-build shed doors from scratch is one of the most satisfying DIY upgrades you can make. It improves storage access, protects your tools, boosts curb appeal, and gives your shed a fresh, finished look. The process is simple when you break it down: measure the opening, cut a stable panel, add trim, install diagonal bracing, seal every edge, hang the door on strong hinges, and weatherproof the gaps.
You do not need advanced carpentry skills or a professional workshop. You need careful layout, outdoor-rated materials, and enough patience to avoid rushing the alignment. Build the doors square, brace them correctly, and protect them from moisture, and they can serve your shed for many seasons. Plus, every time you open them, you get the small but mighty satisfaction of thinking, “Yes, I built that.” That feeling is worth at least three trips to the hardware store.