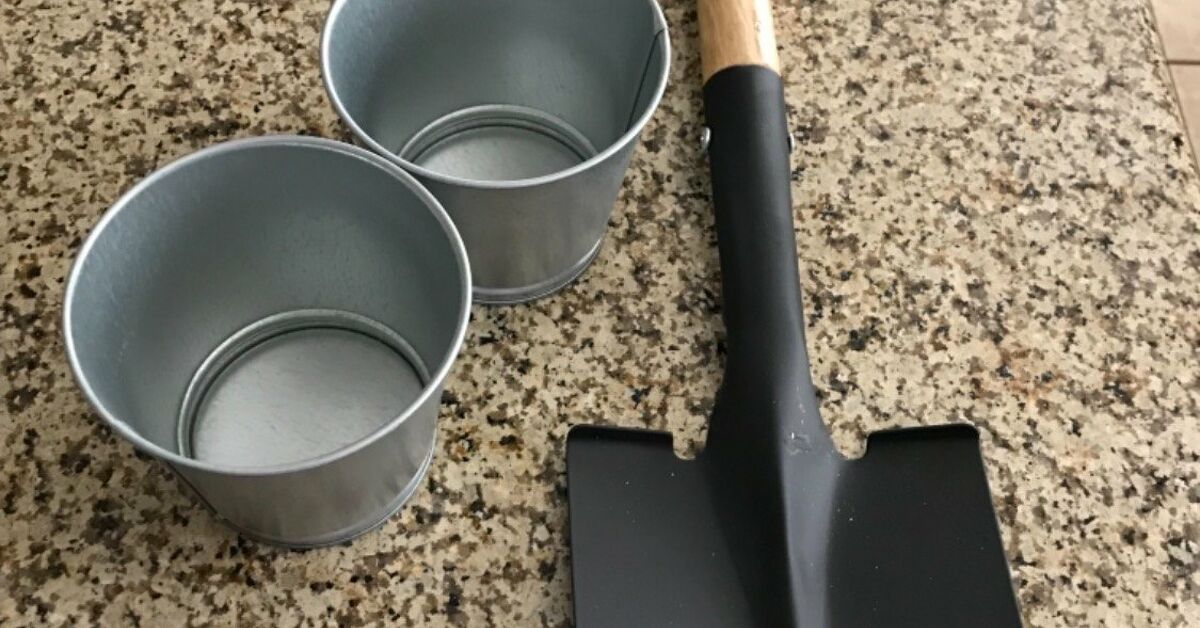
If your front door is begging for something cheerful, quirky, and just a little bit “I definitely own more flower pots than I need,” a garden shovel wreath DIY is the project to make. It is not a traditional wreath in the leafy-circle sense, and that is exactly why people love it. A small shovel becomes the base, faux flowers bring the color, ribbon adds personality, and suddenly your porch looks like spring moved in and started paying rent.
This DIY garden decor idea works because it is simple, inexpensive, and wildly customizable. You can make it look farmhouse-chic, bright and playful, rustic, vintage, or full-on floral drama. It also gives old or low-cost garden tools a second life, which is always satisfying. There is something charming about turning a humble shovel into front door decor. It says, “Yes, I garden. Or at least I enjoy decor that suggests I do.”
In this step-by-step guide, you will learn how to make a garden shovel wreath DIY that looks polished, lasts longer, and does not fall apart the first time the wind gets ideas. We will cover materials, painting tips, design options, common mistakes, and a real-world experience section at the end so you know what this project is actually like once glue strings and ribbon tails enter the chat.
Why a Garden Shovel Wreath DIY Works So Well
A shovel wreath is really a decorative door hanger, but it borrows the best parts of wreath design: a focal point, seasonal styling, layers of texture, and a welcoming look for your entryway. The difference is that it has more personality than a standard round wreath. It feels playful, garden-inspired, and creative without being difficult to make.
Another reason this project works is that the shovel already provides structure. You are not starting from scratch with a wire frame and hoping your floral picks cooperate. The shovel blade acts as the visual anchor, the handle gives you a built-in hanging shape, and the whole piece naturally reads as spring or summer decor. It also transitions beautifully into fall if you switch out the blooms for sunflowers, wheat stems, or mini pumpkins.
Best of all, this DIY front door wreath alternative is beginner-friendly. If you can clean, paint, glue, and tie a bow without starting a dramatic feud with the ribbon, you can make this project.
Materials You Will Need
- One small shovel, either lightweight metal or sturdy plastic
- Spray primer, if needed for the shovel material
- Spray paint in your chosen color
- Faux greenery such as eucalyptus, lamb’s ear, or fern stems
- Faux flowers such as daisies, lavender, tulips, peonies, or sunflowers
- Wired ribbon, burlap ribbon, or seasonal patterned ribbon
- Twine or jute cord
- Hot glue gun and glue sticks
- Florist wire or craft wire
- Wire cutters or strong scissors
- Optional embellishments like wood signs, mini bees, ladybugs, berries, or faux butterflies
- Over-the-door wreath hanger or removable hook for display
If you are using a metal shovel, look for one that is not too heavy. If you are using a child-size plastic shovel, that is even easier to hang and decorate. For the prettiest result, choose faux florals with a mix of bloom sizes so the arrangement looks full instead of flat.
Step 1: Prep the Shovel Like You Mean It
Before you reach for the spray paint, prep matters. A lot. If the shovel has stickers, glue residue, dirt, or dust, remove all of it first. Wash the surface, let it dry fully, and then decide how much extra prep it needs.
For a plastic shovel, a simple wipe-down and a light scuff with fine sandpaper is usually enough to help paint grip better. For a metal shovel, remove rust or peeling areas first. Light sanding, a quick cleaning, and thorough drying will make a big difference in how smooth the final finish looks. Skipping prep is basically inviting your paint to flake off later in dramatic little curls.
If your shovel has a glossy finish, do not trust it. Glossy surfaces love to reject fresh paint like a cat rejects affordable toys. Lightly scuffing the surface gives your primer and paint something to hold onto.
Step 2: Prime and Paint the Shovel
This is where the magic starts. Use a primer if your shovel material calls for it, especially if you are painting metal or changing from a dark base to a lighter color. A good primer helps with adhesion, smoother coverage, and a longer-lasting finish.
When painting, apply several thin coats instead of one thick coat. That is the difference between “adorable porch decor” and “why does my shovel look like it was dipped in cake frosting?” Hold the can at a steady distance, spray in light passes, and let each coat dry according to the can directions. Painting both sides is optional, but it gives the finished wreath a cleaner look if it shifts in the wind.
Popular color choices for a garden shovel wreath DIY include white, sage green, robin’s egg blue, pale yellow, black for contrast, or distressed cream for a farmhouse look. If you want something brighter, coral, turquoise, and sunflower yellow all look fantastic for summer decor.
Step 3: Wrap the Handle for Texture
Once the paint is fully dry, add texture by wrapping part of the handle with twine or jute. This small detail makes a big difference. It softens the look of the shovel, adds rustic charm, and helps the project feel more like crafted decor and less like a gardening accident.
Start at the lower part of the handle or just above the shovel blade, add a dab of hot glue, and wrap tightly. Continue gluing every few inches to keep the twine secure. You can wrap just a section for contrast or cover most of the handle for a more finished design. Leave the top opening clear if you plan to use it as your hanging point.
Step 4: Make the Bow
A good bow can rescue average decor. A bad bow can make your wreath look like it lost a fight with a gift bag. So take a minute here.
Use wired ribbon if possible because it holds its shape better. You can create a simple bow with two loops and long tails, or make a fuller florist-style bow if you want more drama. Trim the tails at an angle or in a V-shape for a polished look. Plaid ribbon works beautifully for farmhouse or fall styles, burlap keeps things rustic, and bright floral prints are perfect for spring and summer.
If you hate tying bows, buy a premade bow and protect your peace. This is a judgment-free porch.
Step 5: Build the Floral Arrangement
Now for the fun part. Arrange your faux greenery and flowers on the shovel blade before gluing anything down. This dry-fit step saves you from committing too soon and then having to pry off a badly placed daisy while whispering regrets.
Start with greenery as your base. Let it extend slightly past the edges of the blade to create softness and movement. Then layer in medium flowers, followed by smaller blooms or filler stems. Work in odd numbers where possible so the arrangement feels natural. If one side looks too heavy, tuck a smaller stem into the opposite side to balance it out.
Attach the larger pieces first with hot glue, then reinforce bulky stems with florist wire if needed. Smaller stems can be tucked in and glued after the main layout is in place. The goal is a clustered arrangement that looks intentional, not like your craft table sneezed on the shovel.
Best Flower Choices for a Garden Theme
- Daisies for a cheerful cottage look
- Lavender for a softer farmhouse feel
- Tulips for classic spring door decor
- Sunflowers for a bold late-summer or fall style
- Eucalyptus for a clean, modern green backdrop
- Wildflower mixes for a more natural, meadow-inspired design
Step 6: Attach the Bow and Finishing Details
Once the floral cluster is secure, add the bow where it makes the most visual sense. Most people attach it near the base of the handle or at the top of the floral arrangement. That placement helps tie the whole design together and gives the eye a clear focal point.
If you want to personalize your DIY shovel door hanger, this is the moment. Add a small wooden welcome tag, a faux bee, a monogram, seasonal berries, or even a tiny chalkboard sign. Just keep scale in mind. The shovel is already a statement piece, so let the accents support it instead of staging a hostile takeover.
Step 7: Hang It the Smart Way
Your garden shovel wreath DIY may be lightweight, but it still needs secure hanging. Use the shovel handle opening if it has one, or attach a loop of ribbon or florist wire to the back. Then hang it with an over-the-door wreath hanger or a removable hook rated for the weight.
If your door is fully exposed to intense sun and rain, keep expectations realistic. Faux florals and ribbon last longer on a covered porch or protected entry. Outdoor-rated materials help, but weather always gets a vote. Think of your wreath like patio furniture cushions: it can handle some outdoor life, but it prefers not to be personally mentored by a thunderstorm.
Easy Style Variations to Try
Spring Garden Shovel Wreath
Use pastel paint, tulips, daisies, eucalyptus, and a gingham bow. This version looks fresh, bright, and classic on a front door.
Farmhouse Shovel Door Hanger
Choose a distressed white or black base, burlap ribbon, cotton stems, lamb’s ear, and a small wood tag that says “Welcome.”
Summer Bee Theme
Paint the shovel yellow or white, use black-and-white ribbon, add daisies and faux bees, and lean into cheerful backyard vibes.
Fall Harvest Version
Swap in sunflowers, wheat, berries, and plaid ribbon. A muted orange or cream shovel base works beautifully here.
Vintage Garden Look
Use soft sage paint, dried-look florals, lace ribbon, and antique-inspired embellishments for a more romantic style.
Common Mistakes to Avoid
- Using too much glue: Hot glue is helpful, not a personality trait. Too much can look messy and create strings everywhere.
- Skipping prep: Paint will not last well on a dirty or slick surface.
- Making the top too heavy: Oversized florals can pull the design off balance.
- Ignoring scale: Tiny flowers on a wide shovel look lost. Match bloom size to your base.
- Choosing flimsy ribbon: Soft ribbon without structure may droop instead of holding a crisp bow shape.
- Hanging it in harsh weather: Even great DIY decor lasts longer when protected.
Frequently Asked Questions
Can I use a real metal garden shovel?
Yes, but lighter is better. A small hand shovel or lightweight decorative shovel is easier to paint, hang, and style.
Can I use real flowers instead of faux flowers?
You can, but faux flowers are much more practical for front door decor. Real flowers look beautiful for a very short time and need water support.
How long does this project take?
The crafting portion is usually quick, often around an hour or two, but drying time for primer and paint adds extra time.
Is this project beginner-friendly?
Absolutely. This is one of the easier upcycled garden decor projects because the shovel gives you a ready-made structure.
Can I change it for different seasons?
Yes. That is one of the best parts. Keep the painted shovel base and swap out ribbon, florals, and accents through the year.
Conclusion
If you want a front door project that is easy, charming, and full of personality, a garden shovel wreath DIY is a winner. It combines the appeal of seasonal wreath making with the fun of upcycled garden decor, and it leaves plenty of room for your own style. You can keep it sweet and simple with greenery and ribbon, or build something bold enough to make your neighbors pause mid-dog-walk.
The real secret is not expensive supplies or perfect bow skills. It is thoughtful prep, balanced design, and materials that fit your space. Clean the shovel, paint it properly, build your floral cluster in layers, and hang it securely. Do that, and you will end up with a DIY garden wreath alternative that looks custom-made, because it is.
And honestly, there is something deeply satisfying about turning a shovel into decor. It is practical. It is playful. It is slightly ridiculous in the best possible way. Which, if we are being honest, is the sweet spot for memorable DIY.
My Experience Making a Garden Shovel Wreath DIY
The first time I made a garden shovel wreath DIY, I assumed it would be one of those “quick little crafts” people casually finish while coffee is brewing and birds sing approvingly outside the window. That was adorable. What actually happened was a very normal DIY journey involving second-guessing paint colors, trimming faux stems for the tenth time, and discovering that hot glue strings can somehow attach themselves to absolutely everything, including your elbow.
I started with a cheap little shovel that looked more toy than tool, which turned out to be perfect. It was lightweight, easy to handle, and not precious enough to make me nervous. After cleaning it, I gave it a soft white coat of paint. The first pass looked terrible. Uneven, streaky, a little sad. But once I stopped trying to rush and used lighter coats, the finish improved fast. That was the first lesson: this project rewards patience more than talent. You do not need to be a craft wizard. You just need to stop trying to turn one coat into five.
The next surprise was how much the greenery mattered. I thought the flowers would do all the heavy lifting, but the arrangement looked flat until I added eucalyptus and a few trailing stems. Suddenly it had shape. It stopped looking like blooms glued to a shovel and started looking like intentional spring door decor. That is the moment the whole project clicked for me. The shovel was the skeleton, but the greenery gave it movement and softness.
The bow, of course, tried to humble me. I made one that looked like a wrinkled napkin, one that looked too tiny, and one that was so enormous it seemed to have its own weather system. By the fourth attempt, I found the sweet spot: wired ribbon, medium-sized loops, longer tails, and enough fluffing to make it look relaxed instead of defeated. If anyone tells you a bow “just comes together,” they are either very gifted or lying with great confidence.
When I finally hung the finished wreath on the door, it looked much better than I expected. That is one of the joys of this project. The materials are simple, even humble, but the result feels creative and custom. It also sparked comments immediately. People notice a shovel wreath because it is unexpected. A normal wreath says, “I decorate.” A shovel wreath says, “I decorate, and I have ideas.”
I have since made versions for spring, late summer, and fall, and each one taught me something. Pastels and daisies feel fresh and friendly. Sunflowers make the whole piece louder in a good way. Burlap ribbon pulls everything rustic. Black-and-white checks add structure. And if you put a tiny bee accent on there, prepare for compliments from people who suddenly become very emotional about porch decor.
If I could give one piece of advice from experience, it would be this: lay everything out before gluing. Every time I skipped that step, I ended up peeling something off and pretending that was part of the artistic process. Planning the arrangement first makes the project smoother, faster, and much less likely to end with you staring at your door hanger like it betrayed you personally.
In the end, making a garden shovel wreath DIY feels less like following a strict tutorial and more like styling a tiny seasonal personality for your front door. It is fun, forgiving, and just unusual enough to be memorable. And once you make one, you start looking at other everyday objects and thinking, “Could that be wreath-adjacent?” That is how crafting gets you.