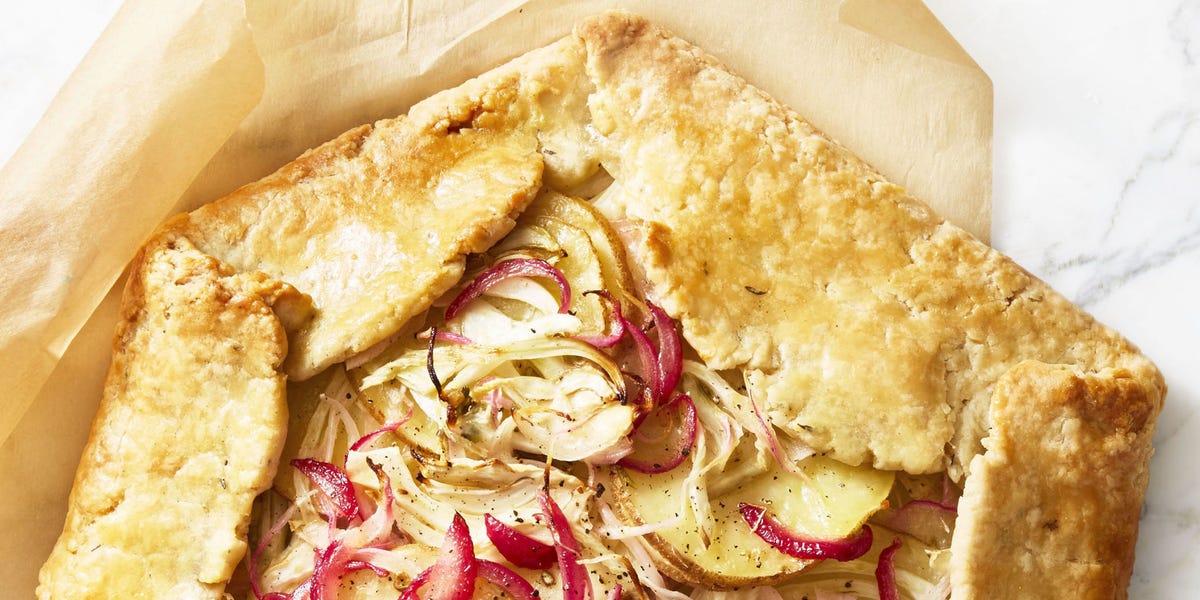
Homemade pastry dough has a dramatic reputation. Mention it at a dinner party and someone will whisper about melted butter, shrinking crusts, and the Thanksgiving pie that emerged from the oven with the structural integrity of a pothole. Fortunately, pastry is far less temperamental when you follow a few dependable rules.
This easiest-ever pastry dough uses ordinary ingredients, a food processor, and a straightforward mixing method. It produces a buttery, tender crust with crisp, flaky layerswithout requiring professional equipment, advanced technique, or a calming phone call to a pastry chef.
Why This Easy Pastry Dough Recipe Works
Great pastry depends on the relationship among flour, fat, liquid, and temperature. Flour gives the crust structure. Butter adds flavor and separates the dough into layers. Water brings everything together, while salt and a little sugar keep the pastry from tasting like decorative cardboard.
The secret is to leave small pieces of cold butter throughout the dough. In the oven, water in the butter turns to steam and helps create tiny spaces between layers of pastry. If the butter melts while you are mixing or rolling, those potential layers disappear before baking begins.
Minimal mixing is equally important. Water hydrates the proteins in wheat flour, and agitation strengthens the resulting gluten network. That is wonderful when making chewy bread but less charming when the goal is tender pie crust. Pulse briefly, add only enough liquid to bind the crumbs, and resist kneading the dough into submission.
Easiest Ever Pastry Dough Recipe
This recipe makes enough dough for one covered 9-inch pie, two standard single-crust pies, approximately 12 hand pies, or two medium galettes.
Preparation Details
- Active preparation: About 15 minutes
- Chilling time: At least 60 minutes
- Total time before rolling: About 1 hour 15 minutes
- Yield: Two 9-inch pastry crusts
- Method: Food processor, with a by-hand option
Ingredients
- 2 1/2 cups (300 grams) all-purpose flour
- 1 tablespoon granulated sugar
- 1 teaspoon fine salt
- 1 cup (226 grams) cold unsalted butter, cut into 1/2-inch cubes
- 1 tablespoon apple cider vinegar or white vinegar
- 6 to 8 tablespoons ice water, as needed
- Extra flour for rolling
The sugar supplies mild flavor and encourages browning; it does not make the dough noticeably sweet. For a savory pot pie or quiche, reduce it to one teaspoon if desired. Vinegar is optional, but its acidity can make the dough more forgiving and easier to handle. Its flavor disappears during baking.
Equipment
- Food processor fitted with the metal blade
- Measuring cups or, preferably, a kitchen scale
- Small bowl or liquid measuring cup
- Flexible spatula
- Plastic wrap or reusable food wrap
- Rolling pin
How to Make the Best Easy Pastry Dough
Step 1: Chill the Ingredients
Cube the butter and refrigerate it while measuring everything else. If your kitchen is particularly warm, place the cubed butter in the freezer for 10 minutes. Combine the vinegar with six tablespoons of ice water and keep the mixture cold.
Cold ingredients are not pastry superstition. Firm pieces of butter remain distinct inside the flour, making a flaky crust possible. Your bowl does not need its own winter coat, but the butter should never feel greasy or soft.
Step 2: Combine the Dry Ingredients
Add the flour, sugar, and salt to the food processor. Pulse two or three times to distribute them evenly. This brief mixing prevents one part of the finished crust from being delightfully seasoned while another tastes as though salt never existed.
Step 3: Cut in the Butter
Scatter the cold butter over the flour. Pulse eight to twelve times, using short one-second bursts. Stop when most of the mixture resembles coarse crumbs but visible pieces of butter remain. The largest pieces should be approximately pea-sized, with plenty of smaller flakes around them.
Do not run the processor continuously. A food processor is efficient, but it can turn cold butter into warm paste with alarming speed. Visible butter is a feature, not an error.
Step 4: Add the Liquid Gradually
Drizzle six tablespoons of the ice-water mixture over the flour and butter. Pulse three or four times. Pinch a small handful of crumbs: if they hold together, the dough has enough moisture. If they fall apart, add more liquid one tablespoon at a time, pulsing once or twice after each addition.
The exact amount varies with humidity, flour measurement, and even the brand of flour. Stop before the dough forms a wet ball around the blade. It should look shaggy and slightly crumbly while holding together when pressed.
Step 5: Shape Without Kneading
Turn the mixture onto a clean work surface. Press the crumbs together gently with your hands. Divide the dough into two equal portions and shape each into a disk about one inch thick. Do not knead it as you would bread dough.
A disk chills faster and is easier to roll into a circle than a thick ball. Wrap each portion tightly so the surface does not dry out or absorb the refrigerator’s fascinating collection of onion-related aromas.
Step 6: Rest and Chill
Refrigerate the disks for at least one hour. During this rest, the flour absorbs moisture more evenly, the gluten relaxes, and the butter becomes firm again. These changes make the dough easier to roll and help reduce shrinking in the oven.
If refrigerated overnight, let the dough stand at room temperature for approximately 10 minutes before rolling. It should be cool and flexible, not rock-hard or soft.
How to Make Pastry Dough by Hand
No food processor? No crisis. Whisk the flour, sugar, and salt in a wide bowl. Add the cold butter and toss to coat it with flour. Use a pastry blender, two forks, or cool fingertips to flatten and break the butter into irregular pieces.
Add the ice-water mixture gradually while tossing with a fork. Once a squeezed handful holds together, transfer the crumbs to the counter and form the disks as directed. Work briskly because warm hands soften butter. If the mixture begins to feel greasy, refrigerate the entire bowl for 10 to 15 minutes before continuing.
Rolling and Shaping the Dough
Lightly flour the work surface and rolling pin. Place one chilled disk in the center and tap it several times with the pin to make it more pliable. Roll from the center outward, rotating the dough a quarter turn every few passes.
For a standard 9-inch pie plate, roll the pastry into a circle approximately 12 inches in diameter and about 1/8 inch thick. Keeping the dough moving prevents sticking and helps reveal troublesome spots before they become permanent relationships with the countertop.
Use only as much extra flour as necessary. Excess flour can make the crust dry and tough. If the edges crack slightly, press them together. If the entire disk breaks into separate pieces, it may be too cold; wait a few minutes and try again.
Transferring It to the Pie Plate
Loosely roll the pastry around the rolling pin, lift it, and unroll it over the pie plate. Alternatively, fold it gently into quarters and unfold it in the pan. Ease the dough into the bottom and corners without stretching it. Stretched pastry tends to pull back during baking.
Trim the overhang, leaving approximately one inch for folding and crimping. Chill the shaped crust for at least 20 minutes before filling or blind baking. This final pause helps the crust hold its shape.
How to Bake the Pastry
For a Filled Pie
Add the prepared filling and bake according to the pie recipe. For a double-crust pie, position the second sheet of pastry over the filling, trim and seal the edges, and cut several vents in the top so steam can escape. An egg wash can provide deeper color and a glossy finish.
For a Fully Blind-Baked Crust
- Heat the oven to 400°F.
- Line the chilled pastry with parchment paper and fill it with pie weights or dry beans.
- Bake for approximately 15 minutes, until the edges begin to set.
- Remove the parchment and weights carefully.
- Return the crust to the oven for another 12 to 18 minutes, until the bottom is dry and golden.
For a partially baked shell that will return to the oven with its filling, shorten the second baking period to approximately five minutes. Oven performance and pie-plate material vary, so judge the crust by its appearance as well as the clock.
Common Pastry Dough Problems and Easy Fixes
The Dough Crumbles While Rolling
The dough may need another minute to warm slightly, or it may have been made with too little water. Allow a very cold disk to rest briefly. If it remains dry, sprinkle a cracked area with a few drops of cold water and press it together gently.
The Dough Is Sticky
Sticky pastry is usually too warm or overhydrated. Dust it lightly with flour, place it between sheets of parchment, and chill it for 10 to 15 minutes. Do not keep adding handfuls of flour, which can change the recipe’s balance.
The Baked Crust Is Tough
Too much water, excessive mixing, heavy rolling, or liberal use of bench flour can produce a tough crust. Next time, stop processing when the mixture is still crumbly and handle it only enough to create a cohesive disk.
The Crust Shrinks
Shrinking often results from stretched dough, insufficient resting, or skipping the chill after shaping. Ease the pastry into the pan, leave a generous overhang, and give it time to relax before baking.
The Bottom Is Soggy
Blind-bake the shell when using a wet or no-bake filling. For fruit pies, bake on a preheated metal sheet pan, which directs strong heat toward the bottom of the plate. Let cooked fillings cool when the recipe requires it; hot filling can melt the butter before the crust reaches the oven.
Flavor Variations and Uses
Sweet Pastry Dough
Add one teaspoon of vanilla extract to the ice water or mix a teaspoon of finely grated lemon or orange zest into the flour. A tablespoon of finely ground sugar can be added for dessert tarts, but avoid substantially increasing the sugar without adjusting the recipe.
Savory Pastry Dough
Reduce the sugar to one teaspoon and add black pepper, dried thyme, finely chopped rosemary, or grated Parmesan. Use the pastry for quiche, chicken pot pie, tomato galettes, meat pies, and savory hand pies.
Easy Ways to Use Leftover Pastry
Brush scraps with melted butter, sprinkle them with cinnamon sugar, and bake until crisp. For a savory snack, use Parmesan and smoked paprika. Stack and reroll scraps only once; repeatedly crushing them together develops gluten and eliminates the flaky layers you worked to preserve.
Make-Ahead and Storage Instructions
Wrapped pastry dough can generally be refrigerated for two to three days. It can also be frozen for up to three months when wrapped tightly and placed in a freezer-safe bag. Labeling it is wise; an anonymous frozen disk can look suspiciously similar to cookie dough, compound butter, or a very disappointing hamburger.
Thaw frozen pastry overnight in the refrigerator, then let it soften at room temperature just until rollable. A shaped, unbaked shell can also be frozen in a freezer-safe metal pan. Avoid moving a glass pie plate directly from the freezer into a hot oven unless its manufacturer specifically states that this is safe.
Raw flour is not ready to eat and may contain harmful germs. Do not taste unbaked pastry dough, and wash hands, utensils, and work surfaces after handling flour.
Practical Pastry-Making Experiences and Lessons
The most useful lesson from everyday pastry making is that dough communicates through texture more reliably than through a timer. A recipe may say to add six tablespoons of water, but flour stored through a humid summer behaves differently from flour opened during a dry winter. The pinch test is therefore more dependable: a handful should hold together without feeling wet.
Beginners frequently expect properly mixed pastry to resemble smooth pizza dough. That expectation leads to extra water and extra processing. Good pastry often looks untidy before chilling. It may have floury patches, rough edges, and visible streaks of butter. After an hour in the refrigerator, moisture spreads through the flour and the apparently chaotic crumbs become a manageable disk. In this particular case, patience performs more useful work than vigorous kneading.
A second practical discovery is that refrigeration solves an impressive number of problems. Dough sticking to the rolling pin? Chill it. Butter becoming shiny? Chill it. The shaped edge slumping while the oven preheats? Chill it. Cooling cannot correct dough that was drastically overmixed, but it can restore firmness and make an awkward crust manageable.
Rolling technique also improves when the goal changes from creating a perfect circle to maintaining an even thickness. An irregular edge can be trimmed or patched; a center that is paper-thin while the perimeter remains bulky is harder to repair. Short strokes from the center, frequent rotation, and occasional lifting produce a more consistent sheet than repeatedly steamrolling from one side to the other.
Another common experience involves fear of cracks. Small cracks are normal and can be pressed together with a fingertip. Larger tears can be patched with a thin piece of dough and a dab of cold water. Once the crust contains fruit, gets crimped, and turns golden in the oven, nobody at the table will conduct a forensic examination of the repair.
Butter size also changes the final texture. Dough in which the butter is processed into tiny crumbs tends to bake tender and relatively uniform. Dough containing flatter, larger pieces develops more dramatic flakes but can be trickier to roll. The mixed-size approach in this recipe offers a practical compromise: small pieces provide tenderness, while occasional pea-sized pieces create visible layers.
Warm kitchens require a different rhythm. On a cool day, pastry can be rolled and shaped leisurely. In summer, it helps to measure every ingredient before removing the butter from the refrigerator, work in short stages, and return the dough to the cold whenever it softens. A marble counter is pleasant but unnecessary; speed, preparation, and a refrigerator are more important than expensive surfaces.
Finally, homemade pastry becomes genuinely easy through familiarity rather than perfection. The first crust may be rustic, the second more even, and the third good enough to inspire unnecessary confidence and elaborate leaf decorations. Each batch teaches the hands what cool butter, properly hydrated crumbs, and rollable dough should feel like. Even an imperfect crust generally tastes excellent when it contains real butter and a good filling. Serve it proudlyand if one corner looks eccentric, that is where the ice cream goes.
Conclusion
The easiest-ever pastry dough is built on a few simple habits: use cold butter, add ice water gradually, mix minimally, and chill the dough before rolling and baking. Follow those principles and four basic ingredients transform into a crisp, flavorful crust suitable for fruit pies, galettes, quiches, hand pies, and savory dinners.
Pastry does not require magic hands. It requires cool butter, a light touch, and enough patience to let the refrigerator participate. Once this versatile dough becomes part of your baking routine, the refrigerated store-bought roll may start feeling a little nervous.