A large pothole in a concrete driveway has a special talent: it starts as an ugly nuisance and quickly becomes the one spot every tire, wheelbarrow, delivery driver, and unsuspecting ankle manages to find.
The good news is that a localized pothole in an otherwise solid concrete driveway can often be repaired without replacing the entire slab. The bad news is that pouring a random bucket of wet concrete into the hole and smoothing the top is usually not a repair. It is more like giving the pothole a temporary hat.
A durable concrete driveway pothole repair depends on three things: removing all failed concrete, preparing a stable base and sound bonding surface, and choosing a repair material designed for the depth and traffic conditions involved. Skip any of those steps, and the patch may crack, loosen, sink, or pop out.
This guide explains how to repair a concrete driveway with large potholes, how to decide whether a patch is appropriate, what materials to use, and how to avoid the mistakes that turn a weekend project into an annual tradition.
First, Determine Why the Pothole Formed
Before grabbing a sledgehammer with the enthusiasm of a demolition-show host, inspect the damage. A pothole is a symptom. The real problem may be limited surface deterioration, or it may extend through the slab and into the base beneath it.
Common causes of large potholes in concrete driveways
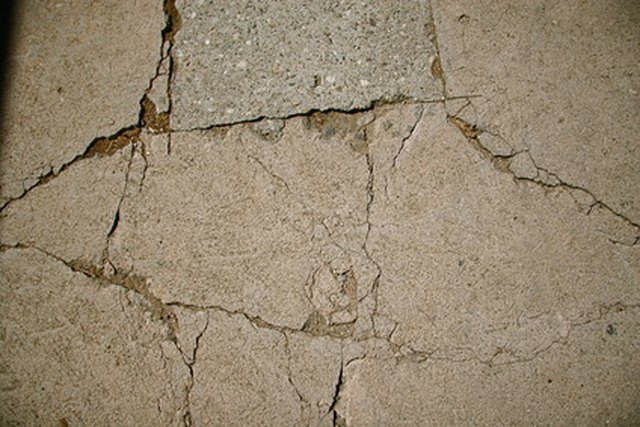
Concrete driveway damage can develop from freeze-thaw cycles, water entering cracks, deicing chemicals, poor drainage, repeated vehicle loads, inadequate curing during the original installation, weak concrete, corrosion of embedded steel, or a poorly compacted subgrade.
A small surface defect can expand when water reaches weakened concrete. In cold climates, repeated freezing and thawing can accelerate deterioration. If the material supporting the slab washes away or settles, the concrete may lose support and break under vehicle loads.
Look beyond the visible hole. Check for:
- Loose or hollow-sounding concrete around the perimeter
- Cracks extending several feet beyond the pothole
- A slab that rocks, sinks, or has noticeable vertical displacement
- Standing water or runoff flowing toward the damaged area
- Soft soil, mud, or empty voids beneath the slab
- Exposed reinforcing steel with significant corrosion
- Several large potholes or widespread crumbling across the driveway
A localized hole surrounded by solid, stable concrete is a reasonable candidate for patching. Widespread structural failure, major settlement, severe heaving, or extensive base erosion may justify removing and replacing a larger section instead.
Repair or Replace? Make This Decision Before Buying Materials
Repairing a pothole makes sense when the deterioration is confined to a manageable area and the surrounding slab remains sound. Replacement becomes more practical when the driveway is breaking apart faster than you can patch it.
Consider professional evaluation or partial slab replacement when:
- The damaged area reaches through the full slab and the surrounding concrete is also fractured.
- Multiple sections have sunk because of a failed or washed-out base.
- The slab moves when vehicles cross it.
- Large interconnected cracks cover much of the driveway.
- The same area has already been patched repeatedly and continues to fail.
A patch cannot stop a slab from moving. Likewise, a high-strength repair mortar cannot magically compact unstable soil beneath it. Concrete is excellent at many things, but counseling a bad foundation is not one of them.
Tools and Materials for a Large Concrete Driveway Pothole Repair
The exact materials depend on the size and depth of the repair, but a typical project may require:
- Safety glasses or goggles
- Hearing protection
- Waterproof, alkali-resistant gloves
- Long sleeves, sturdy work boots, and appropriate respiratory protection when required
- Concrete saw or angle grinder with a masonry blade
- Dust-control equipment or a wet-cutting setup
- Rotary hammer, demolition hammer, sledgehammer, and masonry chisel
- Stiff-bristle brush
- HEPA-filtered vacuum or other suitable cleanup equipment
- Pressure washer or hose, when appropriate
- Shovel and hand tamper
- Crushed stone for base repair, if needed
- Mixing bucket, mortar mixer, or wheelbarrow
- Drill with a mixing paddle for compatible repair products
- Trowel, float, and straightedge
- Exterior-rated concrete repair mortar or concrete mix
- Bonding agent or primer only when required by the selected product
- Clean mixing water
- Plastic sheeting or another manufacturer-approved curing method
Choose the repair material by depth, not by advertising enthusiasm
Thin premixed patching compounds are not intended to fill every large pothole. Many products have minimum and maximum application thicknesses. A material designed for a quarter-inch surface repair may perform poorly when dumped four inches deep.
For a deep pothole, select a product specifically approved for exterior horizontal concrete, vehicle traffic, and the full depth of the repair. Depending on the project, that may be a rapid-setting concrete repair mix, a polymer-modified repair mortar, or conventional concrete for a larger full-depth section.
Read the technical instructions before purchasing. Check allowable thickness, working time, mixing requirements, temperature limits, curing instructions, and return-to-service time. Product chemistry matters more than whether the bag has a picture of an impressively muscular driveway on it.
How to Repair a Concrete Driveway with Large Potholes: Step by Step
Step 1: Mark the repair boundary
Do not simply fill the irregular crater exactly as you found it. The ragged edges often contain cracked or weakened concrete that will eventually break away.
Mark a simple square or rectangular repair area that extends into sound concrete. Avoid complicated shapes and narrow points, which are difficult to consolidate and more prone to cracking.
If the pothole reaches an existing control or expansion joint, preserve that joint rather than creating one solid patch across it. Concrete slabs move. A patch that bridges a functioning joint may crack where the joint was trying to move all along.
Step 2: Cut clean perimeter edges
Where appropriate for the repair system, use a concrete saw or masonry cutting tool to establish clean boundaries. The goal is to avoid a weak feathered edge that tapers to almost nothing.
Follow the selected repair product’s required minimum edge depth and preparation instructions. Some professional repair materials specify a minimum perimeter saw cut before deteriorated concrete is removed.
Concrete cutting can generate respirable crystalline silica dust. Use appropriate dust-control methods, such as wet cutting or suitable dust extraction, and follow tool instructions and applicable safety requirements. Wear eye and hearing protection, and keep electrical equipment properly protected when water is involved.
Step 3: Remove every piece of unsound concrete
This is the step homeowners are most tempted to rush, and it is one of the most important.
Break out loose, fractured, delaminated, or crumbling concrete until you reach material that is solid. A patch bonded to weak concrete is only as strong as that weak layer. When the old material releases, it may take your beautiful new patch with it.
Use a hammer and chisel for smaller areas or a rotary or demolition hammer for larger repairs. Work carefully near the perimeter to avoid damaging good concrete beyond the planned boundary.
After the obvious debris is removed, tap around the exposed area. Hollow or noticeably different sounds may indicate additional delaminated material that needs attention.
Step 4: Inspect and repair the base
If the pothole extends through the slab, inspect what lies underneath. The base should be firm and stable.
Remove mud, organic material, loose debris, or obviously unstable material. If the supporting aggregate has washed away, rebuild the base with an appropriate compactable material, commonly crushed stone suitable for the application.
Add base material in manageable layers and compact each layer thoroughly. Do not simply pour a thick pile of loose stone into the cavity and hope the weight of the new concrete will handle the paperwork.
The finished base elevation must leave enough depth for the repair material. Match the approximate thickness of the surrounding slab unless the repair design or site conditions require otherwise.
Step 5: Clean the repair area thoroughly
Bonding surfaces must be free of material that interferes with adhesion. Remove loose concrete, dust, dirt, oil, grease, old coatings, and other contaminants.
A stiff brush, controlled washing, and appropriate vacuum equipment can help. After mechanical preparation, inspect the surface again. The exposed concrete should be sound rather than dusty, flaky, or polished smooth.
Cleaning is not glamorous, but it separates durable concrete repair from expensive arts and crafts.
Step 6: Condition or prime the surface as required
Different repair products require different substrate conditions.
Many cement-based systems call for the existing concrete to be brought to a saturated surface-dry condition. That means the concrete has absorbed moisture but has no puddles or standing water on the surface. This helps prevent very dry old concrete from rapidly pulling water out of a fresh cementitious patch.
Other products, including certain polymer or epoxy systems, may require a dry substrate or a specific primer. Do not automatically soak, dry, or coat the repair area based on a generic internet trick. Follow the instructions for the exact material you are using.
Step 7: Measure the volume and mix enough material
Estimate the pothole volume before mixing. For a roughly rectangular repair:
Length × width × average depth = repair volume
Keep all measurements in the same units. For example, a repair measuring 3 feet long, 2 feet wide, and 4 inches deep has an approximate volume of 2 cubic feet.
Compare the calculated volume with the yield printed on the repair material packaging. Adding a modest allowance for irregular surfaces, waste, and unexpected voids can prevent the unpleasant discovery that you are half a bag short while fast-setting material is already becoming a decorative boulder in your mixing bucket.
Step 8: Mix exactly according to the product instructions
Use clean water and measure it rather than estimating with the classic construction unit known as “about that much.”
Too much water may make a cement-based mix easier to spread, but it can also increase shrinkage and reduce performance. Mix only as much rapid-setting material as you can place and finish within its working time.
For large repairs, organize tools and helpers before mixing. A fast-setting product does not care that your finishing trowel is still in the garage.
Step 9: Place and consolidate the repair material
Place the material while it is fresh and workable. Press it firmly against the prepared edges and into irregularities so that large voids are not trapped along the interface.
For deep repairs, follow the product’s instructions regarding maximum lift thickness. Some materials can be installed deeply in one placement; others require lifts or different products for deeper sections.
Consolidate the material appropriately without overworking it. Use a trowel, rod, or suitable tool to work the mix into corners and around the edges.
Bring the repair slightly above the final elevation if necessary for screeding, then strike it off level with the surrounding driveway using a straightedge.
Step 10: Match the surrounding surface texture
A perfectly polished patch in the middle of a broom-finished driveway can look like a tiny concrete skating rink.
After screeding and initial finishing, match the surrounding texture as closely as practical. A light broom finish is common on exterior driveways because it provides texture. Time the finishing according to the material instructions and avoid adding water to the surface simply to make finishing easier.
Keep the patch aligned with the surrounding slab so it does not create a tire-catching bump or a depression that collects water.
Step 11: Cure the patch properly
Curing is not the part where you stare at the patch and ask whether it looks dry yet.
Cement-based repair materials need the conditions specified by their manufacturer to develop their intended properties. Depending on the product, curing may involve moisture retention, plastic covering, a compatible curing compound, or simply protection for a specified period.
Protect fresh material from freezing, heavy rain, excessive heat, rapid drying, and premature traffic. Normal-setting and rapid-setting products have very different timelines. Some repair materials permit vehicle traffic relatively quickly, while conventional concrete systems require much longer protection.
Follow the stated return-to-service time for your product rather than testing the patch with a 5,000-pound SUV because it “looks pretty solid.”
Weather Matters More Than Most DIY Guides Admit
Concrete repair is sensitive to environmental conditions. Cold weather slows many cement reactions and can create serious problems if fresh material freezes. Hot, dry, or windy conditions can pull moisture from the surface too quickly.
Every repair material has an approved application temperature range. Schedule the job when conditions fall within that range, and remember that the temperature of the existing concrete matters too.
Also check the forecast for rain. A surprise storm arriving minutes after finishing can damage the surface or disrupt curing. Likewise, intense direct sunlight on a hot driveway can shorten working time dramatically.
Common Mistakes That Cause Concrete Patches to Fail
Filling over loose concrete
If the pothole still contains cracked and deteriorated material, the repair is built on a weak foundation. Remove damage until the remaining concrete is sound.
Creating feather-thin edges
Thin tapered patch edges are vulnerable to chipping. Prepare the perimeter according to the repair material’s minimum thickness requirements.
Ignoring the failed base
A stable patch needs stable support. If water has washed away the subbase, fix that condition before placing new concrete.
Using the wrong patching product
A cosmetic surface filler is not automatically a deep structural repair material. Match the product to the depth, exposure, and intended traffic.
Adding excessive water
Extra water may improve short-term workability while hurting the properties you actually care about. Measure accurately and follow the mix ratio.
Bridging an active joint
Existing control and isolation joints serve a purpose. Filling them rigidly as part of a large patch may simply relocate the cracking problem.
Driving on the repair too soon
A patch can look hard at the surface before it is ready for vehicle loads. Follow the manufacturer’s return-to-service guidance.
How to Help Prevent the Pothole from Coming Back
After the repair has cured, address the conditions that contributed to the damage.
Direct roof runoff and landscape drainage away from the driveway where practical. Seal appropriate cracks and joints with compatible products to reduce water intrusion. Repair small defects before they become cavities. In freezing climates, use deicing products thoughtfully and follow recommendations for your concrete.
Do not assume a topical sealer can repair structural damage, but a suitable maintenance program can help reduce moisture intrusion and surface deterioration on sound concrete.
Pay special attention to the transition between the repaired area and the original slab. If new cracks develop or the patch begins moving vertically, investigate the support beneath the driveway rather than repeatedly applying another surface filler.
Practical Experience: What Large Concrete Pothole Repairs Teach You
Real-world driveway repair tends to teach the same lessons repeatedly, usually after someone has tried the quick method first.
The biggest lesson is that the visible pothole is rarely the exact size of the actual repair. A crater that looks two feet wide may become a three-foot repair after all loose and hollow concrete is removed. This surprises first-time DIYers because they naturally want to preserve as much of the old driveway as possible. That instinct is understandable, but keeping weak concrete around the edges often creates a neat-looking patch attached to material that is already failing.
Another recurring lesson is that preparation takes longer than placement. Mixing and pouring the repair material may be the fastest part of the project. Cutting the perimeter, breaking out damaged concrete, cleaning the cavity, repairing the base, arranging tools, and planning the finishing sequence consume most of the effort. That is normal. A repair that spends 80 percent of its time on preparation and 20 percent on placement usually has better odds than one that reverses those percentages.
Large potholes also reveal how important water management is. In many failed driveway areas, water is not merely sitting on top of the concrete. It is entering through cracks, traveling along joints, washing fine material from the base, or collecting where the driveway has settled. Repairing the concrete without correcting obvious drainage problems may produce a handsome patch directly above the same environment that caused the original failure.
Material choice is another practical turning point. Homeowners often purchase a patch because the package says “concrete repair” without checking its allowable depth. The result can be a thick mass of material intended only for thin applications. Better results come from measuring the cavity first and then choosing a system designed for that thickness. Deep hole, deep-repair material. Thin surface defect, thin-repair material. Concrete repair becomes much less mysterious once that simple rule is respected.
Fast-setting products introduce their own lesson: speed is useful only when the work area is ready. Before mixing, have the cavity cleaned, surface conditioned as required, water measured, tools within reach, and finishing plan decided. Otherwise, the material’s greatest advantagerapid strength developmentbecomes the reason everyone is suddenly sprinting around the driveway looking for a missing trowel.
It is also wise to perform a final inspection before placing material. Look at the edges, corners, base, and any existing joints. Ask whether anything is still loose, dirty, unstable, or likely to trap water. Five extra minutes at this stage can prevent a much larger amount of chipping and rework later.
Finally, a repaired area does not need to be visually invisible to be successful. New and old concrete commonly differ in color and texture. Weathering may reduce the contrast over time, but exact color matching is difficult. The more important goals are sound bonding, stable support, proper drainage, safe elevation, and durability under traffic.
A slightly visible patch that stays solid is far better than a cosmetically perfect patch that becomes a new pothole after the next difficult season. Driveways, unlike social media profiles, benefit more from structural honesty than perfect filters.
Conclusion: A Long-Lasting Repair Starts Below the Surface
Learning how to repair a concrete driveway with large potholes is not mainly about mastering a fancy trowel technique. The durable repair begins before fresh material ever enters the hole.
Inspect the damage, determine whether the surrounding slab and base are stable, remove every piece of unsound concrete, create proper repair boundaries, clean the bonding surfaces thoroughly, and select an exterior repair material designed for the required depth and vehicle traffic. Then mix, place, finish, and cure it exactly as directed.
The most expensive bag of repair material cannot compensate for loose concrete, a washed-out base, poor preparation, or impatient curing. Do the hidden work correctly, and the visible part becomes much easier.
When the damage is widespread, the slab is moving, or major base failure is present, replacing a section may be smarter than repeatedly patching it. But for a large, localized pothole surrounded by sound concrete, a carefully executed patch can restore a safer, smoother, and much better-looking drivewaywithout turning the entire front yard into a construction zone.
Note: Product requirements vary. Always follow the current technical data, safety instructions, application limits, and curing requirements for the specific repair material and equipment used on your project.