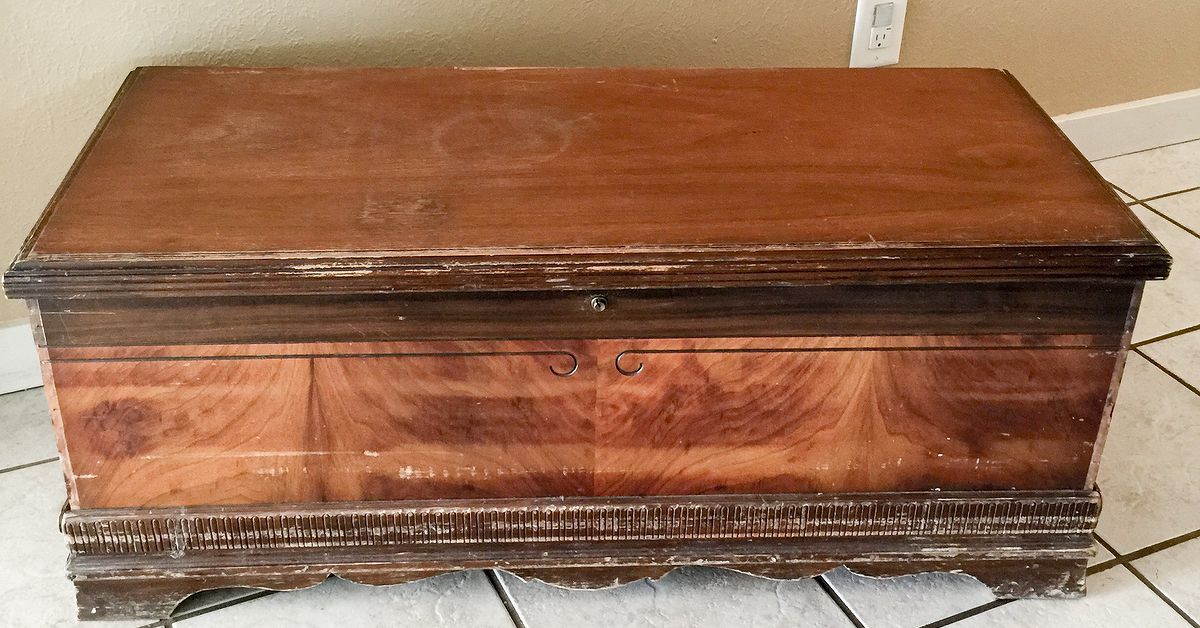
A vintage cedar chest rarely enters your life quietly. It usually appears at a rummage sale, thrift store, estate auction, or relative’s garage wearing a tired brown finish and enough scratches to qualify as a handwritten autobiography. The veneer may be lifting, the hardware may look grumpy, and the lid may squeak as though it has opinions about being disturbed.
Yet beneath that neglected exterior is often a beautifully proportioned storage chest with decades of character. A colorful makeover can rescue it from furniture limbo while preserving the details that make it special. For this 1940s cedar chest makeover, the goal is not to erase its age. The goal is to combine vintage charm, practical repairs, and expressive color in the spirit of the #SPiTchallenge.
The result can be bold without looking chaotic, modern without pretending the chest was built yesterday, and useful enough to earn a place at the foot of a bed, beneath a window, or in an entryway. Before the color starts flying, however, this makeover adventure needs a careful planand one extremely important safety check.
Why a 1940s Cedar Chest Is Worth Saving
Cedar chests were designed to store blankets, linens, clothing, and sentimental household treasures. Many examples from the 1940s feature waterfall-style fronts, curved lids, decorative veneers, contrasting trim, and interiors lined with aromatic red cedar.
Eastern red cedar has a fine texture, attractive reddish-brown heartwood, good dimensional stability, and useful resistance to decay and insects. Although cedar’s reputation for repelling clothes moths is stronger than the available scientific evidence, the wood remains popular for storage because of its fragrance, appearance, and stability.
A damaged exterior does not necessarily mean the entire chest is ruined. Peeling veneer, failed glue, worn lacquer, and scratched trim can often be repaired or creatively incorporated into a new design. The key is determining whether the chest is merely unattractive or genuinely unstable.
Safety Comes Before the Color
Inspect the Lock and Latch
Before cleaning, sanding, painting, or filling a single chip, inspect the locking mechanism. The U.S. Consumer Product Safety Commission has warned owners about older Lane and Virginia Maid cedar chests fitted with locks that automatically latch when the lid closes. Approximately 12 million chests were included in a recall after children became trapped inside, and 14 deaths were reported between 1977 and 2015. Recalled locks should be permanently removed or replaced with safe hardware that does not trap someone inside.
Do not assume another brand is automatically safe. Test whether the lid can latch without a key and whether the mechanism can be opened from inside. When in doubt, remove the lock. A vintage key is charming; an entrapment hazard is not.
Consider the Possibility of Lead
A chest from the 1940s may have been painted, varnished, repaired, or repainted several times. Older furniture can contain lead in paint or varnish, and sanding can turn that material into hazardous dust. The Environmental Protection Agency recommends containing the work area, keeping other people away, using protective equipment, and following lead-safe practices when disturbing questionable finishes. Testing the existing coating before aggressive sanding is the sensible first step.
If a test suggests lead is present, avoid casual dry sanding. Consider sealing the intact finish, using appropriate removal procedures, or hiring a qualified professional.
Evaluate the Chest Like a Restorer
Inspect the legs, base, hinges, lid supports, interior panels, and joints. Look for glue failure, loose components, cracks, wood-boring insect holes, fresh powdery debris, mold, or sections that move under light pressure. The National Park Service recommends treating a wooden object as unstable when continued deterioration is likely unless the condition is corrected.
Take photographs before disassembly. Bag and label every screw, hinge, bracket, and piece of trim. Vintage hardware has a remarkable ability to disappear five minutes after being placed somewhere “safe.”
Supplies for a Colorful Cedar Chest Makeover
- Protective gloves, eye protection, and a suitable respirator
- Lead-test kit appropriate for the existing finish
- Drop cloths or plastic sheeting
- Mild degreasing cleaner and lint-free cloths
- Putty knife, veneer scraper, or small craft blade
- Wood glue, clamps, wax paper, and scrap wood blocks
- Wood filler or a two-part repair compound
- Sandpaper in several grits
- HEPA-equipped vacuum or dust-extraction system
- Primer or bonding primer when required
- Paint, concentrated gel stain, or colorful glazing product
- Brushes, foam applicators, spray bottles, and blending cloths
- Compatible clear topcoat
- Replacement safety latch, hinges, or lid support if needed
Step-by-Step 1940s Cedar Chest Makeover
Step 1: Clean Before Making Any Decisions
Vacuum the interior with a soft brush attachment, paying attention to corners and hinge areas. Clean the exterior with a mild degreaser that will not saturate the veneer. Years of furniture polish, hand oils, wax, and dust can prevent new coatings from bonding.
Let the chest dry completely. Once it is clean, the true condition becomes easier to read. What initially looked like failed finish may simply have been a thick layer of old polish and household grime.
Step 2: Repair or Remove Loose Veneer
Loose but intact veneer is usually worth saving. Carefully lift the edge, remove crumbling adhesive, apply wood glue, and clamp the area between protected blocks. Wax paper prevents the repair blocks from becoming permanent accessories.
If a veneer section is missing, choose among three approaches: install a matching patch, fill and paint the damaged area, or remove an entire badly failed panel and create a deliberate new surface. Patch repairs work best when the grain and thickness of the replacement resemble the original veneer. Aggressive sanding is risky because vintage veneer can be surprisingly thin.
Do not peel away sound veneer merely because one corner has lifted. That is the furniture equivalent of demolishing a kitchen because one cabinet door squeaks.
Step 3: Sand Strategically
The objective is not always to strip every surface to bare wood. If the old coating is stable, a thorough cleaning and light scuff sanding may provide enough grip for primer or paint. Reserve heavier sanding for damaged, uneven, or bare sections.
When preparing raw wood for stain, finishing manufacturers commonly recommend beginning with a medium grit and progressing to approximately 220 grit while sanding with the grain. Test the process on an inconspicuous area because excessive polishing can reduce stain absorption, while coarse scratches can become painfully obvious after color is applied.
Use hand sanding around curved waterfall edges and thin veneer. A power sander can transform a repairable panel into bald plywood with breathtaking efficiency.
Step 4: Build a Color Story
The most successful colorful furniture makeovers begin with a controlled palette. Choose two or three dominant colors and one supporting neutral instead of inviting every bottle in the workshop to the party.
For a coastal look, blend turquoise, sea green, deep blue, and touches of natural wood. For an autumn-inspired chest, combine amber, rust, plum, and dark walnut. A jewel-toned design might use teal, violet, emerald, and smoky black. Cream or warm gray can soften a vivid palette and keep the chest compatible with the room around it.
Map the colors before applying them. Decide whether the grain should remain visible, where the darkest tones should anchor the design, and which architectural details deserve contrast. Curved fronts often look more dimensional when the color flows horizontally with the shape.
Step 5: Apply the Color in Layers
The #SPiTchallenge approach celebrates expressive color using concentrated gel stain or glaze that can be brushed, wiped, sprayed, blended, or diluted. On raw wood, official product guidance for Unicorn SPiT recommends lightly misting the surface, applying one or more diluted colors along the grain, allowing the color to dry, and sealing the finished work.
Begin with the lightest color. Add medium tones while the surface is workable, then introduce dark shades sparingly to create depth. A damp cloth or misting bottle can soften hard boundaries. Blend in long movements that follow the chest’s curves rather than rubbing randomly in circles.
Allow some imperfections to remain visible. Tiny dents, grain changes, and repaired edges add movement beneath translucent color. The finish should feel intentional, not factory-flat.
Always make a sample board first. Colorful stain can react differently over cedar, replacement veneer, filler, plywood, and residual finish. A ten-minute test can prevent a ten-hour emotional crisis.
Step 6: Add Painted Details
Paint can define the base, feet, trim, or lid frame while the stained sections remain translucent. A nearly black navy, charcoal, warm white, or muted green can give the brighter colors visual boundaries.
Small details make a large difference. Consider a thin stripe along the lid, a contrasting lower rail, a stenciled motif, or a softly distressed edge. Keep embellishments related to the shape of the chest. A streamlined waterfall chest usually benefits from broad, flowing details rather than a collection of unrelated decorative flourishes.
Step 7: Seal the Exterior
Color products used as stains or glazes generally require a protective topcoat. Choose a coating compatible with every product beneath it and follow the manufacturer’s instructions for drying time, recoating, and ventilation.
Gloss finishes intensify color and create greater visual depth, while satin and matte finishes produce a softer, flatter appearance. Several thin coats are safer than one heroic coat that sags down the front like melting plastic. Color-product guidance also notes that the sheen and number of clear coats can substantially change the final visual effect.
Do not rush the drying stage. Stain that feels cool, tacky, or unusually soft is not ready for a topcoat. Inadequate drying time is a common cause of finish failure, particularly when gel stain is applied over an existing surface.
Step 8: Refresh the Cedar Interior Carefully
Unless the interior is severely stained or damaged, avoid painting over the cedar. The warm wood color and familiar aroma are part of the chest’s identity.
Vacuum first. If the surface is rough or the fragrance has faded, lightly hand-sand the interior with fine paper while following the grain. Remove all dust before storing fabric. Do not apply an exterior-style polyurethane simply to strengthen the cedar scent; sealing the interior would work against that goal.
Damaged trays or shelves can be repaired and lined with removable fabric or archival-quality paper. A removable liner is easier to clean and preserves access to the original wood beneath it.
Step 9: Restore the Hardware
Clean reusable hinges and handles gently. Polishing every mark away can make old hardware look strangely disconnected from the chest. A dark wax, aged-brass finish, or understated metallic paint can coordinate the pieces without making them look brand new.
Replace damaged lid supports and unsafe locking parts. Reinstall the hardware only after the finish has cured enough to resist fingerprints, scratches, and pressure from screw heads.
Should You Paint an Antique Cedar Chest?
Not every vintage chest should receive a dramatic makeover. A rare, documented, valuable, or exceptionally well-preserved example may deserve conservation rather than creative refinishing. Research labels, stamps, serial numbers, and construction details before removing an original finish.
For a common chest with extensive veneer loss, previous repairs, water stains, or a heavily compromised coating, a well-planned painted or colorful stained finish may be the most practical way to keep it useful. The restoration process should match the value, rarity, condition, and intended use of the furniture rather than following one rigid rule.
Preservation and creativity are not always enemies. Leaving the cedar interior, manufacturer’s label, original profile, and repairable veneer intact can honor the past even when the exterior receives an unapologetically modern palette.
Common Cedar Chest Makeover Mistakes
Skipping the Safety Inspection
Never become so distracted by color samples that you overlook a dangerous lock, unstable lid, lead-containing finish, or damaged support.
Sanding Through the Veneer
Start gently and check your progress frequently. Curved edges and corners lose veneer faster than broad, flat panels.
Using Too Many Colors
A colorful makeover still needs hierarchy. Repeat the main colors in several areas and use the darkest shade to create structure.
Applying Thick Stain or Topcoat
Thick layers dry slowly, trap solvents, and encourage wrinkles or tackiness. Thin, controlled applications are easier to correct.
Ignoring Product Compatibility
Water-based color, oil-based stain, shellac, primer, and polyurethane do not automatically cooperate. Create a complete sampleincluding the topcoatbefore committing to the chest.
Making the Interior Too Perfect
A cedar chest should still feel like a cedar chest when the lid opens. Preserve labels, patina, and usable original features whenever possible.
How to Use the Finished Cedar Chest
Once restored and fully cured, the chest can serve as blanket storage at the foot of a bed, a low table in a guest room, seasonal linen storage, an entryway accent, or a window-side display surface.
Be cautious about using it as a bench unless the lid, hinges, base, and frame are structurally suitable for seated weight. A chest designed to hold quilts is not automatically qualified to host three adults during a family reunion.
Use felt pads beneath decorative objects and avoid placing hot, wet, or rubber-backed items directly on the finish. Keep the chest away from prolonged direct sunlight, heating vents, damp basements, and dramatic humidity swings.
The Makeover Experience: What a Colorful Cedar Chest Teaches You
The experience of restoring a 1940s cedar chest is rarely a straight line from “before” to “after.” It is closer to a small expedition in which every repair reveals another decision. The first surprise usually arrives during cleaning. Under the dull brown film, attractive grain begins to appear, and suddenly the original plan to paint everything bright blue feels less certain.
Then the veneer enters negotiations. One loose corner lifts easily, suggesting the repair will take ten minutes. Fifteen minutes later, that corner is connected to a larger section that seems to be held down by dust, optimism, and one surviving molecule of glue. This is the moment when patience becomes more useful than enthusiasm. Slow clamping, careful scraping, and waiting overnight produce better results than attempting to overpower eighty-year-old materials.
Color application brings a different kind of challenge. A vivid turquoise that looks cheerful in the bottle may become intense on a large panel. Adding water, blending in green, and introducing a darker blue can turn that flat color into something resembling mineral deposits, ocean water, or aged copper. The process becomes less about covering the wood and more about responding to it.
The curved front often becomes the star. Pigment settles into the grain, lighter sections catch the room’s illumination, and darker tones emphasize the waterfall profile. It is tempting to continue adding color forever. Knowing when to stop becomes part of the skill. The best point is usually one layer earlier than the moment when every interesting variation has been blended into a uniform swamp.
Mistakes contribute to the experience as well. A drip may need to be softened. One repaired veneer patch may absorb more pigment than the original wood. A topcoat test may deepen a pale green into a dramatic emerald. These moments are not evidence that the project has failed. They are reminders that vintage furniture is a collection of different materials, repairs, and histories rather than a predictable sheet of new lumber.
There is also a satisfying emotional shift near the end. Reinstalling the hardware transforms a colorful wooden box back into a recognizable piece of furniture. Opening the lid reveals the quiet cedar interior, creating a contrast between the expressive exterior and the largely preserved center. The chest still feels old, but no longer neglected.
Most importantly, a makeover like this changes how you look at damaged furniture. Peeling veneer becomes a repair problem rather than a death sentence. Scratches become evidence of use. An outdated finish becomes an invitation to experiment. The project teaches restraint, adaptability, and respect for materials while still leaving room for humor and bold choices.
Not every stage is glamorous. There will be dust, stuck screws, drying delays, and at least one moment spent searching for a tool that is already in your hand. Yet the finished chest offers something new furniture cannot easily reproduce: a visible conversation between its original era and the person who rescued it.
Conclusion
A successful 1940s cedar chest makeover balances safety, repair, history, and color. Begin by checking the lock and old finish, stabilize the structure, protect delicate veneer, and test every coating system before applying it to a prominent surface. Then let the color enhance the chest’s curves and grain instead of simply burying them.
The #SPiTchallenge spirit is not about making an old chest louder for the sake of being loud. It is about exploring color with enough control to create depth, personality, and a finish that feels connected to the furniture. Done thoughtfully, a forgotten rummage-sale chest can become practical storage, functional art, and a conversation piece with another eighty years of life ahead.
Note: Always verify the safety of vintage locking hardware and test unknown finishes for lead before sanding or stripping. Product instructions, drying times, and finish compatibility vary, so test the complete process in a hidden area first.