Note: This article is written for homeowners, renters, DIY beginners, and anyone who has ever opened a cabinet drawer and wondered why it suddenly behaves like it has personal issues.
Cabinet drawers are supposed to be boring in the best possible way. You pull, they open. You push, they close. No grinding, no crooked gaps, no dramatic side-eye from a drawer front that sits higher on one side than the other. But over time, even well-built kitchen, bathroom, laundry room, and workshop drawers can slip out of alignment. Screws loosen, slides shift, cabinet boxes settle, humidity swells wood, and heavy cookware turns a once-smooth drawer into a tiny stubborn filing cabinet.
The good news: most cabinet drawer problems do not require a full remodel, a professional cabinetmaker, or a suspiciously expensive “drawer whisperer.” In many cases, you can adjust cabinet drawers with a screwdriver, a level, a flashlight, patience, and maybe a snack for morale. The key is diagnosing the problem before twisting every screw in sight. Cabinet drawers can look wrong for several different reasons: the drawer box may be crooked, the slide may be loose, the drawer front may need fine-tuning, or the cabinet itself may not be level.
Below are four practical ways to adjust your cabinet drawers, from quick screw-tightening fixes to deeper slide and drawer-front adjustments. These methods work for many common drawer systems, including side-mount slides, undermount slides, soft-close drawers, older wood runners, and face-frame or frameless cabinets. Your exact hardware may look different, but the principles are the same: level the drawer, align the slides, correct the front, and make the motion smooth.
Before You Start: Identify the Real Drawer Problem
Before grabbing a screwdriver like you are about to duel the cabinet, take a minute to inspect the drawer. Open and close it slowly. Watch the gaps around the drawer front. Listen for scraping. Feel whether one side drags more than the other. A drawer that rubs at the top needs a different fix than one that closes crooked or pops open by itself.
Common signs your cabinet drawer needs adjustment
- The drawer front sits higher or lower on one side.
- The drawer rubs against the cabinet frame.
- The drawer does not close completely.
- The drawer front sticks out farther on one side.
- The drawer slides feel gritty, noisy, or uneven.
- The drawer opens on its own after being closed.
- The gaps between stacked drawers are uneven.
Remove everything from the drawer before adjusting it. Yes, even the mystery packet of soy sauce from 2019. Heavy items can hide the real problem and make the drawer harder to remove. Once empty, pull the drawer out and look for release levers, locking clips, or tabs depending on the slide style. Many side-mount ball-bearing slides have small levers on each side. Undermount slides often have locking devices under the front of the drawer. Older wood drawers may simply lift out after being pulled forward.
Way 1: Tighten, Level, and Reset the Drawer Slides
The simplest way to adjust cabinet drawers is also the most overlooked: tighten the slide screws and reset the drawer position. Drawer slides carry repeated force every time the drawer opens and closes. Over months or years, screws can loosen slightly. A tiny shift at the slide can create a very noticeable crooked drawer front.
How to tighten drawer slide screws
Start by removing the drawer. Shine a flashlight inside the cabinet and inspect both the left and right slides. Look for missing screws, loose screws, stripped holes, bent brackets, or slides that are no longer parallel. If a screw spins without tightening, the screw hole may be stripped. In that case, use a slightly larger screw of the same length, or repair the hole with wood glue and a small wood plug before reinstalling the screw.
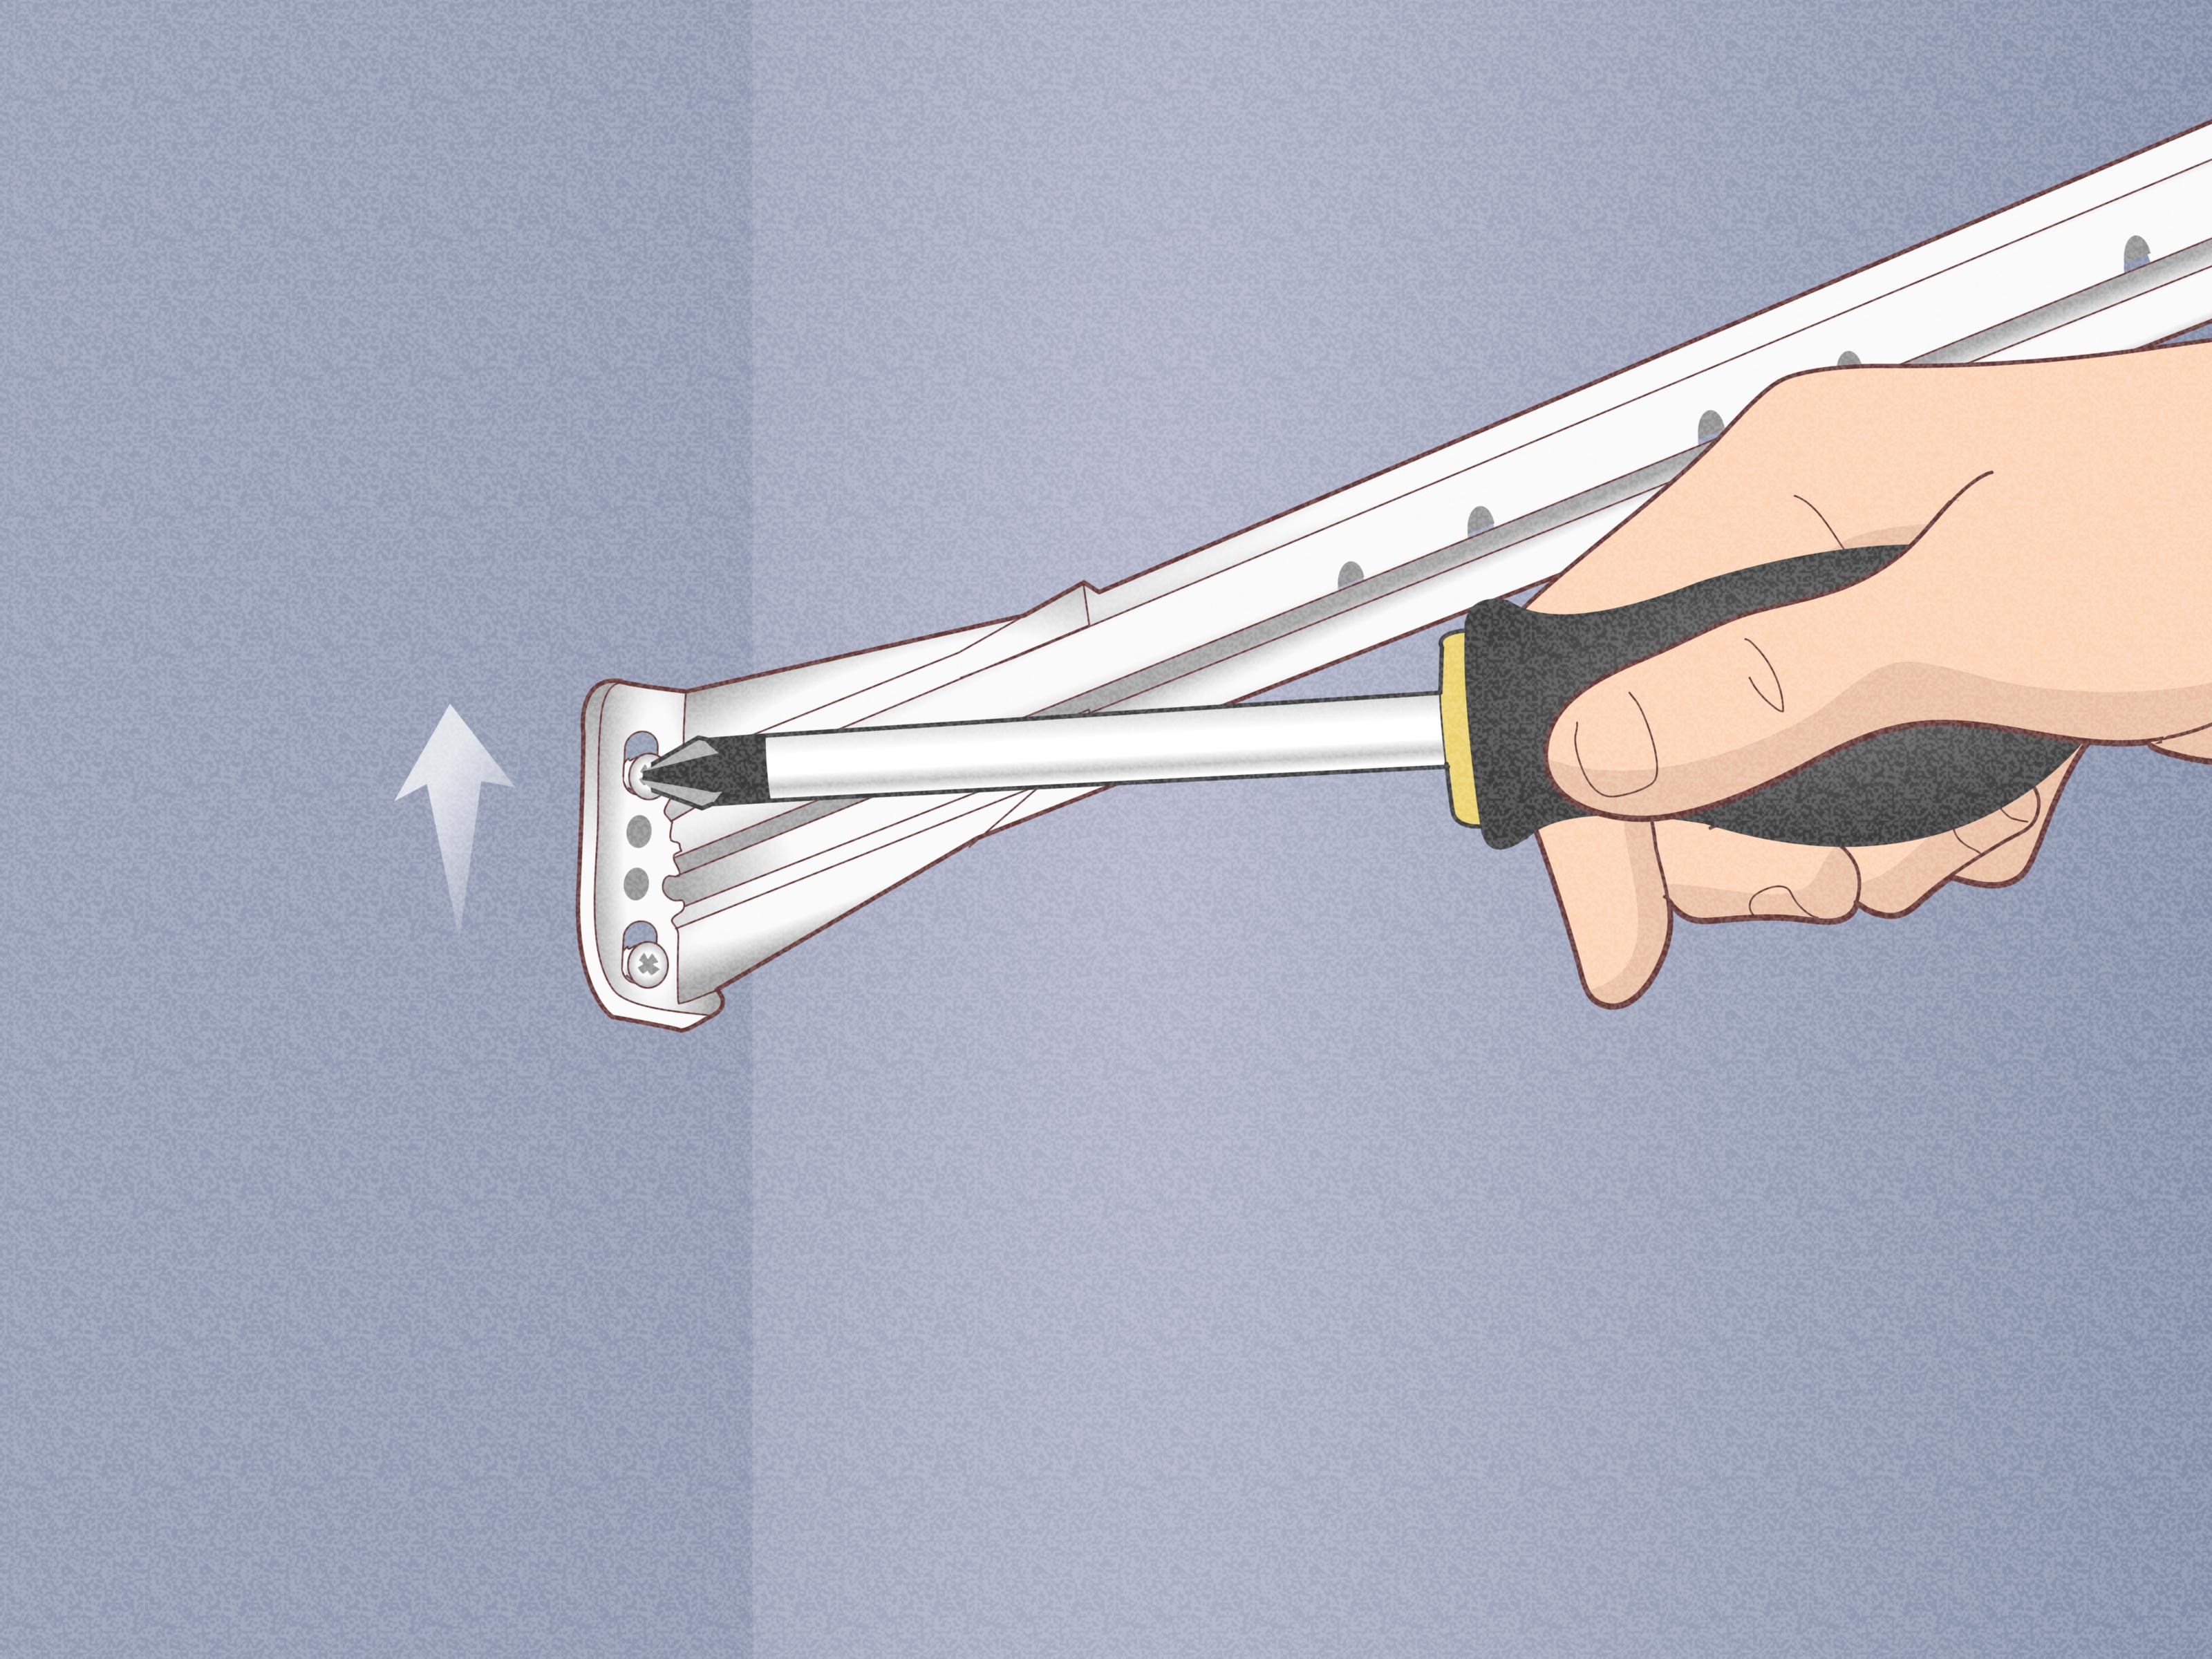
Use a screwdriver rather than a drill for final tightening. A drill can overdrive the screw and make the problem worse, especially in particleboard or MDF cabinet boxes. Tighten each screw until snug, but do not crush the slide or distort the track. If the slide has slotted mounting holes, loosen the screw slightly, move the slide up, down, forward, or backward as needed, and then tighten it again.
How to check if the slides are level
Place a small level on each slide if there is room. If not, measure from the cabinet floor or face frame to the slide at the front and back. Both sides should be installed at matching heights and should run parallel from front to back. If one slide is higher, the drawer may tilt. If one slide is farther forward than the other, the drawer front may sit proud on one side.
For a drawer that sits too low on one side, raise the slide on that side slightly. For a drawer rubbing at the top, lower both slides a little. For a drawer that does not close all the way, check whether the slides are mounted too far forward, blocked by debris, or not fully seated. Small changes matter. Move hardware in tiny increments, test the drawer, and repeat. Cabinet adjustment is less “one big heroic fix” and more “three calm little tweaks.”
Way 2: Adjust the Drawer Front for Even Gaps
Sometimes the drawer works perfectly, but the front looks crooked. This is common with modern cabinets because the drawer box and the decorative drawer front may be separate pieces. The drawer box can slide smoothly while the front sits too high, too low, too far left, or too far right. That is annoying, but also fixable.
Check the reveal around the drawer front
The “reveal” is the visible gap around the drawer front. In a clean cabinet layout, the reveal should look consistent across the top, bottom, and sides. If you have stacked drawers, the horizontal gaps between them should look straight and even. Stand back a few feet and look at the entire cabinet run. Sometimes one drawer looks wrong only because the drawer above it is the real troublemaker. Cabinet drawers are sneaky like that.
For drawer fronts attached with screws from inside the drawer box, loosen the screws slightly while supporting the front. Do not remove the screws completely unless necessary. Shift the front into position, using playing cards, folded cardboard, or thin spacers to create even gaps. Once the drawer front looks aligned, tighten the screws again from the inside.
Using built-in drawer front adjustment mechanisms
Many modern undermount and soft-close drawer systems include built-in adjustment features. These may allow height adjustment, side-to-side movement, tilt adjustment, and sometimes depth adjustment. Look under the front corners of the drawer for orange, gray, blue, or white locking clips. Depending on the hardware, you may find wheels, tabs, levers, or small screws designed specifically for drawer alignment.
Height adjustment usually raises or lowers the drawer front. Side adjustment moves the front left or right. Tilt adjustment helps correct a front that leans inward or outward. Depth adjustment can help when one side of the drawer front sits farther out than the other. Make equal changes on both sides when the entire drawer front needs to move. Make different changes only when correcting a tilt or uneven gap.
Always test after each adjustment. Close the drawer gently and compare the gaps. Open it again and adjust a little more if needed. If your drawer has soft-close hardware, push it fully closed so the mechanism resets before judging alignment. A drawer that is only half-engaged may look misaligned even when the adjustment is correct.
Way 3: Fix Side-to-Side Racking and Crooked Closing
Drawer racking happens when the drawer shifts side to side instead of moving straight in and out. It may feel like the drawer is twisting as it closes. Wide drawers are especially prone to this because people often pull from one knob or one side of a long handle. Over time, that uneven force can stress the slides and exaggerate alignment problems.
How to spot drawer racking
Open the drawer halfway and look at both slides. If one side moves ahead of the other, the drawer may be racking. Close the drawer slowly. If the left side touches first and the right side lags behind, the slides may not be parallel. If the drawer front looks diagonal when nearly closed, you likely need to adjust the slide depth or square the drawer box.
Remove the drawer and inspect the slide position. Measure diagonally across the cabinet opening if you suspect the cabinet box is out of square. A cabinet that is not square can make perfect slides behave badly. In that case, tiny shims behind the slide can help bring the drawer into better alignment.
How to correct a drawer that closes crooked
If one side of the drawer front sticks out when closed, adjust the slide on that side slightly backward or adjust the opposite side forward, depending on the hardware and available slots. For side-mount slides, loosen the screws in the slotted holes, shift the slide, and retighten. For undermount slides, use the built-in depth or rear adjustment if available.
If the drawer is wide, always open and close it from the center of the pull whenever possible. If it has two knobs, use both hands. This may sound overly fancy for a drawer full of spatulas, but even pressure keeps the slides working evenly. Cabinet hardware likes balance. It does not appreciate being yanked around like a shopping cart with one bad wheel.
If racking continues after adjustments, check for worn slides, bent members, broken rear brackets, or loose drawer-box joints. A cracked drawer box can twist under load, making alignment impossible until the box is repaired. Tighten loose corner joints, glue separated wood parts, and replace damaged slides when adjustment no longer solves the issue.
Way 4: Clean, Lubricate, or Replace Problem Drawer Slides
Not every drawer problem is about alignment. Sometimes the drawer is simply dirty, dry, swollen, or worn out. Kitchen drawers collect crumbs, dust, grease, pet hair, and tiny unidentified objects that somehow survive every cleaning session. Bathroom drawers deal with humidity and product residue. Workshop drawers collect sawdust. All of that can make slides drag, squeak, or bind.
Clean the tracks before adjusting anything major
Remove the drawer and vacuum the cabinet interior. Wipe metal slides with a dry cloth or a lightly damp cloth, then dry them thoroughly. Check the ball-bearing tracks for grit. Do not pack the slide with heavy grease unless the manufacturer recommends it. Grease can attract more dirt, which turns the track into a crunchy paste. Not exactly the luxury soft-close experience.
For metal slides, a small amount of silicone-based lubricant can help restore smooth motion. Apply lightly and wipe off excess. For old wooden drawer runners, wax is often the better choice. Rub paraffin wax, paste wax, or even a plain candle along the wood contact points. Avoid vegetable oil or heavy household oils on wood runners because they can become sticky and attract dust.
When to replace drawer slides instead of adjusting them
Adjustment has limits. If the slide is bent, rusted, missing ball bearings, cracked at the mounting point, or no longer holds the drawer closed, replacement may be the smarter fix. Choose the same slide type when possible because drawers are built with specific clearances. Side-mount, undermount, bottom-mount, and center-mount slides each require different spacing.
Measure the existing slide length and drawer clearance before buying replacements. Most slides are sold by length, and the drawer box must match the slide’s clearance requirements. If you upgrade to soft-close slides, read the installation specifications carefully. Soft-close hardware is wonderfully civilized, but it is less forgiving when installed crooked. It wants level, parallel, properly spaced slides. In return, it gives you that satisfying quiet close that makes your kitchen feel slightly more expensive than it was yesterday.
Tools You May Need to Adjust Cabinet Drawers
- Phillips screwdriver
- Flathead screwdriver
- Small level
- Tape measure
- Flashlight
- Vacuum with crevice attachment
- Wood shims or thin cardboard
- Replacement screws
- Paraffin wax or paste wax for wood runners
- Silicone lubricant for metal slides
You do not need every tool for every adjustment. For many cabinet drawers, a screwdriver and a careful eye are enough. The most important tool is patience. The second most important tool is not pretending you remember which screw went where. Take a photo before removing hardware if you are new to drawer repairs.
Specific Examples: Matching the Fix to the Problem
Example 1: The drawer front is too low on the right side
Remove the drawer and inspect the right slide. If it is loose, raise it slightly using the slotted holes and tighten the screws. If the drawer uses undermount hardware, adjust the right front locking device upward. Reinstall the drawer and check the reveal.
Example 2: The drawer closes but one corner sticks out
This is usually a depth or racking issue. Check whether both slides are mounted the same distance from the cabinet front. Loosen the slide screws and move the proud side back slightly, or use the depth adjustment if your hardware includes one.
Example 3: The drawer rubs against the cabinet frame
Look for a high spot. If the drawer rubs at the top, lower both slides slightly or lower the drawer front. If it rubs on one side, adjust the front left or right. Also check whether the drawer box is swollen from humidity or overloaded with heavy items.
Example 4: The drawer is hard to open but looks straight
Clean the slides first. Vacuum crumbs and debris from the track. Wipe metal slides clean and apply a light silicone lubricant if needed. For wood runners, use wax on the contact points. If the slide still grinds or catches, inspect for damage and consider replacement.
Extra Experience: What Real Cabinet Drawer Adjustments Teach You
After adjusting a few cabinet drawers, you start to notice that drawer problems rarely appear overnight. They sneak in slowly. One day the drawer closes with a tiny bump. A month later, it needs a hip-check. Eventually, you are negotiating with it while holding a pan lid and muttering things you would not say at a dinner party. That gradual decline is why many homeowners ignore drawer issues until they become irritating.
One practical lesson is to start with the cabinet itself. If a base cabinet is not level, the drawers may never look quite right. This is especially common in older homes where floors have settled. You can adjust the drawer front beautifully, but gravity will keep reminding you who is in charge. If several drawers in the same cabinet bank lean in the same direction, do not blame each drawer individually. Check whether the cabinet box is level and square. Sometimes the “drawer problem” is actually a cabinet installation problem wearing a drawer costume.
Another experience-based tip is to avoid over-adjusting. Beginners often loosen every screw, move everything at once, and then wonder why the drawer now looks like it was installed during an earthquake. Adjust one variable at a time. Tighten loose screws first. Test. Then adjust height. Test. Then side-to-side. Test again. This slow approach feels less exciting, but it prevents you from creating three new problems while solving one old one.
Drawer weight also matters more than people expect. A drawer full of cast-iron pans, canned goods, tools, or cleaning bottles puts more stress on slides than a drawer holding dish towels. If a heavy drawer keeps drifting out of alignment, inspect the slide rating and the mounting screws. Short screws in weak material may not hold up over time. In some cases, replacing light-duty slides with better-rated full-extension slides is a better long-term solution than repeatedly tightening the same tired hardware.
Humidity can also make drawers behave differently by season. Wood drawer boxes and wood runners can swell in damp months and shrink in dry months. If a drawer sticks only during humid weather, do not immediately sand aggressively. Clean it, wax the runners, and look for obvious rub marks first. Sand only the high spots, and sand lightly. Wood is very easy to remove and extremely annoying to put back.
Finally, good drawer adjustment is partly visual. Step back and look at the whole cabinet, not just the drawer you adjusted. A drawer can be technically level but visually off compared with neighboring doors and drawer fronts. Cabinetry is a grid, and your eyes notice uneven gaps quickly. Use thin spacers to compare reveals, and make small corrections until the row looks balanced. When the drawer opens smoothly, closes quietly, and lines up with the others, you get one of those underrated homeowner victories: nobody else notices, but you know. And every time the drawer glides shut properly, it feels like the kitchen just gave you a tiny round of applause.
Conclusion: Small Adjustments Can Make Cabinet Drawers Feel New Again
Learning how to adjust cabinet drawers is one of those practical DIY skills that pays off again and again. A crooked drawer can make a whole kitchen feel worn out, while a smooth, aligned drawer instantly makes cabinets feel cleaner, sturdier, and better cared for. Start with the basics: empty the drawer, inspect the slides, tighten loose screws, and check for level. Then fine-tune the drawer front, correct side-to-side racking, and clean or lubricate the slides as needed.
Most drawer adjustments are small, simple, and completely doable with everyday tools. The trick is to work patiently and make one change at a time. When adjustment no longer helps, replacement slides may be the best answer. Either way, you do not have to live with drawers that scrape, sag, wobble, or close like they are making a dramatic exit. Give them a little attention, and your cabinet drawers can get back to doing their job quietly, smoothly, and without the attitude.