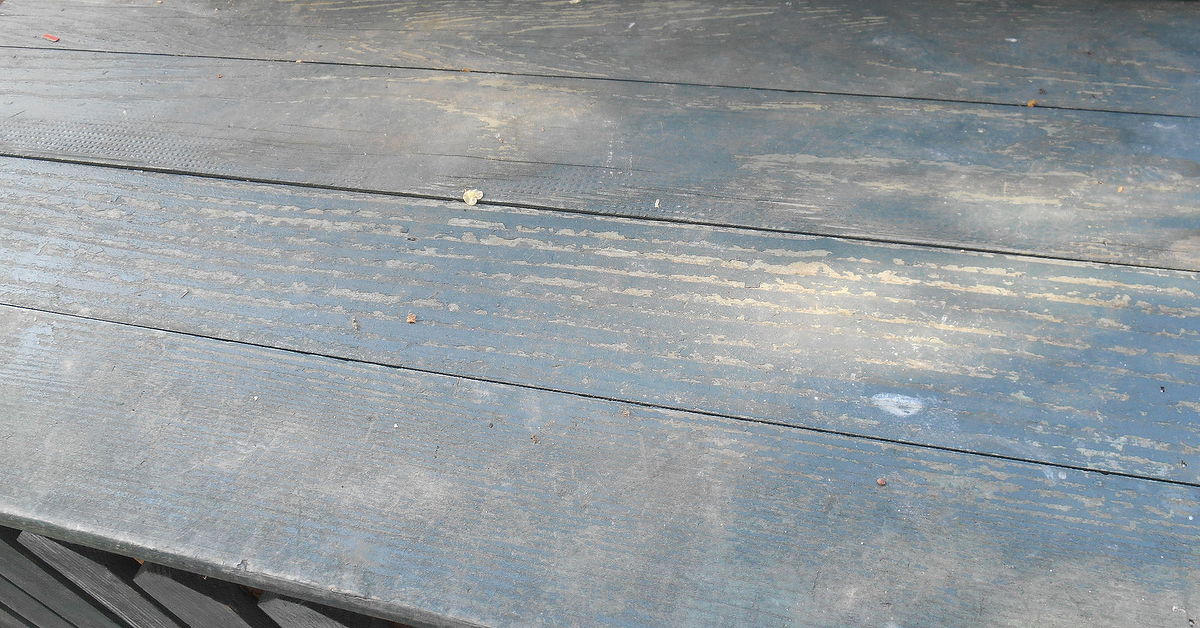
A garden workbench has a hard life. It catches muddy pots, leaking watering cans, soil spills, sun, rain, forgotten seed packets, and occasionally one very judgmental squirrel. After a few seasons, even the sturdiest bench can start looking less like a charming potting station and more like something rescued from behind a shed during a thunderstorm.
The good news? You do not need to replace it. With the right prep, exterior-grade paint, smart repairs, and a few practical upgrades, you can repaint and update a garden workbench DIY-style over a weekend. This project is affordable, satisfying, and surprisingly forgiving. A little sanding here, a splash of color there, a hook for your trowel, and suddenly your old workbench is ready for its magazine-cover moment.
This guide walks you through how to clean, repair, sand, prime, paint, seal, organize, and personalize your garden workbench so it becomes both beautiful and useful. Whether you call it a garden workbench, potting bench, outdoor work table, planting station, or “that place where I lose my gloves,” the goal is the same: make it sturdy, weather-ready, easy to clean, and enjoyable to use.
Why Repaint and Update a Garden Workbench?
A garden workbench is more than outdoor furniture. It is a command center for planting, pruning, repotting, seed starting, tool cleaning, and pretending you are more organized than you were last spring. Repainting gives the bench a fresh protective coating, while updating its layout can make gardening faster and less frustrating.
Exterior wood faces moisture, sunlight, temperature swings, dirt, mildew, and everyday wear. Over time, old paint peels, bare wood absorbs water, screws loosen, and surfaces become rough. Repainting helps protect the wood, slows weather damage, improves cleanability, and makes the entire garden area look intentional instead of accidental.
Updating the bench also improves function. Adding shelves, hooks, a waterproof work surface, labeled storage, casters, a tool rail, or a soil bin turns a tired table into a hardworking outdoor station. Think of it as giving your garden bench a promotion.
Tools and Materials You Will Need
Before you begin, gather your supplies. This keeps the project moving smoothly and prevents the classic DIY ritual of making four separate hardware store trips while wearing paint-speckled shorts.
Basic Tools
- Drop cloth or plastic sheeting
- Bucket, mild soap, sponge, and scrub brush
- Garden hose or damp rags
- Paint scraper or putty knife
- Sandpaper in 80-, 120-, and 180-grit
- Sanding block or orbital sander
- Dust mask, safety glasses, and gloves
- Exterior wood filler or epoxy filler
- Caulk rated for exterior use
- Paintbrushes and small foam rollers
- Painter’s tape
- Screwdriver or drill
Paint and Finish Supplies
- Exterior wood primer
- Exterior acrylic latex paint or exterior enamel
- Stain-blocking primer for tannin-rich woods like cedar or redwood
- Clear exterior topcoat, if recommended for your chosen finish
- Clean tack cloth or microfiber cloth
Optional Upgrade Materials
- Hooks for hand tools
- Small pegboard or slatted backing
- Metal, tile, or sealed wood work surface
- Drawer pulls or knobs
- Outdoor-rated casters
- Small bins for seeds, gloves, labels, and twine
- Galvanized tray or removable soil bin
- Battery-powered task light or solar light
Step 1: Inspect the Workbench Before Painting
Start by giving the bench a full inspection. Look for loose screws, cracked boards, soft wood, peeling paint, rusted hardware, mildew, wobbling legs, and joints that have opened up. Press a screwdriver gently into suspicious areas. If the wood feels spongy, crumbly, or damp deep inside, it may need replacement rather than cosmetic repair.
Pay special attention to feet and lower shelves because they often sit close to wet ground. Check the back edge too, especially if the bench has been pushed against a fence or shed wall where airflow is limited. Moisture loves hiding in quiet corners like it is paying rent there.
If the bench is structurally sound, repainting is a great option. If a board is split, replace it. If screws are rusty, swap them for exterior-rated screws. If the bench rocks, tighten fasteners or add small braces. Paint can make a bench prettier, but it cannot fix a wobbly frame by sheer optimism.
Step 2: Clean the Garden Workbench Thoroughly
Paint sticks best to clean surfaces. Garden workbenches collect soil, sap, fertilizer dust, pollen, bird gifts, and mystery grime that may or may not have a backstory. Before sanding or painting, wash everything.
Mix mild soap with warm water and scrub the workbench using a sponge or stiff brush. Remove caked-on soil from corners, shelf gaps, and around screws. If mildew is present, use an appropriate outdoor cleaner and follow the product directions carefully. Rinse with clean water and allow the bench to dry completely.
Do not rush the drying stage. Exterior wood needs time to release moisture before primer and paint are applied. Painting damp wood can lead to peeling, bubbling, and a finish that ages faster than lettuce in July. A dry, breezy day is ideal.
Step 3: Handle Old Paint Safely
If your garden workbench is old, painted, or inherited from a place where history happened before warning labels became popular, be careful. Old painted furniture may contain lead-based paint, especially if the coating is very old. Avoid dry sanding or aggressively scraping unknown old paint without taking safety precautions.
For questionable finishes, use a lead test kit or consult a professional. Work outside, wear protective gear, keep dust contained, and clean the area thoroughly. If lead is suspected, do not create airborne dust. Safety is not the glamorous part of DIY, but neither is explaining to everyone why you turned a weekend project into a health hazard.
Step 4: Scrape Loose Paint and Sand the Surface
Once the bench is clean and dry, remove loose or peeling paint with a scraper. You do not need to strip every inch down to bare wood unless the existing finish is failing everywhere. If most of the old paint is firmly attached, you can sand it smooth and paint over it after priming.
Use 80-grit sandpaper for rough spots, peeling edges, and uneven patches. Move to 120-grit for general smoothing, then finish with 180-grit where hands will touch the surface. Sand in the direction of the grain to avoid visible scratches. Rounded corners are helpful on a workbench because sharp edges lose paint faster and collect damage more easily.
After sanding, remove dust with a brush, vacuum, tack cloth, or damp microfiber cloth. Dust left behind can create a gritty finish. Nobody wants a garden bench that feels like it was painted during a sandstorm.
Step 5: Repair Cracks, Holes, and Gaps
Fill small holes, dents, and cracks with exterior wood filler. Press the filler firmly into the damaged area, let it dry according to the label, then sand it smooth. For deeper rot or large missing sections, use an exterior-rated wood repair epoxy or replace the damaged board.
Seal narrow gaps where water may collect using exterior paintable caulk. Focus on joints, seams, and places where vertical pieces meet horizontal shelves. Water sitting in cracks is one of the fastest ways to ruin outdoor wood. A little caulk now can save you from future peeling, swelling, and muttering under your breath.
Step 6: Choose the Best Paint for an Outdoor Garden Workbench
For most wooden garden workbenches, a high-quality exterior acrylic latex paint is a smart choice. It handles weather well, offers good color retention, dries relatively quickly, and cleans up with soap and water. Exterior enamel can also work well, especially for surfaces that need extra durability.
A satin or semi-gloss finish is usually better than flat paint for a garden workbench. Satin has a softer look and hides minor flaws, while semi-gloss is easier to wipe clean. Since this bench will meet wet pots, spilled soil, plant tags, and the occasional coffee mug, cleanability matters.
If your bench is made from cedar, redwood, or another tannin-rich wood, use a stain-blocking primer before painting. Tannins can bleed through light paint and create brownish stains. That is not “rustic charm.” That is wood chemistry politely ruining your color choice.
Step 7: Prime the Bench Properly
Primer improves paint adhesion, seals bare wood, blocks stains, and helps the topcoat look even. Apply primer to all bare wood, repaired areas, sanded spots, and any surface where the color is changing dramatically. If the entire bench has been stripped or heavily sanded, prime the whole thing.
Use a brush for corners, joints, slats, and detailed areas. Use a small foam roller for flat shelves and work surfaces. Apply a thin, even coat rather than one heavy coat. Heavy primer can drip, pool, and create ridges that you will later have to sand while questioning your life choices.
Let the primer dry fully. Then lightly sand with 180-grit paper if the surface feels rough. Wipe away the dust before painting.
Step 8: Paint the Garden Workbench
Now comes the fun part: color. Stir the paint well, but do not shake it like a protein drink unless you enjoy bubbles. Start with the underside, legs, lower shelves, and back areas. Then move to the top and visible surfaces. Painting from bottom to top helps you catch drips and avoid leaning into wet paint.
Use a brush to cut into corners and around hardware. Use a roller on wide flat areas. Apply two thin coats instead of one thick coat. Thin coats cure better, look smoother, and resist peeling more effectively. Allow the first coat to dry according to the paint label before applying the second coat.
Choose colors that fit your garden style. Soft sage green blends beautifully with plants. Deep navy looks polished near a white fence. Warm terracotta feels earthy and cheerful. Cream or white brightens a shady corner. Black can look modern, but it may get hot in full sun. A colorful accent shelf or painted drawer front adds personality without turning the whole bench into a carnival float.
Step 9: Protect the Work Surface
The top of the garden workbench takes the most abuse. It gets scraped by pots, soaked by watering cans, and sprinkled with soil. You can paint it like the rest of the bench, but you may want extra protection.
Consider adding a removable galvanized tray, a sealed wood panel, peel-and-stick outdoor-rated tile, or a metal work surface. A smooth, wipeable top makes cleanup easier. If you use tile or metal, make sure edges are secure and not sharp. If you use painted wood, let the paint cure fully before heavy use. Dry-to-touch is not the same as fully cured. Paint needs time to harden, even if it looks ready for action.
Step 10: Add Smart Storage Upgrades
Once the paint is fresh, upgrade the workbench so it works harder. A few simple additions can make a big difference.
Add Hooks for Tools
Install hooks along the side or back for trowels, pruners, gloves, brushes, and a hand broom. Keep frequently used tools within reach. This prevents the familiar garden mystery where your trowel disappears six times in one afternoon.
Add a Lower Shelf
A lower shelf is perfect for potting soil, watering cans, empty pots, and heavy items. Keep weight low to make the bench more stable. Use bins to keep supplies tidy and prevent small items from rolling into the land of lost plant labels.
Add a Pegboard or Slatted Back
A vertical back panel creates instant organization. Pegboard works well if the bench is under cover. For exposed outdoor areas, wood slats with hooks may hold up better. Paint the backing panel in a contrasting color for a custom look.
Add a Soil Bin
A removable plastic or galvanized bin can hold potting mix during planting. Choose a container with a lid if the bench stays outside. Dry potting mix is useful. Wet potting mix is basically garden pudding.
Add Casters
If you need to move the bench around a patio, install outdoor-rated locking casters. Make sure they can support the bench’s weight plus supplies. Locking wheels are important because a rolling workbench sounds fun until it slowly escapes down the driveway.
Step 11: Weatherproof the Details
Outdoor projects last longer when small details are handled well. Raise the bench slightly off the ground using rubber feet, furniture glides, or pavers. This helps prevent the legs from sitting in moisture. Keep the bench where air can circulate around it. If possible, place it under an awning, porch roof, shed overhang, or tree canopy that provides partial protection.
Check screw heads, joints, and end grain. End grain absorbs moisture quickly, so make sure cut ends are primed and painted. If you added new boards, coat all sides before installation when possible. A workbench is easiest to protect before it is loaded with bags of soil and three pots you swear you are going to use soon.
Step 12: Style the Bench Without Sacrificing Function
A garden workbench should be practical, but it can still look charming. Add a small shelf for terracotta pots, a labeled jar for plant markers, a hook for twine, and a weatherproof basket for gloves. Use matching containers if you like a polished look, or mix vintage tins and old crates for cottage character.
Just avoid overdecorating the work surface. If every inch is covered with cute objects, you no longer have a workbench. You have a display table wearing gardening clothes. Leave enough open space for repotting plants, mixing soil, and setting down trays.
Common Mistakes to Avoid
Skipping Surface Prep
Paint failure usually starts before the paint is even opened. Dirty, glossy, damp, or dusty surfaces cause poor adhesion. Cleaning, sanding, and priming may feel slow, but they are the reason the finish lasts.
Using Interior Paint Outside
Interior paint is not made for outdoor weather. Use exterior-rated paint for a garden workbench. It is designed to resist moisture, fading, mildew, and temperature changes better than indoor paint.
Painting in Bad Weather
Avoid painting in rain, high humidity, extreme heat, strong wind, or direct blazing sun. Mild, dry weather gives the paint time to level and dry properly. Your paint can only do so much; do not ask it to perform miracles during a heat wave.
Applying Paint Too Thickly
Thick coats take longer to dry and are more likely to drip, wrinkle, or peel. Two thin coats are usually stronger and better-looking than one heavy coat.
Using the Bench Too Soon
Let the paint cure before heavy use. A freshly painted surface may feel dry but still be soft underneath. Give it time before dragging pots across it or loading it with tools.
Maintenance Tips After Repainting
After your garden workbench makeover is finished, simple maintenance will keep it looking good. Wipe up standing water. Brush off soil after use. Tighten screws once or twice a season. Touch up scratches before moisture gets under the paint. Store the bench under cover during harsh winter weather if you can.
At the beginning of each gardening season, inspect the surface for peeling, cracks, mildew, or exposed wood. Small touch-ups are easy. Ignored damage becomes a bigger project, and bigger projects tend to arrive at the exact moment you would rather be planting tomatoes.
Best Design Ideas for Updating a Garden Workbench
If you want your repainting project to feel like a true transformation, try one of these design directions.
The Cottage Garden Bench
Use soft green, cream, pale blue, or warm white paint. Add brass hooks, terracotta pots, a wood crate, and handwritten labels. This style looks relaxed, timeless, and perfect beside roses or herbs.
The Modern Garden Station
Choose charcoal, black, slate blue, or deep olive. Add clean-lined hooks, metal bins, and a smooth worktop. Keep accessories minimal. This style works well on patios, near contemporary planters, or beside raised beds.
The Colorful Backyard Bench
Paint the frame one color and the shelves another. Try coral with cream, teal with white, or yellow with sage. Bright colors make the bench a cheerful focal point and help it stand out in a busy garden.
The Upcycled Farmhouse Bench
Keep some wood texture visible, use muted paint, replace knobs with vintage-style hardware, and add a galvanized tray. This look is ideal if your bench already has character, dents, and a story involving at least one previous owner.
Personal Experience: Lessons From Repainting and Updating a Garden Workbench DIY
The first thing you learn when repainting a garden workbench is that “quick refresh” is a suspicious phrase. It sounds innocent, but it often means you will start by wiping down one shelf and end up reorganizing the entire garden corner. That is not a failure. That is the natural life cycle of a DIY project.
One practical lesson is to photograph the bench before taking anything apart. If you remove hooks, drawer pulls, shelves, or a back panel, a quick photo helps you remember where everything goes. Otherwise, you may find yourself holding a random bracket and wondering whether it was important. Spoiler: it probably was.
Another lesson is that sanding always takes longer than expected, but it is worth it. The smoothest, most professional-looking paint jobs usually come from patient prep, not fancy brushwork. When old paint edges are feathered smooth and rough grain is knocked down, the new finish looks intentional. When sanding is skipped, the bench may still look better from across the yard, but up close it can look like it is wearing five sweaters under a raincoat.
Color testing is also useful. Paint can look very different outdoors than it does on a store card. Sunlight, shade, surrounding plants, fence color, and patio materials all change how a color reads. A sage green may look elegant in the morning and gray by evening. A cheerful yellow may look charming on a sample and alarmingly loud on a whole bench. Test a small area before committing.
When updating storage, the best approach is to organize around real habits, not imaginary perfect habits. If you always drop gloves on the top shelf, add a small basket there. If you constantly lose plant tags, attach a jar or cup to the side. If you use pruners daily, give them a dedicated hook at eye level. A workbench should support the way you actually garden, not the way a catalog thinks you garden while wearing spotless linen.
One of the most useful upgrades is a removable work tray. Soil spills are inevitable, and a tray makes cleanup fast. You can lift it, dump excess soil back into a bin, rinse it, and move on. A small hand broom hanging nearby is another tiny improvement that feels luxurious after the third potting session.
It is also smart to protect the feet of the bench. Many garden workbenches fail from the bottom up because legs sit on damp ground. Raising the bench on pavers or adding rubber feet improves airflow and reduces moisture exposure. This small step does not change the look much, but it can extend the life of the project.
Finally, give the finished bench a little time before loading it heavily. Fresh paint needs patience. Once it has cured, stock the bench with only what you truly use: hand tools, gloves, twine, labels, seed packets, small pots, and potting mix. Leave open workspace. The best garden workbench is not the one with the most accessories; it is the one that makes you want to garden more often.
Conclusion
Learning how to repaint and update a garden workbench DIY-style is one of the most rewarding outdoor projects because the results are both pretty and practical. With careful cleaning, sanding, repairs, priming, exterior paint, and smart storage upgrades, an old bench can become a durable potting station that makes gardening easier and your outdoor space more inviting.
The secret is not rushing the prep. Clean thoroughly, let the wood dry, sand properly, use the right primer, choose exterior-grade paint, and protect the areas that take the most abuse. Then add features that match your gardening routine: hooks, shelves, bins, trays, casters, or a wipeable worktop.
A refreshed garden workbench does not just look better. It helps you work better. It keeps tools close, soil contained, pots organized, and your garden corner feeling like a place you actually want to spend time. And honestly, any project that makes gardening easier while giving an old bench a second life deserves a proud little nod every time you walk past it.