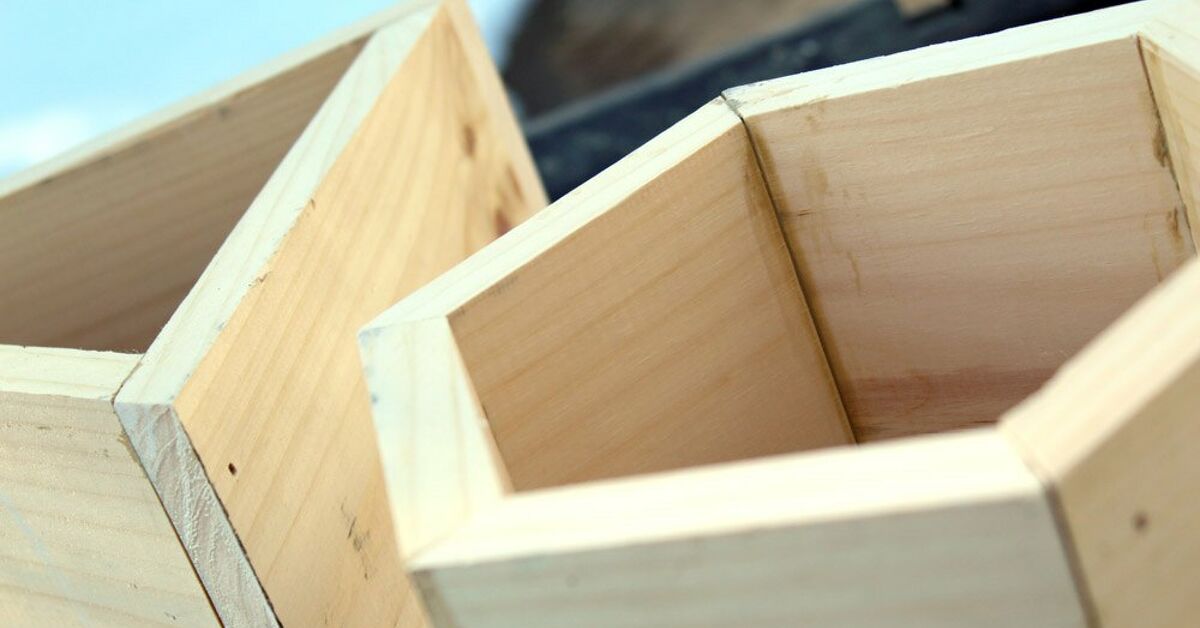
Geometric DIY planter boxes are what happens when gardening meets architecture and the two decide to have coffee on your patio. They are practical, stylish, and wonderfully customizable. Instead of settling for a basic rectangle that says, “I bought this while half-awake at a big-box store,” a geometric planter box says, “Yes, I own a miter saw, and yes, I may now be emotionally attached to cedar boards.”
The beauty of geometric planter boxes is that they can be as simple or as dramatic as you want. You can build a clean hexagon for herbs, a triangular planter for a corner, a diamond-patterned wood box for succulents, or a modern raised planter with angled trim that looks like it belongs outside a boutique coffee shop. Even better, you do not need to be a master carpenter. With careful measuring, basic tools, outdoor-safe materials, and a little patience, this project is very achievable for weekend DIYers.
In this guide, you will learn how to build geometric DIY planter boxes from start to finish: planning the shape, choosing wood, cutting angles, assembling the frame, adding drainage, finishing the surface, and planting successfully. We will focus on a versatile geometric wood planter box with angled decorative slats, plus variations for triangular, hexagonal, and modern raised designs.
Why Build Geometric DIY Planter Boxes?
A planter box already gives you more control over soil, drainage, plant placement, and garden design. A geometric planter box adds personality. It turns herbs, flowers, grasses, and succulents into a design feature rather than a collection of lonely pots having an identity crisis on the deck.
Geometric planters work especially well in modern patios, small gardens, balconies, front porches, and entryways. Their clean lines pair beautifully with ornamental grasses, trailing vines, compact shrubs, lavender, rosemary, basil, succulents, and seasonal flowers. They also make awkward spaces useful. That empty corner beside the steps? Triangle planter. Narrow balcony wall? Long rectangular box with diagonal trim. Sunny deck rail? A compact geometric herb box.
The main keyword here is geometric DIY planter boxes, but the real goal is simple: build something sturdy enough for soil, attractive enough to show off, and forgiving enough that one slightly imperfect angle does not ruin your weekend.
Choose the Right Geometric Planter Design
Before buying wood, decide what shape fits your space and your skill level. Geometry is lovely, but it is also sneaky. A square box with diagonal trim is easier than a full hexagon, and a triangular planter requires more accurate angle cuts than a standard rectangular planter.
Beginner-Friendly: Rectangular Box With Geometric Trim
This is the easiest option and the best place to start. You build a standard rectangular planter, then add angled wood strips to the outside in triangles, diamonds, or chevron patterns. The structure stays simple, but the finished box looks custom.
Intermediate: Triangle Planter Box
A triangular planter box is excellent for corners and modern landscapes. It usually requires 60-degree or 45-degree cuts, depending on the design. It looks sharp, saves space, and makes your patio look like it has a plan instead of “plants happened here.”
Advanced: Hexagon or Pyramid Planter
Hexagon and pyramid planters are stunning, especially for succulents, strawberries, herbs, or layered flowers. They require more precise measuring and repeated angled cuts. If you enjoy puzzles and own clamps, this may be your moment.
Materials You Will Need
The following list is for one medium rectangular geometric planter box, approximately 24 inches long, 16 inches wide, and 16 inches tall. You can resize it easily once you understand the structure.
Wood and Hardware
- 1×6 cedar boards for side panels
- 2×2 cedar boards for corner posts and frame supports
- 1×2 cedar or pine boards for geometric trim
- Exterior-grade wood screws
- Waterproof wood glue
- Galvanized brad nails or finish nails, optional
- Landscape fabric or mesh screen
- Exterior wood stain, paint, or clear sealer
- Potting mix suitable for containers
Recommended Tools
- Miter saw or circular saw with a guide
- Drill and drill bits
- Measuring tape
- Speed square or carpenter’s square
- Clamps
- Sander or sanding block
- Pencil
- Safety glasses and hearing protection
Cedar is a popular choice because it resists rot better than many common woods and looks beautiful outdoors. Redwood, cypress, and teak are also durable options. If you plan to grow herbs or vegetables, be careful with unknown scrap wood, old painted wood, railroad ties, or lumber treated with harsh chemicals. Your basil deserves better than mystery chemicals with a side of pesto.
Plan the Size and Shape Before Cutting
Measure your space before you cut anything. A planter that looks modest in the garage can become a wooden yacht once you place it on a balcony. Consider sunlight, walking space, water access, and the mature size of your plants.
For a general-purpose patio planter, a 24-by-16-inch box is easy to move before filling and large enough for herbs, annual flowers, compact peppers, lettuce, or dwarf ornamental grasses. For deeper-rooted plants, increase the height to 18 or 20 inches. For succulents, a shallower planter may work well as long as the drainage is excellent.
Cut List for a Medium Geometric Planter Box
For a 24-inch by 16-inch by 16-inch planter, use this sample cut list:
- Four 2×2 corner posts cut to 16 inches
- Four long 1×6 side boards cut to 24 inches
- Four short 1×6 side boards cut to 14.5 inches, adjusted for board thickness
- Three to four bottom slats cut to fit inside the box
- Several 1×2 trim pieces cut as needed for diagonal geometric patterns
Always measure your actual boards before final cuts. Lumber dimensions can be surprisingly dramatic for something that claims to be standardized. Dry-fit the pieces before fastening to make sure the box sits square.
Step-by-Step: How to Build Geometric DIY Planter Boxes
Step 1: Build the Basic Frame
Lay two corner posts on your work surface and attach one long side board across them. Keep the top edge flush with the tops of the posts. Drill pilot holes first to prevent splitting, then fasten the board with exterior screws. Add the second long side board beneath it, leaving a small gap if you want a subtle shadow line or placing it tight if you prefer a clean wall.
Repeat this process for the opposite long side. You now have two side panels. Attach the short boards between them to create a box. Use clamps to hold everything steady and check the corners with a square. This is the point where the planter either becomes a box or a modern art statement titled “Almost Rectangular.”
Step 2: Add Bottom Supports
Install 2×2 support rails along the inside bottom edges of the planter. These rails will hold the bottom slats. Attach them securely with screws. Then lay your bottom boards across the supports, leaving small gaps between boards for water movement.
Do not seal the bottom so tightly that water has nowhere to go. Planters need drainage. Plants enjoy water, but they do not enjoy living in soup.
Step 3: Drill Drainage Holes
Drill several drainage holes in the bottom boards. For larger planter boxes that sit flat on a patio or deck, you can also drill holes slightly above the bottom edge along the sides. This helps water escape even if the box is resting on a solid surface.
Good drainage is one of the most important parts of building a successful DIY planter box. Without it, roots can sit in standing water, which can lead to rot and weak plant growth. A beautiful planter with poor drainage is basically a very stylish plant bathtub.
Step 4: Line the Interior
Cut landscape fabric or mesh screen to fit the inside of the planter. Staple or tack it in place so it covers gaps and helps reduce soil loss. Make sure drainage holes remain open. You can cut small X-shaped openings in the fabric over each drainage hole if needed.
Landscape fabric is not a magic shield against moisture, but it helps keep potting mix where it belongs. For edible plants, avoid questionable plastic liners unless you know they are safe for garden use.
Step 5: Create the Geometric Pattern
Now comes the fun part: the geometry. Use 1×2 trim boards to create triangles, diamonds, chevrons, or asymmetrical modern lines on the outside of the box. Lay the trim pieces directly on the planter sides and mark the angles with a pencil.
For a simple diamond pattern, place one diagonal strip from the lower left corner to the upper center of the panel, then another from the upper center to the lower right corner. Mirror the pattern on the next panel or rotate it for a more playful look. Cut each piece with a miter saw, dry-fit it, then attach it with waterproof wood glue and brad nails or small exterior screws.
For a bolder look, paint the planter box one color and stain the trim another. Black box with natural cedar trim? Very modern. White box with sage green trim? Cottage garden, but make it fancy. Natural cedar with clear sealer? Classic and quietly smug.
Step 6: Sand Everything Smooth
Sand rough edges, corners, and trim pieces. Pay special attention to the top rim and any place hands may touch. Sanding also helps stain or paint adhere more evenly. If you are leaving the cedar natural, sanding gives the wood a cleaner finish and reduces splinters.
Step 7: Apply an Outdoor Finish
Apply exterior stain, paint, or sealer according to the manufacturer’s instructions. Coat the outside, top rim, and exposed edges. Let everything dry completely before adding soil or plants.
If the planter will hold edible plants, choose finishes carefully. Many DIYers prefer leaving the interior unfinished or using products labeled as safe for garden beds. The exterior can still be painted or stained for style. Refresh the finish yearly or as needed, especially if your planter lives in full sun, heavy rain, or winter weather.
Step 8: Fill With the Right Potting Mix
Use a high-quality potting mix designed for containers, not dense garden soil. Container plants need a mix that holds some moisture while still allowing air to reach the roots. Garden soil can compact inside boxes, causing poor drainage and unhappy plants.
Fill the planter most of the way, leaving about one inch of space at the top so water does not spill over every time you hydrate your tiny leafy roommates.
Step 9: Plant for Shape and Contrast
The best plants for geometric planter boxes depend on sun exposure and box depth. For full sun, try lavender, rosemary, thyme, sedum, ornamental grasses, dwarf marigolds, zinnias, or compact peppers. For partial shade, consider coleus, begonias, parsley, mint, ferns, or caladiums.
To enhance the geometric look, mix plant forms. Pair upright plants with trailing plants. Use spiky foliage against rounded leaves. Place taller plants toward the back or center and trailing plants near the edges. A sharp planter box looks even better when the planting design has contrast and movement.
Geometric Planter Box Variations
Modern Triangle Planter
To build a triangle planter, cut three equal side panels and join them at angled corners. A simple equilateral triangle uses 60-degree corners. Reinforce each corner with interior blocks or brackets. This style is perfect for corners, entryways, and grouping in sets of three.
Hexagon Herb Planter
A hexagon planter typically uses six equal boards with angled ends. Each end is cut so the pieces form a six-sided shape. This design is excellent for herbs because each side creates a natural planting zone. Put basil on one side, thyme on another, parsley on another, and suddenly dinner feels like it has a personal assistant.
Raised Geometric Planter Box
Add legs to lift the planter off the ground. Raised planters reduce bending and can work well on patios and decks. Use sturdy 2×2 or 4×4 legs, cross-bracing, and strong fasteners. Once filled with soil and water, planters become heavy, so build for strength rather than optimism.
Geometric Privacy Planter
Attach a trellis or vertical slat screen to the back of the planter. This works well for climbing plants, ornamental grasses, jasmine, clematis, or privacy on a patio. A geometric trim pattern on the planter base plus a simple vertical screen creates a clean architectural look.
Common Mistakes to Avoid
Skipping Pilot Holes
Outdoor boards can split when screws are driven too close to the end. Drill pilot holes first, especially with cedar or narrow trim pieces.
Forgetting Drainage
A planter without drainage holes is risky. Water needs a way out. If you want to place a decorative liner pot inside your wooden box, make sure the inner pot drains freely and does not sit in standing water.
Using the Wrong Soil
Do not fill your planter with heavy backyard soil. Use container potting mix. Your plants will reward you by not dramatically wilting in protest.
Choosing Plants With Different Needs
Do not plant cactus, basil, mint, and a thirsty fern in the same small box unless you enjoy botanical drama. Group plants with similar sunlight and watering needs.
Making the Box Too Big to Move
Wood plus soil plus water equals “why did I build this on the wrong side of the patio?” Place the planter before filling it, or add locking casters if the design allows.
Maintenance Tips for Long-Lasting Planter Boxes
Check your geometric DIY planter boxes at least once a season. Look for loose trim, clogged drainage holes, peeling finish, or signs of rot. Clean the exterior with mild soap and water. Refresh stain or sealer when the wood starts absorbing water quickly or looks faded.
At the end of the growing season, remove dead plants and roots. If the potting mix is depleted, refresh it with new mix and compost appropriate for containers. Avoid letting wet soil sit in an unused wooden planter all winter if you can empty it or move it under cover.
If your planter has a bold painted pattern, keep a small labeled jar of leftover paint for touch-ups. Nothing ruins a sleek geometric design faster than one mysterious scrape from a patio chair that apparently has chosen violence.
Design Ideas for a Stylish Outdoor Space
Use geometric planter boxes in groups for a stronger design effect. A pair of matching boxes can frame a doorway. Three triangle planters can soften a patio corner. A long rectangular planter with diagonal trim can define an outdoor dining space. Tall planters with grasses can create privacy without building a fence.
For a modern look, stick to a limited color palette: black, white, charcoal, natural cedar, olive green, or warm terracotta. For a playful garden, paint each geometric section a different color. For a rustic look, use reclaimed wood, but only after confirming it is safe for planting.
Lighting also matters. Place solar lights near the planter, add small uplights behind ornamental grasses, or use warm string lights above the area. At night, the shadows from geometric trim can make the planter look even more dimensional.
Experience Notes: What Building Geometric DIY Planter Boxes Teaches You
Building geometric DIY planter boxes is one of those projects that looks simple until you meet your first angled cut. Then, suddenly, you remember every math teacher who told you geometry would matter someday. The good news is that planter boxes are forgiving. Plants are naturally distracting. If one corner is slightly imperfect, a cheerful cascade of sweet potato vine can cover it like a leafy public relations department.
One of the biggest lessons from this project is to start with the simplest structure and add geometry as decoration. A rectangular box with diagonal trim gives you the modern geometric look without forcing you to build a complicated polygon on your first try. This approach is faster, sturdier, and easier to repair. It also lets you experiment with patterns. You can lay out trim pieces, step back, rearrange them, and decide whether the design feels balanced before attaching anything permanently.
Another useful experience is learning that dry-fitting is not optional. Place every board where it belongs before glue or screws enter the chat. A piece that looks perfect on the saw table may reveal a tiny gap once it meets the rest of the box. Tiny gaps are not the end of the world, but repeated tiny gaps can turn a crisp geometric design into something that looks like it was assembled during an earthquake.
Clamps are also more important than they seem. They act like an extra set of calm, sensible hands. When attaching side panels, trim, or bottom supports, clamps help keep boards from shifting. This matters because screws have a talent for pulling boards out of alignment at the exact moment you feel confident.
Finishing the wood before planting is another lesson worth respecting. Once soil and plants are inside, touching up the lower edges becomes awkward. Sand thoroughly, wipe away dust, and apply your chosen exterior finish before the planter becomes heavy. If using paint, consider painting the base color first, then adding stained or painted trim afterward. This gives the geometric pattern cleaner edges.
Drainage is the quiet hero of this entire project. Many beginners focus on how the planter looks, but the plants care deeply about what happens at the bottom. Drainage holes, breathable potting mix, and open pathways for excess water make the difference between thriving plants and a sad little swamp. Before planting, pour water into the empty lined box and check whether it escapes properly. This five-minute test can save an entire season of frustration.
Plant selection is where the project becomes personal. A geometric planter filled with succulents feels sculptural and low-maintenance. The same box filled with basil, parsley, thyme, and chives becomes a kitchen garden. Add ornamental grasses and trailing flowers, and it becomes patio decor. The box is only the frame; the plants are the living artwork.
The most satisfying part is that geometric planter boxes look more expensive than they are. With clean cuts, sanded edges, and a thoughtful finish, basic boards can become something that looks designer-made. You may even find yourself staring at leftover wood scraps and thinking, “That could be a mini planter.” This is how DIY spreads. First a planter, then a bench, then suddenly you are explaining to friends why you need three different sandpaper grits.
Most importantly, this project teaches patience without requiring perfection. Measure carefully, cut slowly, check for square, and enjoy the process. A handmade planter has character. The goal is not factory precision; the goal is a sturdy, beautiful box that makes your space greener and makes you smile every time you water it.
Conclusion
Learning how to build geometric DIY planter boxes is a rewarding way to upgrade your patio, porch, balcony, or garden. The project combines practical woodworking with creative design, giving you a planter that supports healthy plants while adding modern style to your outdoor space. Start with a simple rectangular frame, add geometric trim, drill proper drainage holes, use container-friendly potting mix, and finish the wood for outdoor durability.
Whether you build a triangle planter for a corner, a raised box for herbs, or a sleek rectangular planter with diamond-pattern trim, the same principles apply: plan carefully, use weather-resistant materials, protect the wood, and give your plants the drainage they need. The result is a custom planter box that looks sharp, functions well, and gives your garden a little architectural confidence.
Note: This article is written for web publication in standard American English and is based on practical DIY woodworking and container-gardening best practices from reputable home improvement and horticultural resources.