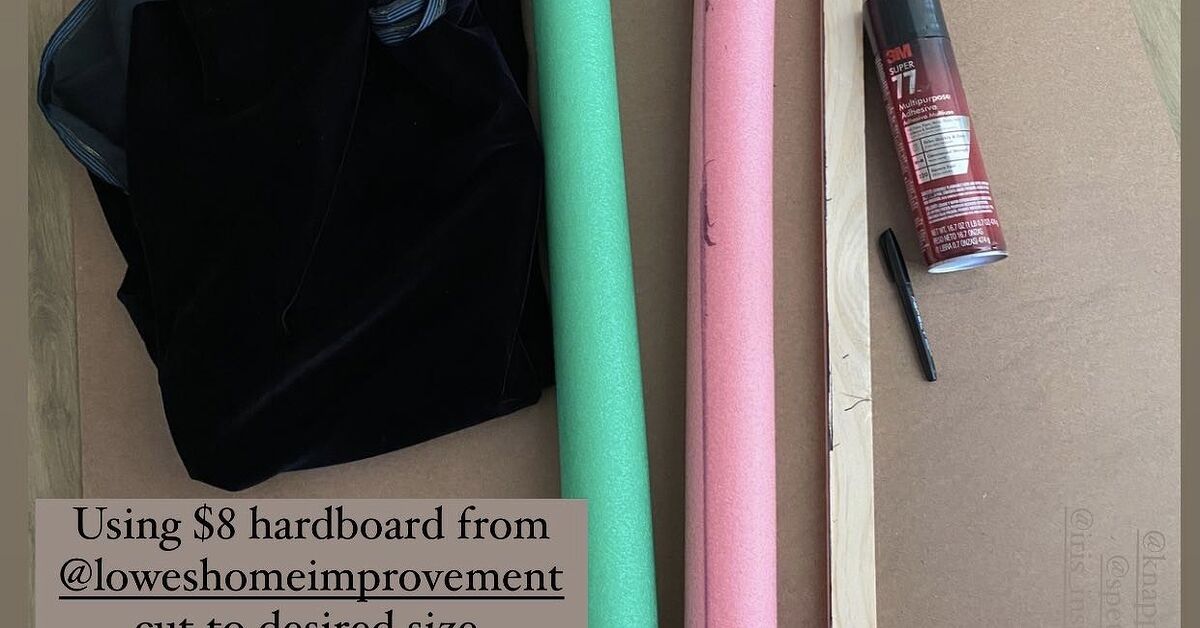
A custom upholstered headboard can make a bedroom feel polished, comfortable, and expensive. The problem is that professionally made fluted headboards often cost enough to make your wallet hide under the bed. The clever alternative is a stack of pool noodles, a plywood panel, batting, and upholstery fabric.
Cut lengthwise, pool noodles become uniform half-round forms that create soft vertical channels. Once covered, the bright foam disappears and the headboard looks more boutique hotel than backyard pool party. This beginner-friendly method can be adapted for almost any bed size, fabric style, or bedroom color scheme.
Why Pool Noodles Work for a DIY Upholstered Headboard
Pool noodles are lightweight, inexpensive, easy to cut, and already rounded. Traditional channel upholstery may require large sheets of foam that must be measured and shaped precisely. Noodles provide a consistent profile with much less carving. They also add enough softness for casual leaning while keeping the finished panel lighter than many thick-foam headboards.
The repeated curves create shadows and texture, so even a plain neutral fabric looks interesting. Depending on the textile, the same structure can feel modern, glamorous, playful, or cozy.
Plan the Headboard Before Buying Materials
Measure the Actual Bed
Measure the mattress or bed frame instead of relying only on its labeled size. A headboard that matches the mattress width looks tailored. Extending it two to six inches past each side creates a more generous, designer-style proportion. Use painter’s tape to outline the planned width and height on the wall, then check the shape from the doorway and while sitting on the bed.
Choose the Channel Direction and Top Shape
Vertical channels make a room feel taller and are easiest for beginners. Horizontal channels can visually widen a wall but require more leveling. A straight top is clean and modern, rounded corners soften the design, and an arch makes a stronger statement. For a first project, a rectangle with gently curved upper corners offers plenty of style without introducing complicated cuts.
Tools and Materials
- 1/2-inch or 3/4-inch plywood cut to the planned dimensions
- Enough pool noodles to cover the panel width
- Upholstery or performance fabric, plus extra for wrapping
- Quilt batting or upholstery batting
- Foam-safe adhesive or a low-temperature hot-glue gun
- Heavy-duty staple gun and staples
- French cleat, headboard brackets, or another rated mounting system
- Stud finder, level, drill, screws, and suitable wall anchors
- Tape measure, straightedge, marker, utility knife, fabric scissors, and sandpaper
- Optional dust-cover fabric for the back
Buy more fabric than the exact calculation suggests. Extra material makes it easier to center patterns, straighten the grain, wrap thick edges, and recover from the occasional measurement that was apparently taken by a mischievous ghost.
How to Make the Pool Noodle Upholstered Headboard
Step 1: Prepare the Plywood
Have the plywood cut at a home-improvement store or cut it with the appropriate saw and protective equipment. Draw any curved corners or arch before cutting. Sand every edge until smooth so the wood cannot snag the batting or wear through the fabric. Remove all dust.
Step 2: Split the Pool Noodles Lengthwise
Mark a straight line down each noodle. Place it on a protected surface and carefully cut from end to end with a sharp utility knife or long serrated knife. A simple jig made from two parallel scrap boards can keep the noodle from rolling. Each noodle should produce two long pieces with flat backs and rounded fronts.
The cuts do not need to be furniture-factory perfect. Batting hides small irregularities. Consistent thickness and safe cutting matter more than microscopic precision.
Step 3: Dry-Fit the Channels
Arrange the half-noodles on the plywood with the rounded sides facing up. Begin at the center and work outward so the pattern stays balanced. Place the pieces tightly for continuous fluting or leave narrow gaps for deeper-looking valleys.
Check the outer edges before gluing. You may need to trim the final pieces or let them extend slightly beyond the plywood. Mark or number the backs so the layout can be recreated.
Step 4: Attach the Foam
Test the adhesive on a scrap first because some solvent-based products can damage foam. Use a product labeled as foam-compatible and follow its ventilation and curing instructions. Secure the center piece, then continue toward both sides while checking that the channels remain straight.
Low-temperature hot glue can be used for tacking, but high heat may deform the noodles. The foam only needs to remain stable while batting and fabric are installed.
Step 5: Wrap the Panel in Batting
Drape batting over the front and leave several inches around every edge. One layer creates crisp channels; two layers create a softer look but may reduce definition. Pull the batting around the plywood and staple it to the back, starting at the center of each side and moving toward the corners. Trim bulky overlaps.
Step 6: Position the Fabric
Lay the fabric face down on a clean floor. Center the padded panel on top with the foam facing downward. Confirm that the weave, stripe, pattern, or velvet nap runs in the intended direction. Leave enough fabric to travel over the rounded foam and reach several inches onto the back.
Step 7: Staple Evenly
Place one staple at the center of the top edge, then one at the center of the bottom. Repeat at the centers of both sides. Continue outward, alternating between opposite edges so the tension stays balanced.
Pull firmly enough to remove wrinkles but not so tightly that the channels flatten. Turn the panel upright every few minutes and inspect the front. Temporary staples are useful until the alignment is correct; a staple remover is the official tool of second thoughts.
At each corner, fold the fabric neatly like gift wrap. Do not trim aggressively until the fold looks smooth from the front.
Step 8: Define the Fluted Channels
The fabric tension may create sufficient definition on its own. For deeper grooves, gently guide the fabric between noodles with a smooth plastic upholstery tool or dull putty knife while adjusting the staples. Do not use a sharp object against the textile.
Work across the panel gradually and compare the channels often. Consistent grooves look more professional than extremely deep but uneven ones.
Step 9: Finish the Back
Trim excess batting and fabric while leaving material beyond the staple lines. For a polished finish, staple dust-cover fabric over the back. Keep the mounting points exposed and make sure no loose fabric interferes with the hardware.
Step 10: Mount It Securely
A French cleat distributes the load and lets the headboard lift on or off the wall. Attach one section to the plywood and the matching section to wall studs whenever possible. Use a level, rated fasteners, and hardware appropriate for the wall construction.
Do not depend on random screws driven only into drywall. When studs are not located where required, use correctly rated anchors and follow the mounting-system directions. Another option is adding legs and bolting the headboard to a compatible bed frame. Large panels should be lifted and installed by two people.
Choosing Fabric That Looks Expensive
Bouclé creates a cozy, designer look and disguises tiny bumps, although loops may catch on pet claws or jewelry. Velvet produces rich shadows across the channels, but its nap must run consistently. Linen-look and performance fabrics feel relaxed and are often easier to maintain.
A medium-weight upholstery fabric with minimal stretch is the safest beginner choice. Thin cloth may reveal the padding underneath, while extremely thick fabric becomes bulky at corners. Large geometric prints require exact centering, so solid colors and small-scale textures are more forgiving.
Stylish Design Variations
Neutral Hotel Style
Use cream, mushroom, taupe, or charcoal fabric and make the panel slightly wider than the mattress. Add simple bedding and wall-mounted reading lights.
Jewel-Tone Glamour
Choose emerald, sapphire, burgundy, or deep teal velvet. Narrow channels and extra height create drama without button tufting.
Two-Panel Construction
Build two narrower panels and mount them side by side. They are easier to carry through hallways and up stairs, and the center seam nearly disappears among the channels.
Common Mistakes to Avoid
- Skipping the tape mock-up: Test the proportions on the wall before cutting plywood.
- Starting at one side: Begin in the center so the outer channels remain balanced.
- Using the wrong adhesive: Test it on foam and follow the label.
- Overstretching the fabric: Excess tension compresses the curves.
- Ignoring the textile direction: Crooked grain or inconsistent nap is easy to notice.
- Underestimating installation: Use rated hardware and structural attachment points.
Cleaning and Maintenance
Vacuum the headboard periodically with an upholstery attachment on low suction. Treat stains according to the fabric care code and test cleaners in a hidden area. Avoid soaking the textile, since moisture can enter the batting and foam. Dust the top edge, inspect mounting hardware occasionally, and keep the headboard away from open flames, hot bulbs, and other high-heat sources.
What the Project Really Feels Like: Practical Experience and Lessons Learned
The most surprising part of building a pool noodle upholstered headboard is how quickly it changes from looking ridiculous to looking convincing. During the first half of the project, the workspace resembles the aftermath of a pool party held inside a lumber aisle. Bright foam tubes are everywhere, the plywood looks enormous, and it is reasonable to wonder whether this was a terrible idea. The transformation begins as soon as the batting goes on. Once the fabric is stretched across the rounded forms, the pool noodles disappear visually and the design starts reading as intentional upholstery.
The slowest step is usually not cutting or gluing. It is arranging the channels. Small differences in noodle diameter, cut angle, or spacing become noticeable when several pieces sit next to one another. Dry-fitting everything before applying adhesive prevents most problems. Starting with the center line is especially helpful because the eye notices an off-center pattern immediately, even when it cannot explain why the headboard feels slightly suspicious.
Fabric choice affects the experience more than expected. Textured fabrics such as bouclé are forgiving because they disguise tiny bumps and staple adjustments. Velvet is visually rewarding but demands attention to nap direction. A plain woven fabric looks simple, yet its straight grain can expose crooked positioning. The easiest material is generally a medium-weight performance fabric that stretches just enough to wrap curves without behaving like athletic wear.
Another lesson is that staple placement matters. Firing dozens of staples rapidly feels productive, but restraint produces a better result. A few temporary staples allow the front to be checked and corrected. Once the alignment looks right, additional staples can be added between them. A staple remover is worth keeping nearby; upholstery is partly the art of confidently attaching fabric and partly the art of quietly removing evidence of earlier confidence.
Mounting deserves the same attention as the decorative work. The completed headboard may be relatively light for its size, but its broad surface can shift if the cleat is uneven or loosely anchored. Locating studs, leveling the hardware, and asking another person to help lift the panel makes installation much safer. Two smaller panels are easier for one person to handle, especially in apartments with narrow stairs or sharp hallway turns.
The finished result tends to look more expensive from normal viewing distance than it does on the workbench. That is not an insult; it is the magic of upholstery. Bedrooms are viewed as complete compositions, and repeated curves, soft fabric, layered bedding, and good lighting work together. Minor imperfections that seemed enormous during construction usually vanish once pillows are in place.
For a first attempt, a rectangular queen-size design in a solid neutral fabric is the most manageable. More complex arches, patterned textiles, and extra-tall panels are excellent second projects. The essential technique remains the same: create a balanced foam form, wrap it smoothly, secure it patiently, and mount it responsibly. Pool noodles may never regain their former dignity, but your bedroom will gain plenty.
Conclusion
A pool noodle upholstered headboard delivers the soft, fluted appearance of custom furniture without advanced upholstery skills or a designer budget. Careful measuring, symmetrical foam placement, compatible adhesive, balanced fabric tension, and secure mounting are what separate a polished result from a craft project that looks as though it is still waiting for swim practice.
Take your time during the dry fit and stapling stages. Once the panel is wrapped and installed, the unlikely materials disappear behind a comfortable, textured focal point made specifically for your room.
Note: Measurements and hardware requirements vary by bed, wall type, fabric, and mounting method. Follow all tool and product instructions, ventilate the workspace when using adhesives, and use mounting hardware rated for the completed headboard.
Research references used for synthesis: pool-noodle construction and wrapping methods ; standard upholstered-headboard methods and fabric tension ; mounting and stud guidance ; adhesive safety and ventilation ; upholstered-headboard cleaning guidance .