Installing a subwoofer in your car is one of the fastest ways to make your music feel less like it is politely asking for attention and more like it has kicked open the door wearing sunglasses. Whether you listen to hip-hop, country, rock, EDM, jazz, or podcasts with suspiciously dramatic intro music, a properly installed car subwoofer adds the low-end punch that factory speakers often cannot deliver.
The good news? You do not need to be a professional installer to understand how a car subwoofer installation works. The not-so-good news? You do need patience, the right tools, safe wiring habits, and the humility to admit that electrical tape is not a personality trait. A clean installation is not just about loud bass. It is about protecting your vehicle, avoiding electrical issues, keeping your audio signal clean, and making the system sound balanced instead of like a trunk full of angry laundry.
This guide explains how to install a subwoofer in your car, including planning your system, choosing a location, running power and signal wires, connecting the amplifier, tuning the bass, and avoiding common mistakes. It is written for beginners, but detailed enough to help you make smarter decisions before you start removing trim panels like a raccoon with a socket set.
Before You Start: Know What Type of Subwoofer Setup You Have
Not every subwoofer installation is the same. Before touching a wire, identify which setup you are working with. The most common options are a powered subwoofer, a component subwoofer with a separate amplifier, or a factory stereo upgrade using a line output converter.
Powered Subwoofer
A powered subwoofer has the amplifier built into the enclosure. This is usually the easiest option for beginners because you do not need to mount a separate amp. You still need power, ground, signal input, and a turn-on method, but the wiring is more compact. Powered subs are popular under seats, behind truck seats, and in small cargo areas.
Component Subwoofer and Separate Amplifier
This setup uses a subwoofer mounted in a box and a separate mono or multi-channel amplifier. It usually offers more output and flexibility than a powered subwoofer. You will need to match the subwoofer’s impedance and RMS power rating with the amplifier so the system plays safely and efficiently.
Factory Stereo with Line Output Converter
If your vehicle still has the original factory radio and it does not have RCA preamp outputs, you may need a line output converter. A line output converter, often called an LOC, takes speaker-level audio from the factory system and converts it into a signal that an aftermarket amplifier can use. In many modern cars, this is the cleanest way to add bass without replacing the dashboard stereo.
Tools and Materials You Will Need
A successful car subwoofer installation starts with the right parts. Trying to install a subwoofer without the proper wiring kit is like trying to build a sandwich with only optimism. You may get somewhere, but it will not be pretty.
- Subwoofer and enclosure
- Amplifier, unless using a powered subwoofer
- Amplifier wiring kit with correct power and ground wire gauge
- Inline fuse holder and correct fuse
- RCA cables or speaker-level input wiring
- Remote turn-on wire
- Speaker wire
- Line output converter, if using a factory stereo without RCA outputs
- Wire crimpers, wire strippers, and electrical connectors
- Socket set and screwdrivers
- Trim removal tools
- Multimeter
- Zip ties or wire loom
- Sandpaper or a wire brush for the ground point
Choose an amplifier wiring kit based on the current demands of your amplifier and the length of the cable run. Many basic subwoofer setups use 8-gauge or 4-gauge wire, but larger systems may need heavier cable. When in doubt, follow the amplifier manufacturer’s recommended wire size and fuse rating.
Step 1: Plan the Installation Before Pulling Panels
Planning saves time, plastic clips, and emotional stability. Decide where the subwoofer and amplifier will go before you begin wiring. Common locations include the trunk, cargo area, under a seat, or behind a truck seat. The location should allow airflow around the amplifier, protect wiring from damage, and keep the subwoofer secure during hard braking.
Also plan the wire routes. A clean installation usually separates the power wire from the RCA signal cables. For example, you might run the power cable along the driver’s side of the vehicle and the RCA cables along the passenger side. This helps reduce the chance of noise entering the audio signal.
Look for an existing firewall grommet where the power wire can pass from the engine bay into the cabin. Never drill blindly through the firewall. Behind that metal could be wiring, brake components, insulation, or the ghost of every bad decision ever made in a garage.
Step 2: Disconnect the Negative Battery Cable
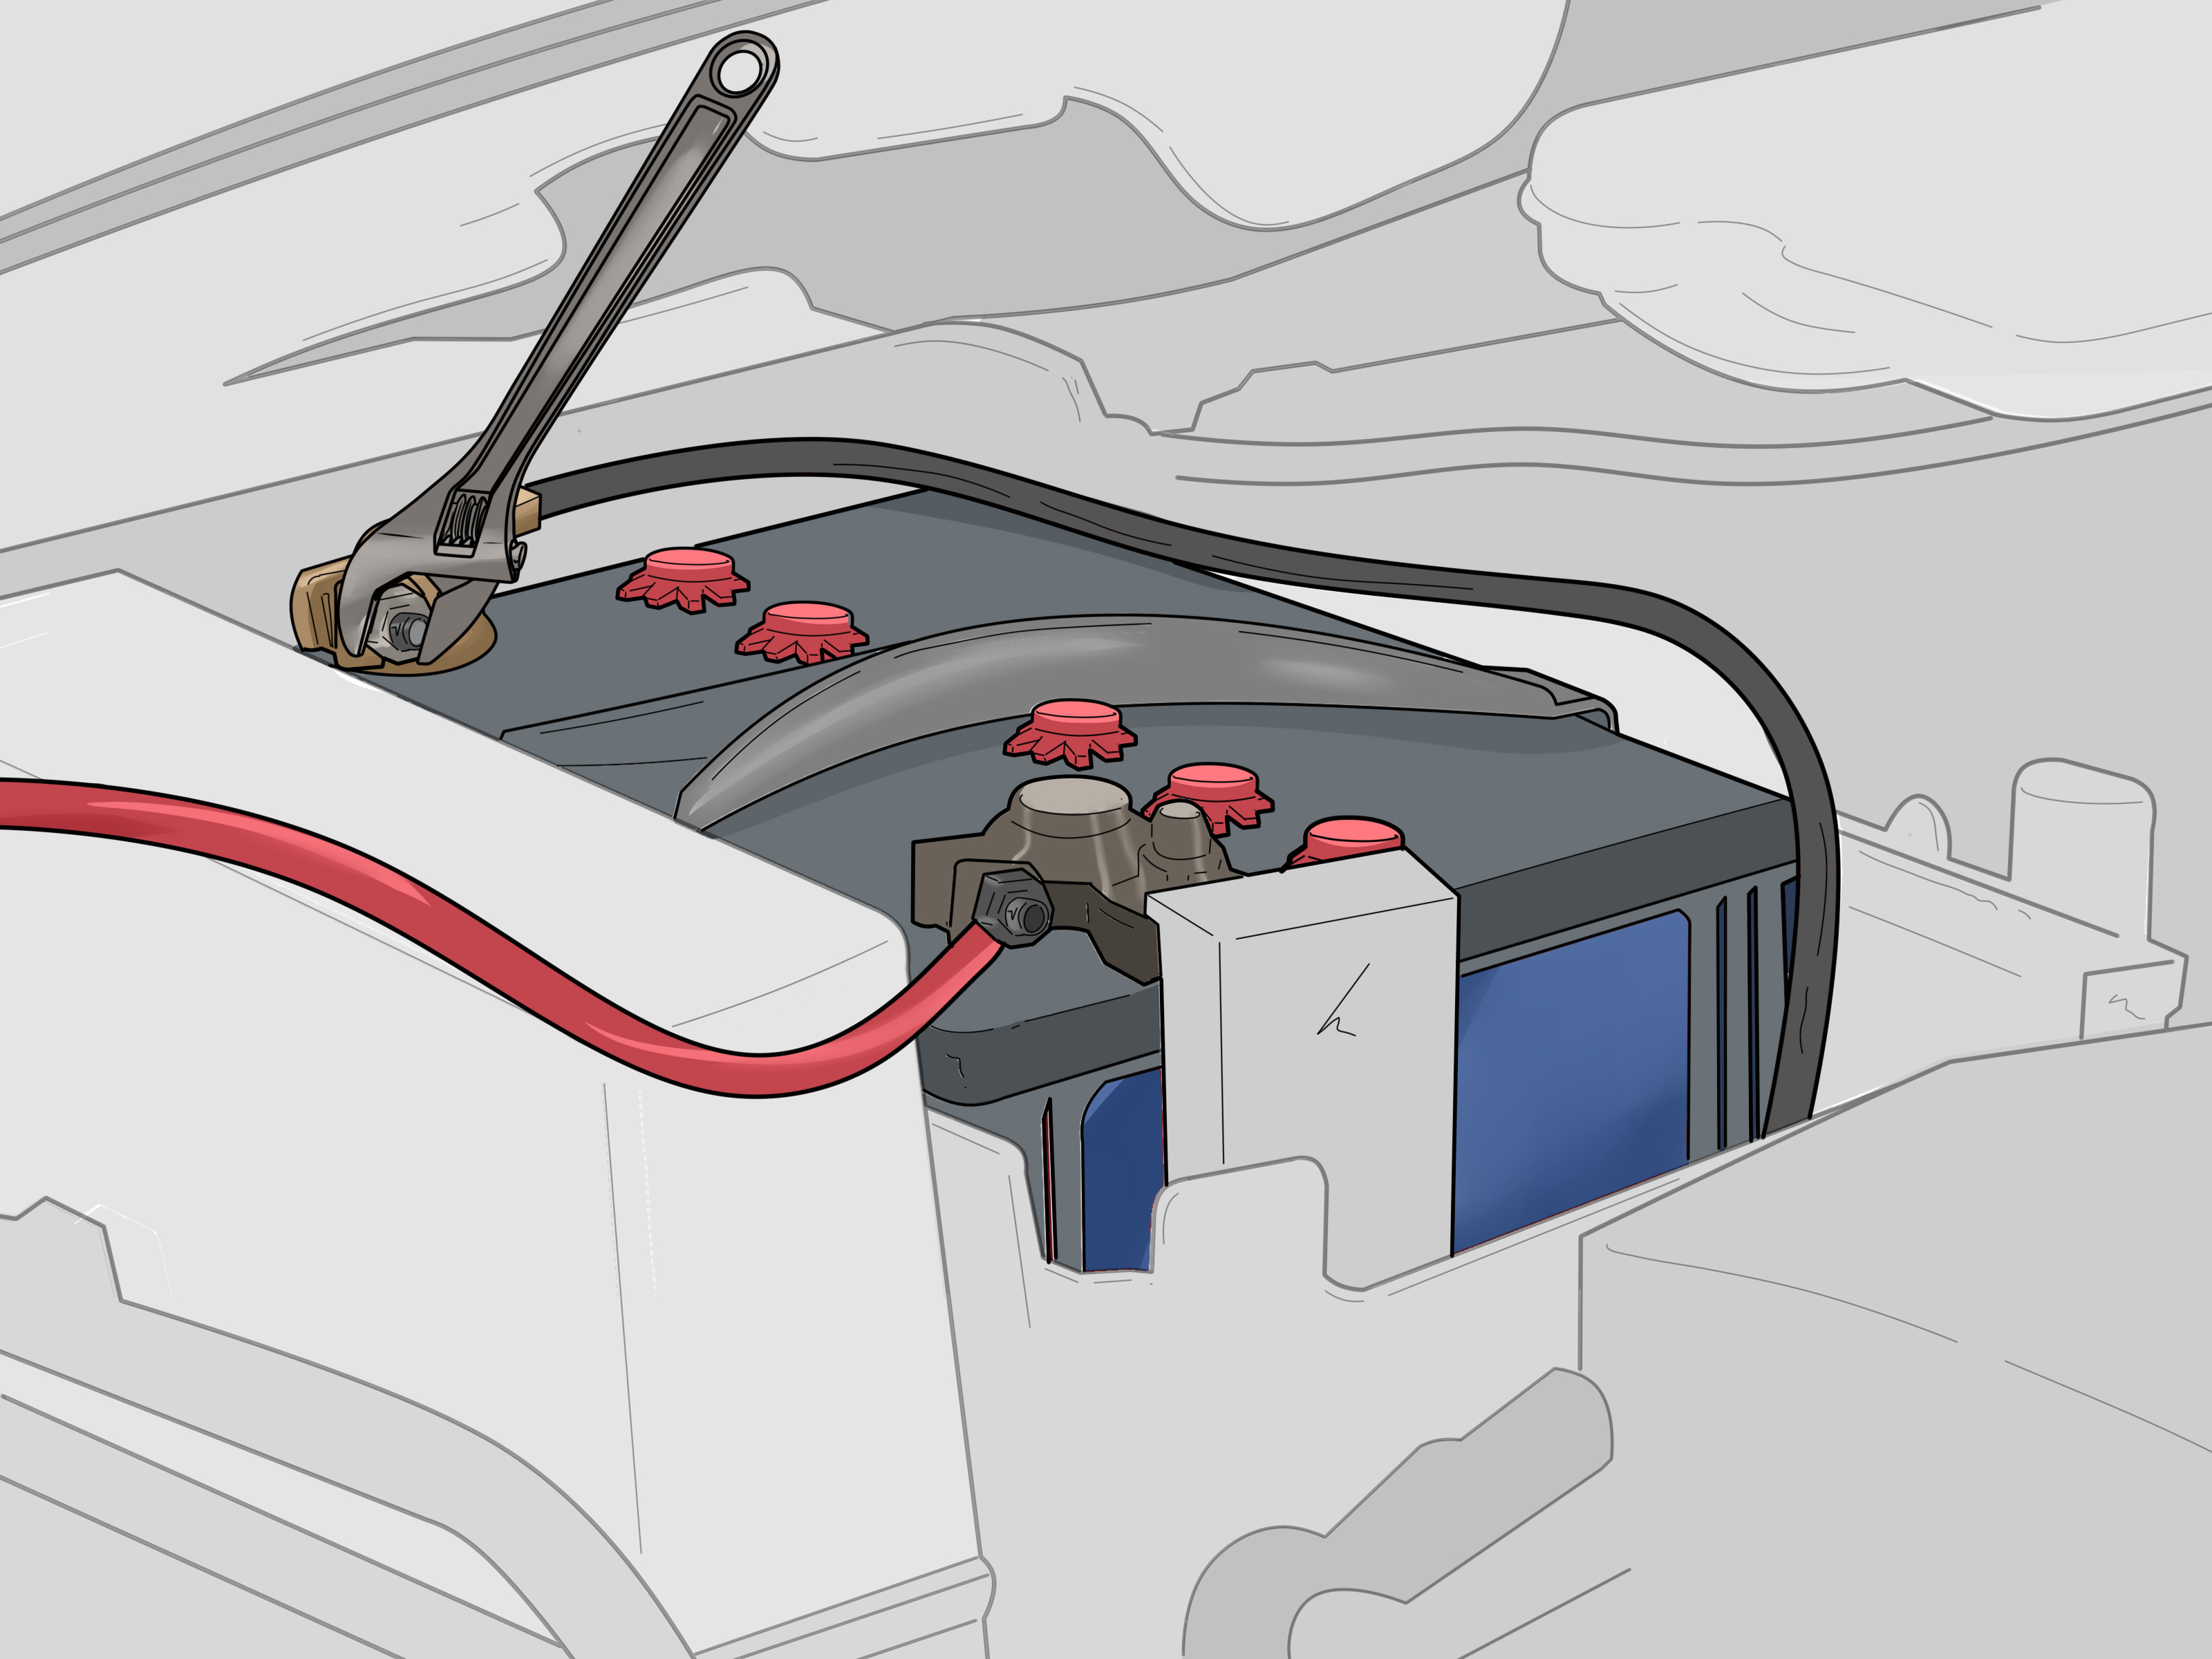
Before doing any electrical work, disconnect the negative battery terminal. This simple step reduces the risk of short circuits while you run power wire, connect the amplifier, or work near factory wiring. Secure the disconnected cable so it cannot accidentally touch the battery terminal while you are working.
This is not the step to skip because “it will only take a minute.” Many expensive problems also begin with that sentence.
Step 3: Run the Power Wire from the Battery
The amplifier power wire should connect to the positive battery terminal and run through an inline fuse holder near the battery. The fuse protects the vehicle if the power wire shorts against metal. Install the fuse holder close to the battery according to the wiring kit or amplifier manufacturer’s guidance, but do not insert the fuse yet. Leave the system unfused until all wiring is complete.
Route the power wire through a protected firewall opening and into the cabin. Use a rubber grommet whenever the wire passes through metal. Inside the vehicle, tuck the cable under trim panels or carpet, keeping it away from seat tracks, pedals, sharp brackets, and hot areas. The wire should be hidden, but not crushed, stretched, or forced into places where it can rub over time.
Step 4: Choose a Solid Ground Point
The amplifier ground is just as important as the power wire. A poor ground can cause noise, weak output, amplifier shutdown, or mysterious behavior that makes you question whether your car is haunted.
Use a short ground wire connected to clean, bare metal near the amplifier. A factory bolt connected to the vehicle chassis can work well if the metal is solid and free of paint, primer, rust, or sealant. Sand the contact area until shiny bare metal is visible, attach the ground securely, and tighten the connection. Avoid flimsy brackets or painted sheet metal that cannot provide a reliable electrical path.
For some newer vehicles, grounding directly to the battery or using manufacturer-recommended grounding points may be necessary. If the vehicle has advanced electronics, start-stop systems, or unusual battery management, check vehicle-specific information before choosing a ground point.
Step 5: Connect the Audio Signal
The audio signal tells the amplifier what to play. How you connect it depends on your stereo.
If You Have an Aftermarket Stereo
Most aftermarket head units include RCA preamp outputs. Use RCA cables from the subwoofer output or rear output of the head unit to the amplifier input. If the stereo has a dedicated subwoofer output, use it. That usually gives you better control over crossover frequency, subwoofer level, and bass adjustment from the stereo menu.
If You Have a Factory Stereo
Many factory stereos do not include RCA outputs. In that case, use a line output converter or an amplifier with speaker-level inputs. The converter taps into speaker wires and creates a low-level signal for the amplifier. In some vehicles, especially those with factory amplified systems, the best signal location may not be behind the radio. It might be at the factory amplifier, rear speaker wires, or a dedicated integration harness.
Factory systems can be tricky because some are equalized, crossed over, or processed to protect factory speakers. If the signal has weak bass before it reaches the converter, your new subwoofer may also sound weak. For modern vehicles with complicated factory audio, a quality integration device or professional advice can save hours of frustration.
Step 6: Run the Remote Turn-On Wire
The remote turn-on wire tells the amplifier when to wake up. Without it, the amplifier may never turn on, or worse, it may stay on all the time and drain the battery. With an aftermarket stereo, connect the remote wire to the head unit’s amplifier turn-on lead, often blue or blue with a white stripe.
If you are keeping a factory radio, the amplifier may use signal sensing, a line output converter with remote output, or a switched 12-volt source. The key is simple: the amplifier should turn on when the car audio system is on and turn off when the vehicle is off.
Step 7: Connect the Subwoofer to the Amplifier
Use speaker wire to connect the amplifier’s speaker output terminals to the subwoofer enclosure terminals. Positive goes to positive, negative goes to negative. That sounds obvious, but many bass problems begin when polarity gets flipped.
If your subwoofer has dual voice coils or you are wiring multiple subwoofers, confirm the final impedance before connecting to the amplifier. Wiring voice coils in series increases impedance, while wiring in parallel lowers impedance. The final load must be compatible with the amplifier. For example, do not wire a subwoofer to a 1-ohm load unless the amplifier is stable at 1 ohm. Matching impedance protects the amplifier and helps the subwoofer perform correctly.
Step 8: Mount the Amplifier and Secure the Subwoofer
Mount the amplifier on a stable surface with room for ventilation. Avoid mounting it upside down under carpet or burying it under cargo where heat cannot escape. Amplifiers generate heat, and heat is the enemy of long-term reliability.
The subwoofer enclosure should also be secured. A loose sub box can slide around during turns or emergency stops. Use brackets, straps, or vehicle-safe mounting hardware. Your subwoofer should deliver bass, not become a wooden bowling ball in the trunk.
Step 9: Check Every Connection Before Adding the Fuse
Before inserting the main fuse at the battery, inspect the entire installation. Confirm that the power wire is connected correctly, the ground is tight, the remote wire is secure, RCA or speaker-level inputs are connected, and the speaker wires are properly attached. Make sure no copper strands are sticking out where they can touch metal or another terminal.
Use zip ties or wire loom to clean up the wiring. Keep wires away from moving parts, seat rails, hinges, and sharp edges. A neat installation is easier to troubleshoot and less likely to fail later.
Step 10: Power Up and Test the System
Once all connections are complete, insert the fuse near the battery and reconnect the negative battery terminal. Turn the stereo on at low volume. Check whether the amplifier power light turns on. If it goes into protect mode, shut everything off and recheck wiring, ground, impedance, and speaker connections.
Play music with steady bass and listen carefully. At first, do not crank the volume. Confirm that the subwoofer plays, the bass sounds clean, and there is no burning smell, buzzing, popping, or engine whine. If something seems wrong, stop and diagnose it before continuing. Bass should make you smile, not make you smell electronics.
Step 11: Set Gain, Crossover, and Bass Boost Correctly
Amplifier tuning is where many beginners accidentally turn a good installation into a distorted mess. The gain is not a volume knob. It matches the amplifier input sensitivity to the signal coming from your stereo. Setting it too high can cause distortion, overheating, and subwoofer damage.
Start with bass boost off. Set the low-pass filter around 70 to 90 Hz as a starting point. This allows the subwoofer to handle deep bass while your door speakers handle vocals and higher instruments. If the bass sounds boomy or easy to locate from the trunk, lower the crossover slightly. If there is a gap between the speakers and subwoofer, raise it a little.
Adjust the gain gradually. Increase the stereo volume to a clean listening level, then raise the amplifier gain until the subwoofer blends with the rest of the system. The goal is balanced bass, not maximum trunk rattle. If the license plate is performing a drum solo, you may have gone too far.
Common Mistakes to Avoid
Skipping the Fuse
The fuse near the battery is not optional. It protects the power wire and the vehicle. If the power cable shorts and there is no fuse, the wire can overheat dangerously. Always use the correct fuse size for the wire and system.
Using a Bad Ground
A weak ground causes many amplifier problems. Use bare metal, a tight connection, and a short ground cable. Do not rely on random screws attached to plastic trim or thin painted brackets.
Mixing Power and Signal Wires Carelessly
Running RCA cables right next to the power wire can increase the chance of noise. Separate them when possible and cross at right angles if they must meet.
Overusing Bass Boost
Bass boost can be fun in tiny amounts, but it often adds distortion and stress. Tune with gain and crossover first. Use bass boost only if needed, and use it gently.
Forgetting About Cargo Space
A giant enclosure may sound exciting until you need to buy groceries, carry sports gear, or take a road trip. Choose a subwoofer box that fits your real life, not just your fantasy parking-lot demo session.
Troubleshooting After Installation
If the amplifier does not turn on, check the fuse, battery connection, ground, and remote turn-on wire. Use a multimeter to verify power at the amplifier. If the amplifier turns on but there is no sound, check RCA cables, speaker-level inputs, line output converter wiring, stereo settings, and subwoofer connections.
If the amplifier goes into protect mode, check for speaker wire shorts, incorrect impedance, overheating, or a poor ground. If you hear whining that changes with engine speed, inspect ground quality, RCA routing, and signal connections. If the bass sounds weak, check polarity, crossover settings, factory signal processing, and enclosure placement.
Most subwoofer problems are not solved by randomly turning knobs. Work through the system step by step. Power, ground, turn-on, signal, speaker wiring, settings. That order will save you from the classic beginner ritual of staring into the trunk while whispering, “Why?”
Real-World Experience: What Installing a Car Subwoofer Teaches You
The first thing most people learn during a car subwoofer installation is that vehicles are not designed with your weekend audio project in mind. Panels are tight, clips hide in strange places, and the perfect ground point always seems to be three inches farther away than your wire wants to reach. That is normal. A good installation is less about speed and more about patience.
One useful experience is doing a “dry layout” before making permanent connections. Place the subwoofer, amplifier, wiring kit, RCA cables, and tools near the vehicle. Visualize where each wire will run. This simple habit prevents the classic situation where the power wire reaches the trunk beautifully, but the RCA cable is six inches too short and your mood instantly becomes a weather alert.
Another practical lesson is to protect the vehicle interior while working. Put screws and clips in small containers. Take photos before unplugging factory connectors. Use plastic trim tools instead of metal screwdrivers whenever possible. Modern interiors can scratch easily, and nothing ruins the joy of new bass like a dashboard panel that now looks like it fought a squirrel.
Grounding is another area where experience matters. Many beginners assume that any bolt touching metal is good enough. In reality, paint, seam sealer, rust, and weak brackets can all create problems. A clean ground point can be the difference between tight bass and an amplifier that behaves like it has trust issues. Sand the metal, tighten the connection, and test it.
Factory stereos also teach patience. In older cars, adding a subwoofer can be straightforward. In newer cars, the factory audio system may use equalization, active noise cancellation, factory amplifiers, or bass roll-off. That means the signal you tap may not contain the full bass you expect. A better line output converter, vehicle-specific interface, or signal processor may be necessary. The lesson is simple: the subwoofer can only play the signal it receives.
Tuning is where your ears become more important than your ego. Many first-time installers set the gain too high because louder seems better for the first ten seconds. Then distortion arrives, the bass gets muddy, and the system sounds tired. A properly tuned subwoofer should blend with the front speakers. You should feel the low end supporting the music, not chasing it around the cabin with a foam bat.
Finally, a good subwoofer installation teaches respect for safety. Use the correct fuse. Secure the box. Protect wires from sharp metal. Do not leave loose tools in the engine bay. Do not test at full volume immediately. When done carefully, installing a subwoofer is rewarding, educational, and genuinely fun. You get better sound, a deeper understanding of your car, and the quiet pride of knowing the bass is there because you made it happen.
Conclusion
Learning how to install a subwoofer in your car is not just about adding louder bass. It is about building a safe, reliable, and balanced car audio system. Start with the right equipment, plan your wiring route, disconnect the battery, fuse the power wire properly, create a solid ground, connect the audio signal correctly, and tune the amplifier with care.
A clean installation can transform everyday driving. Songs gain weight, kick drums feel tighter, and your factory speakers no longer have to pretend they enjoy doing all the heavy lifting. Take your time, double-check every connection, and remember: great bass should sound powerful, controlled, and musical. If your trunk sounds like it is trying to escape the vehicle, tuning may still be required.