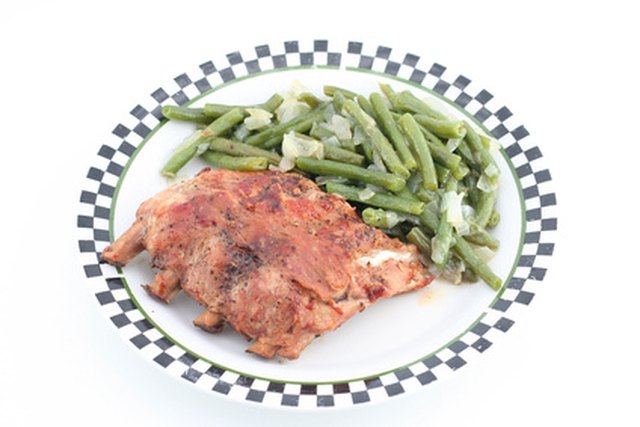
Old roaster ovens may not look glamorous, but they know how to do one very important job: turn tough pork ribs into tender, saucy, napkin-destroying comfort food. Here is the complete guide to making juicy ribs in a vintage, hand-me-down, garage-sale, holiday-borrowed, “does this thing still work?” roaster oven.
Why an Old Roaster Oven Is Perfect for Ribs
If you have an old electric roaster oven sitting in a cabinet, congratulations: you own one of the most underrated rib-making machines in American kitchens. A roaster oven works like a small countertop oven, but with a deeper pan, a tight-fitting lid, and steady surrounding heat. That combination makes it excellent for slow-cooking ribs because it traps moisture while gently breaking down connective tissue.
Ribs are not the kind of meat that appreciates being rushed. They are full of collagen, fat, bone, and attitude. Cook them too fast and they chew like a rubber flip-flop. Cook them low and slow, and that collagen softens into rich, tender goodness. This is why roaster oven ribs can turn out wonderfully juicy even without a smoker, grill, or backyard barbecue setup.
The trick is understanding that food safety and tenderness are not exactly the same thing. Pork ribs are considered safe once they reach the proper minimum internal temperature, but ribs usually become truly tender at a higher temperature after enough time over low heat. In simple kitchen language: safe ribs are good; tender ribs are the ribs people remember.
What You Need to Make Ribs in a Roaster Oven
Ingredients
- 2 to 3 racks pork ribs, baby back, spare ribs, or St. Louis-style ribs
- 2 tablespoons yellow mustard or olive oil, used as a binder
- 1/4 cup brown sugar
- 2 tablespoons smoked paprika
- 1 tablespoon kosher salt
- 1 tablespoon black pepper
- 1 tablespoon garlic powder
- 1 tablespoon onion powder
- 1 teaspoon chili powder
- 1/2 teaspoon cayenne pepper, optional
- 1 cup apple juice, apple cider, broth, or water
- 1 1/2 to 2 cups barbecue sauce
- 1 tablespoon apple cider vinegar, optional for balancing sweet sauce
Equipment
- Electric roaster oven, preferably 16- to 22-quart size
- Removable roasting pan insert
- Roasting rack, if available
- Heavy-duty foil or parchment-lined foil
- Instant-read meat thermometer
- Tongs
- Baking sheet for finishing under the broiler, optional
- Pastry brush or spoon for sauce
One important safety reminder: always use the removable roasting pan insert. Do not pour liquid or place food directly into the heating body of the roaster oven. Old appliances deserve respect. They have seen things. Probably Thanksgiving 1998.
Choosing the Best Ribs for a Roaster Oven
Baby Back Ribs
Baby back ribs are smaller, leaner, and usually cook faster. They are a great choice if you want tender ribs without spending all afternoon hovering around the kitchen like a nervous barbecue parent. In a roaster oven, baby backs usually take about 2 1/2 to 3 1/2 hours at low heat.
Spare Ribs
Spare ribs are larger, meatier, and fattier. They need more time, but they reward patience with deep pork flavor. If baby back ribs are polite dinner guests, spare ribs are the uncle who brings fireworks. Plan on about 3 1/2 to 4 1/2 hours for spare ribs in a roaster oven.
St. Louis-Style Ribs
St. Louis-style ribs are spare ribs trimmed into a neat rectangular rack. They fit nicely into many roaster ovens and cook more evenly than untrimmed spare ribs. For a balance of flavor, shape, and tenderness, St. Louis-style ribs are probably the best all-around choice.
How to Prepare Ribs Before Cooking
Step 1: Pat the Ribs Dry
Do not rinse raw ribs. Rinsing meat can splash bacteria around the sink and countertop, and it does not improve flavor. Instead, pat the ribs dry with paper towels. Dry ribs hold seasoning better and develop a better surface texture during cooking.
Step 2: Remove the Membrane
Flip the ribs bone-side up. On the back of the rack, you may see a thin, shiny membrane. Slide a butter knife under one edge, loosen it, grab it with a paper towel, and pull it off. Removing the membrane helps seasoning reach the meat and keeps the ribs from having a chewy underside.
If the membrane refuses to move, do not turn this into a wrestling match. Score it a few times with a knife and move on. Dinner should not require emotional damage.
Step 3: Add a Binder
Rub the ribs lightly with yellow mustard or olive oil. Mustard is popular because it helps the dry rub stick and its sharp flavor mellows during cooking. You will not end up with mustard-flavored ribs; you will end up with seasoning that stays where you put it.
Step 4: Season Generously
Mix brown sugar, smoked paprika, salt, pepper, garlic powder, onion powder, chili powder, and cayenne in a bowl. Sprinkle the rub over both sides of the ribs, pressing it gently into the meat. For deeper flavor, season the ribs at least 30 minutes before cooking. If you have time, refrigerate them overnight. If you do not have time, do not panic. Ribs are forgiving, unlike group chats.
Step-by-Step: How to Make Ribs in an Old Roaster Oven
Step 1: Preheat the Roaster Oven
Set the roaster oven to 250°F and let it preheat for 15 to 20 minutes. Many older roaster ovens run a little hot or cold, so use an oven thermometer if you have one. If your roaster has only vague dial markings, choose the setting closest to 250°F and check the ribs earlier rather than later.
Step 2: Add Moisture to the Pan
Pour 1 cup of apple juice, apple cider, broth, or water into the bottom of the removable roasting pan. The liquid should sit below the rack, not drown the ribs. You are making tender roaster oven ribs, not pork soup with bones.
Apple juice gives a mild sweetness, broth adds savory depth, and water works perfectly when you want the dry rub and barbecue sauce to do the talking. A splash of apple cider vinegar can help balance rich pork and sweet sauce.
Step 3: Arrange the Ribs
Place the ribs on the roasting rack, bone-side down, if they fit. If the racks are too long, cut them into halves or thirds. You can slightly overlap the ribs, but avoid stacking them tightly. Heat needs room to circulate. Think cozy, not crowded elevator.
If your old roaster oven does not have a rack, line the bottom of the insert with crumpled foil to lift the ribs slightly above the liquid. This helps prevent the bottom from getting mushy.
Step 4: Cover and Cook Low and Slow
Put the lid on the roaster oven and cook at 250°F. Baby back ribs usually need 2 1/2 to 3 1/2 hours. St. Louis-style ribs and spare ribs usually need 3 1/2 to 4 1/2 hours. Avoid lifting the lid constantly. Every peek releases heat and moisture, and the ribs are not doing anything dramatic in there. They are simply becoming delicious.
Step 5: Check for Tenderness
Ribs are ready for saucing when the meat has pulled back slightly from the bones and a toothpick or skewer slides into the meat with little resistance. If you pick up a rack with tongs, it should bend gently and begin to crack on the surface. That bend test is a classic rib clue.
A thermometer is helpful, but ribs can be tricky because bones and thin meat can affect readings. For tenderness, many cooks look for ribs to reach roughly 190°F to 203°F. The exact number matters less than the texture. You want tender meat that still has some bite, not meat that collapses into shredded pork before it reaches the plate.
Step 6: Add Barbecue Sauce
Brush the ribs with barbecue sauce during the last 20 to 30 minutes of cooking. If you sauce too early, the sugar in the sauce may darken too much. For a balanced glaze, stir 1 tablespoon of apple cider vinegar into a sweet bottled sauce. This little trick wakes up the flavor and keeps the ribs from tasting like pork candy.
Step 7: Finish for Sticky Edges
A roaster oven makes ribs tender, but it does not always create the browned, sticky edges people love. For the best texture, transfer the cooked ribs to a foil-lined baking sheet, brush with more sauce, and broil for 3 to 5 minutes until the sauce bubbles and caramelizes. Watch closely. Barbecue sauce can go from glossy to scorched faster than someone says, “Who wants the last rib?”
If you do not want to use the broiler, turn the roaster oven up to 400°F, remove some excess liquid from the pan, leave the lid slightly ajar if your model allows it safely, and cook for 10 to 15 minutes. The broiler still gives better caramelization, but the roaster-only method works when you want fewer dishes.
Roaster Oven Rib Timing Chart
| Rib Type | Roaster Temperature | Approximate Time | Best Texture Cue |
|---|---|---|---|
| Baby back ribs | 250°F | 2 1/2 to 3 1/2 hours | Rack bends easily and meat pulls from bones |
| St. Louis-style ribs | 250°F | 3 1/2 to 4 hours | Toothpick slides in with little resistance |
| Spare ribs | 250°F | 3 1/2 to 4 1/2 hours | Meat is tender but still sliceable |
| Extra-thick ribs | 250°F | 4 to 5 hours | Fat is rendered and meat is soft near the bone |
These times are guidelines, not courtroom testimony. Older roaster ovens vary widely, rib thickness varies, and opening the lid slows cooking. Start checking early, then keep cooking until the ribs feel tender.
Best Dry Rub for Roaster Oven Ribs
A good dry rub should hit four notes: salty, sweet, smoky, and mildly spicy. Brown sugar helps with caramelization, paprika brings color and smoke-like flavor, salt seasons the meat, and garlic and onion powder add savory backbone. Cayenne is optional, but a little heat keeps the ribs interesting.
For a Memphis-style direction, reduce the sugar and add more paprika, black pepper, and a pinch of cayenne. For a sweeter Kansas City-style flavor, keep the brown sugar and use a thick tomato-based barbecue sauce. For a Carolina-inspired twist, finish with a tangy vinegar sauce instead of a heavy glaze.
Should You Wrap Ribs in Foil in a Roaster Oven?
You can, but you do not always need to. Because a roaster oven has a lid and holds moisture well, it already creates a gentle, steamy cooking environment. Foil can make ribs extra soft, especially if your roaster runs dry or hot. However, too much wrapping can make the surface wet and prevent the rub from forming a flavorful crust.
A good compromise is to cook the ribs uncovered inside the covered roaster pan for most of the time, then loosely tent with foil only if they seem to be drying out. If you love very soft, fall-off-the-bone ribs, wrap them tightly with a splash of apple juice for the middle portion of cooking, then unwrap and sauce near the end.
Common Mistakes to Avoid
Cooking Too Hot
High heat can make ribs tough before the collagen has enough time to soften. Keep the roaster around 225°F to 275°F for the main cooking stage. A short high-heat finish is fine; a full afternoon at high heat is where dreams go to dry out.
Adding Sauce Too Early
Most barbecue sauces contain sugar. Sugar burns. Add sauce near the end so it becomes sticky and glossy instead of bitter and blackened.
Skipping the Tenderness Test
Do not rely only on the clock. Ribs are done when they are tender. Use the bend test, toothpick test, and visual pullback from the bones.
Overcrowding the Roaster
If the ribs are packed too tightly, some sections may steam heavily while others cook slowly. Cut racks into smaller pieces so heat can move evenly around the meat.
Forgetting the Final Finish
The roaster oven handles tenderness beautifully, but the broiler, grill, or a high-heat final blast gives the ribs that sticky barbecue finish. Do not skip the final glaze unless you enjoy ribs with the charisma of steamed laundry.
How to Store and Reheat Roaster Oven Ribs
Let leftover ribs cool, then refrigerate them in an airtight container within two hours of cooking. They will keep well in the refrigerator for 3 to 4 days. For longer storage, wrap them tightly and freeze for up to 2 to 3 months.
To reheat ribs without drying them out, place them in a covered pan with a splash of broth, apple juice, or water. Warm at 250°F until heated through. Add a fresh brush of barbecue sauce before serving. Avoid microwaving ribs on high unless you enjoy turning yesterday’s masterpiece into chewy meat confetti.
What to Serve with Roaster Oven Ribs
Ribs love classic American sides. Serve them with coleslaw, baked beans, potato salad, macaroni and cheese, cornbread, grilled corn, pickles, or a crisp green salad. If the ribs are sweet and smoky, choose tangy sides to balance them. Vinegar slaw, dill pickles, and mustard potato salad all work beautifully.
For a casual meal, slice the ribs into individual bones and pile them on a platter with extra sauce on the side. For a backyard-style dinner indoors, add rolls, paper towels, and a bowl for bones. Napkins are not optional. This is ribs, not a tea ceremony.
Real Kitchen Experience: What Cooking Ribs in an Old Roaster Oven Teaches You
Cooking ribs in an old roaster oven feels different from using a shiny modern appliance. There is usually no digital screen, no app notification, and no cheerful beep telling you your pork is ready for greatness. Instead, there is a heavy lid, a temperature dial with the confidence of a weather forecast, and a faint feeling that this appliance has already survived more family gatherings than anyone wants to discuss.
The first lesson is that old roaster ovens reward patience. When you place seasoned ribs inside and close the lid, almost nothing exciting happens for the first hour. The kitchen smells good, but the ribs still look mostly like seasoned meat. Somewhere around the second hour, the magic starts. The fat softens, the rub darkens, and the meat begins pulling back from the bones. This is the point where people wander into the kitchen and ask, “Are those almost done?” The correct answer is usually, “Not yet,” even if your stomach disagrees.
The second lesson is that moisture control matters. A roaster oven holds steam very well, which is great for tenderness but not always great for bark. If you add too much liquid, the ribs can taste more braised than roasted. That is not a disaster, but it changes the texture. A small amount of apple juice or broth in the bottom is enough. The ribs should sit above the liquid, not bathe in it like they are at a pork spa.
The third lesson is that old roaster ovens have personalities. One may run 25 degrees hot. Another may heat more strongly on one side. Another may have a lid that rattles when steam builds up, as if it is trying to contribute to the conversation. After using the same roaster once or twice, you learn its quirks. Rotate the ribs halfway through cooking if one side seems hotter. Check early if your appliance is known for running warm. Give thicker racks more time. This is not complicated cooking; it is attentive cooking.
The fourth lesson is that the finishing step makes the difference between “pretty good ribs” and “please invite me again ribs.” Straight from the roaster, the meat may be tender and flavorful, but the sauce can look a little soft. A few minutes under the broiler transforms it. The barbecue sauce bubbles, thickens, and grabs onto the ribs. Edges darken. The aroma gets louder. Suddenly the ribs look like they came from a barbecue joint instead of the countertop appliance your aunt stores next to holiday tablecloths.
The final lesson is that ribs are social food. Nobody eats ribs politely for long. The first bite may be careful, but by the third rib, everyone has sauce on their fingers and opinions about whether the next batch should be spicier. That is the charm of making ribs in an old roaster oven. It is practical, forgiving, and a little nostalgic. You do not need a smoker, a competition team, or a secret family pitmaster handshake. You need low heat, good seasoning, a bit of moisture, a sticky finish, and enough napkins to suggest you planned ahead.
Conclusion
Making ribs in an old roaster oven is one of the easiest ways to get tender, flavorful ribs without a smoker or grill. The method is simple: season generously, cook low and slow with a little moisture, check for tenderness, sauce near the end, and finish with high heat for a sticky glaze. Baby back ribs cook faster, spare ribs bring bigger flavor, and St. Louis-style ribs offer the best balance of shape, meatiness, and even cooking.
The beauty of this method is its flexibility. You can use a homemade dry rub or your favorite bottled seasoning. You can finish with sweet barbecue sauce, tangy vinegar sauce, or no sauce at all. You can serve the ribs at a summer cookout, game-day dinner, holiday gathering, or random Tuesday when you decide life needs more barbecue.
Note: Cooking times are estimates because rib thickness and roaster oven performance vary. Use a thermometer for food safety, but use tenderness cues such as the bend test, toothpick test, and meat pullback to decide when ribs are truly ready.