Replacing a toilet sounds like one of those home-improvement projects that should require a plumber, three specialized tools, and a small ceremony involving the shutoff valve. In reality, a straightforward toilet replacement is surprisingly manageable. With the correct measurements, basic hand tools, a new seal, and careful lifting, many homeowners can complete the job in a few hours.
The plumbing connections are simple. Water enters through one supply line, and waste exits through the floor opening beneath the bowl. The real challenge is avoiding a handful of common mistakes: purchasing the wrong toilet, overlooking a damaged flange, setting the bowl crooked, reusing an old wax ring, or tightening bolts as though you are assembling a suspension bridge.
This step-by-step toilet replacement tutorial explains how to remove an old toilet, inspect the drain connection, install the new fixture, test for leaks, and prevent the problems that turn an easy Saturday project into an emergency phone call.
Can You Replace a Toilet Yourself?
Most homeowners with basic DIY skills can replace a standard floor-mounted toilet. The job does not normally require soldering, modifying drainpipes, or opening a wall. You should be comfortable using an adjustable wrench, lifting a heavy ceramic fixture, and recognizing when damaged plumbing needs professional attention.
A typical replacement may take two to four hours when the existing flange and floor are in good condition. The project can take longer when closet bolts are rusted, the shutoff valve does not close completely, or hidden water damage appears after the old toilet is removed.
Call a licensed plumber when the drainpipe is cracked, the flange is severely corroded, the subfloor is soft or rotten, the shutoff valve leaks continuously, or the new toilet requires electrical or specialized plumbing connections. Smart toilets, wall-hung models, pressure-assisted systems, and major rough-in changes may also require professional installation.
Choose the Right Replacement Toilet Before You Begin
Measure the Toilet Rough-In
The rough-in is the distance from the finished wall behind the toilet to the center of the closet bolts that secure the bowl to the floor. Do not measure from the baseboard unless it is unusually thick. Most residential toilets use a 12-inch rough-in, although 10-inch and 14-inch configurations also exist.
Measure before shopping. A toilet with the wrong rough-in may sit too far from the wall, collide with the wall, or simply refuse to fit no matter how encouragingly you stare at it.
Check the Bowl Shape and Bathroom Clearance
Round-front bowls are compact and work well in smaller bathrooms. Elongated bowls generally offer more seating comfort but extend farther into the room. Measure the space between the existing toilet and nearby doors, cabinets, tubs, and walls before choosing a longer model.
Consider Toilet Height
Standard-height toilets are familiar and can be comfortable for shorter adults and children. Chair-height or comfort-height toilets are taller and may be easier for many adults, older users, and people with mobility limitations. Compare the listed bowl height carefully because the seat adds additional height.
Look for Water-Efficient Performance
Modern WaterSense-labeled toilets use 1.28 gallons per flush or less and are independently certified for water efficiency and flushing performance. That is at least 20 percent less water than the federal 1.6-gallon-per-flush standard. Replacing a very old toilet can therefore reduce household water use without sentencing everyone to the dreaded double flush.
Water-efficiency research: EPA WaterSense residential toilet guidance and product certification criteria.
Tools and Materials for Replacing a Toilet
Gather everything before shutting off the water. A bathroom floor is not the ideal place to discover that your only wrench is currently living in the trunk of someone else’s car.
- Adjustable wrench or socket set
- Flathead and Phillips screwdrivers
- Locking pliers
- Putty knife or scraper
- Mini hacksaw for stubborn closet bolts
- Bucket, sponge, and old towels
- Rubber gloves and safety glasses
- Cardboard, drop cloth, or an old blanket
- New wax ring or compatible wax-free toilet seal
- New closet bolts, washers, nuts, and caps
- Flexible toilet supply line
- Plastic toilet shims
- Level and tape measure
- Bathroom-grade caulk if required by local code or the manufacturer
Many toilets include tank hardware and a seat, but some do not. Open the box and verify the contents before removing the old fixture. Finding a missing tank gasket after the hardware store closes is a memorable experience, though not in a good way.
How to Replace a Toilet Step by Step
Step 1: Protect the Bathroom
Remove rugs, wastebaskets, shelves, and anything else that restricts movement. Place cardboard or a padded drop cloth nearby so you have a safe place to set the old toilet. Ceramic fixtures can scratch tile, damage flooring, and crack if dropped.
Put on gloves and open a window or run the exhaust fan. The job is not especially hazardous, but old wax and concealed bathroom plumbing rarely qualify as aromatherapy.
Step 2: Shut Off the Water Supply
Find the shutoff valve on the wall or floor near the toilet. Turn it clockwise until it stops. Do not force an old valve that feels frozen. Excessive pressure can damage the valve or supply pipe.
Flush the toilet and hold the handle down to drain as much water as possible from the tank. Remove the tank lid and place it safely on a towel. Use a sponge to soak up the remaining water in the tank and bowl, squeezing it into a bucket.
If water continues entering the tank after the valve is closed, the shutoff valve may not be sealing. Stop and repair the valve or arrange for a plumber before continuing.
Step 3: Disconnect the Supply Line
Place a towel and bucket beneath the connection. Unscrew the supply-line nut from the threaded fill-valve shank under the tank. Start by hand, then use a wrench if necessary.
Replacing an older supply line during toilet installation is inexpensive insurance. Rubber and braided connectors can deteriorate, and reusing a stiff or corroded line may create a leak shortly after the project is finished.
Step 4: Remove the Toilet Tank if Necessary
A two-piece toilet is easier to carry when the tank and bowl are separated. Remove the nuts from the tank bolts beneath the bowl, support the tank with both hands, and lift it straight upward.
If the hardware is badly rusted, penetrating lubricant may help. Use caution when cutting stuck bolts because striking or twisting the porcelain can crack it. A one-piece toilet cannot be separated and usually requires a second person for safe lifting.
Step 5: Remove the Floor Bolts
Pry off the decorative caps at the base of the toilet. Remove the nuts and washers from the closet bolts. If a bolt spins, hold it with locking pliers. If corrosion has converted the hardware into a tiny monument to stubbornness, cut the bolt with a mini hacksaw.
Step 6: Break the Old Seal and Lift the Toilet
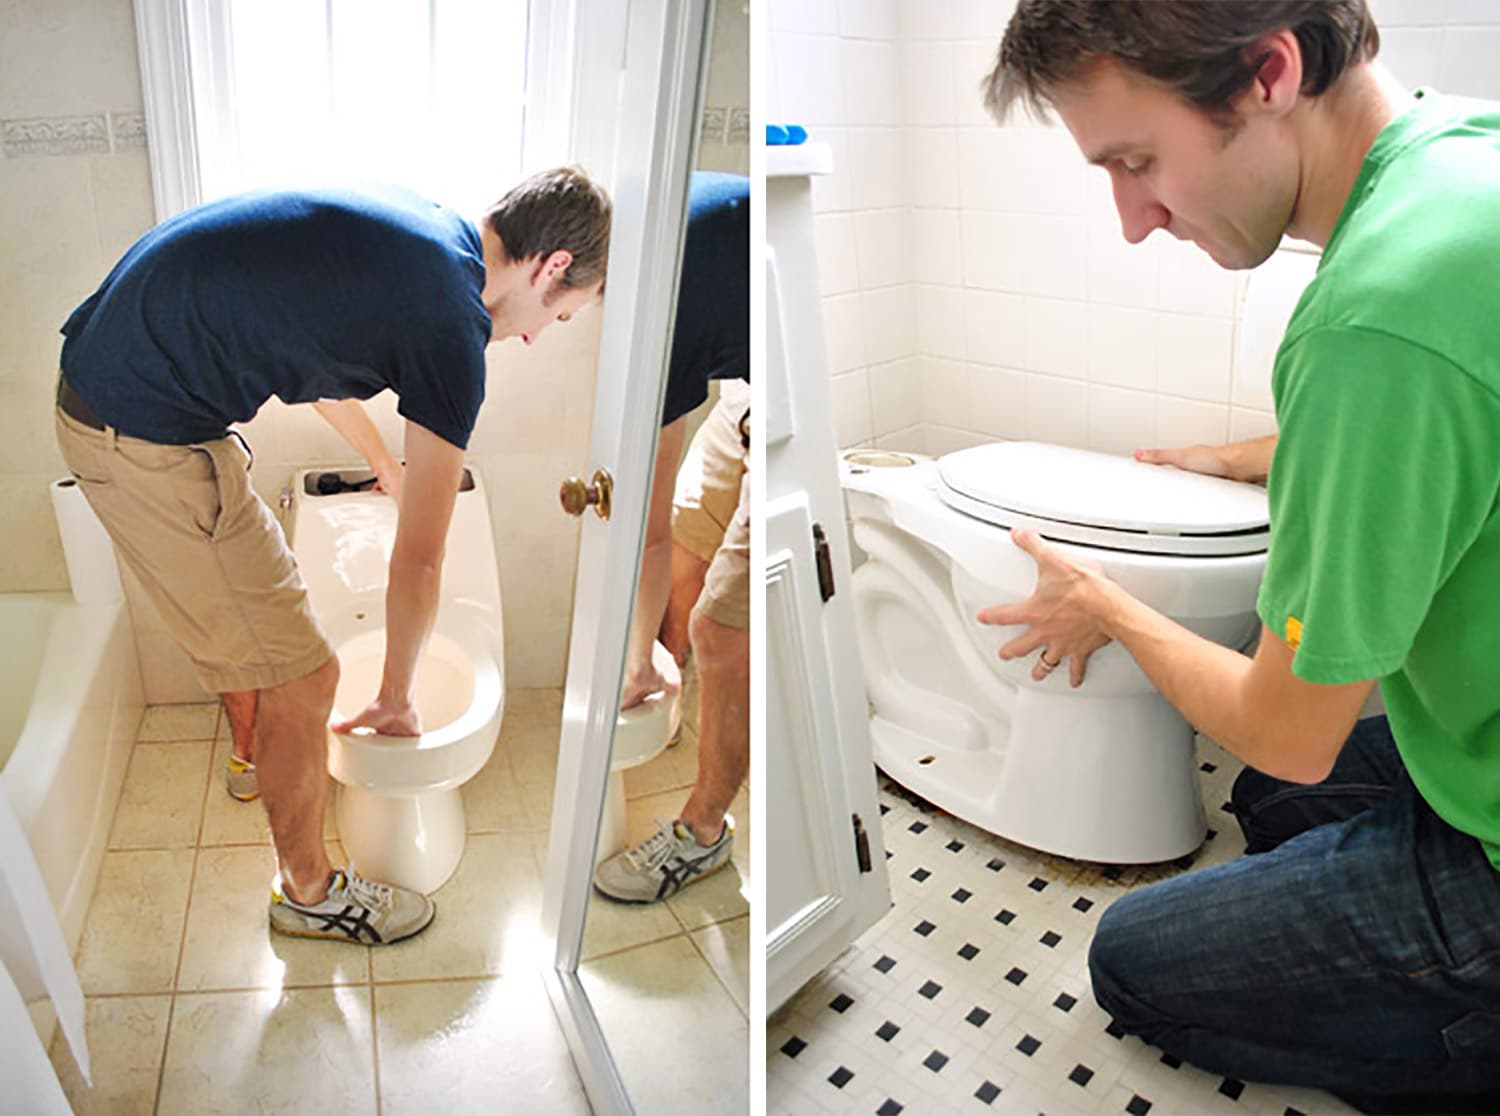
Gently rock the bowl from side to side to loosen the old wax seal. Grip the toilet by the bowl rather than the tank, keep your back straight, and lift with your legs. Ask another person to help if the fixture feels awkward or heavy.
Set the toilet upright on cardboard or an old blanket. Do not drag it across the floor. Some water may remain inside the trap, so keep towels ready.
Removal and lifting guidance synthesized from Home Depot, Lowe’s, This Old House, and Oatey replacement instructions.
Step 7: Temporarily Cover the Drain Opening
Loosely place an old rag inside the drain opening to block sewer gas and prevent tools from falling into the pipe. Leave enough material outside the opening so the rag cannot disappear into the drain. Remove it before installing the new toilet.
Step 8: Remove the Old Wax and Inspect the Flange
Use a putty knife to scrape the old wax from the toilet flange and surrounding floor. Place the wax in a disposable bag rather than washing it down a sink.
Inspect the flange carefully. It should be firmly attached to the floor, free from serious cracks, and positioned at an appropriate height relative to the finished flooring. Also inspect the subfloor for discoloration, softness, swelling, mold, or rot.
A loose or damaged flange must be repaired before the new toilet is installed. If the flange sits too low, use a manufacturer-approved flange extender or the correct extra-thick seal. Do not casually stack two ordinary wax rings. Uneven compression can create gaps, hidden leaks, odors, and future floor damage.
Flange height, repair, and seal guidance: Oatey, Danco, Fluidmaster, Home Depot, and This Old House.
Step 9: Dry-Fit the New Toilet
Before installing the seal, place the new bowl over the flange to confirm that the footprint fits, the bolt holes align, and the toilet sits flat. Check it with a level.
If the bowl rocks, determine where plastic shims will be needed. Remove the bowl after testing. A stable toilet is essential because repeated rocking can damage the seal and loosen the flange.
Step 10: Install New Closet Bolts
Insert the new closet bolts into the flange slots and position them directly across from each other. Use retaining washers or plastic holders if included. The bolts should remain upright while the bowl is lowered into place.
Step 11: Position the New Toilet Seal
Remove the rag from the drain. Install a new wax ring or wax-free gasket according to the product instructions. Traditional wax rings form a seal when compressed between the toilet outlet and flange. Wax-free systems may allow limited repositioning, which can be helpful for first-time installers.
Never reuse an old wax ring. Once compressed or disturbed, it cannot reliably return to its original sealing shape.
Step 12: Lower the Bowl Straight Down
Lift the toilet over the flange and align the base holes with the closet bolts. Lower the bowl straight down without twisting or sliding it around. Once the wax contacts the toilet, repositioning can damage the seal.
Press down firmly on the bowl rim using your body weight. Do not sit on the tank or bounce on the fixture. The base should settle onto the floor as the seal compresses.
Step 13: Level and Secure the Toilet
Install washers and nuts on the closet bolts. Tighten them gradually, alternating from one side to the other. The purpose is to hold the toilet securely, not to test the tensile strength of ceramic.
If the toilet rocks, insert plastic shims at the low points before fully tightening the nuts. Confirm that the bowl is level and stable. Trim exposed shims with a utility knife.
Stop tightening as soon as the bowl is secure. Overtightened floor bolts can crack the porcelain base. Cut excessively long bolts with a mini hacksaw and snap the decorative caps into place.
Bowl setting and alternating bolt-tightening guidance: Home Depot, This Old House, Lowe’s, and manufacturer-oriented seal resources.
Step 14: Attach the Tank on a Two-Piece Toilet
Place the tank-to-bowl gasket over the flush-valve outlet as directed by the manufacturer. Insert the tank bolts with the correct rubber washers, position the tank on the bowl, and install the remaining washers and nuts beneath it.
Alternate between the tank bolts, tightening each a little at a time. Keep the tank level and centered. Do not overtighten; porcelain can crack suddenly and without offering a polite warning first.
One-piece toilets skip this step because the tank and bowl are manufactured as a single fixture.
Step 15: Install the Toilet Seat
Align the seat hinges with the mounting holes near the back of the bowl. Insert the bolts and tighten the nuts according to the seat instructions. Center the seat before final tightening so it does not resemble a picture frame hung slightly crooked.
Step 16: Connect the Water Supply
Attach the flexible supply line to the fill-valve shank beneath the tank. Thread the nut by hand first to avoid cross-threading. Tighten it only as much as the manufacturer recommends, usually hand-tight plus a small additional turn when necessary.
Connect the other end to the shutoff valve if it was removed. Avoid twisting, kinking, or sharply bending the supply line.
Step 17: Turn On the Water and Test for Leaks
Open the shutoff valve slowly and allow the tank to fill. Inspect the supply-line connections, fill-valve shank, tank bolts, tank-to-bowl gasket, and toilet base.
Flush the toilet at least three to five times. Use dry paper towels around each connection; even a tiny leak will quickly leave a visible wet mark. Confirm that the tank stops filling, the bowl refills properly, and no water appears near the base.
If water leaks from the base during flushing, shut off the supply. The toilet may need to be removed and reset with a new seal. Tightening the floor bolts harder is not a reliable cure and can crack the bowl.
Step 18: Decide Whether to Caulk the Base
Recommendations about caulking vary. Some local codes require a sanitary seal around the toilet base. Some manufacturers recommend caulk for stability and easier cleaning. Other professionals prefer leaving at least part of the rear uncaulked so a concealed leak can become visible.
Follow the toilet manufacturer’s instructions and local plumbing requirements. When caulk is required, use mildew-resistant bathroom caulk and apply a neat bead only after confirming that the toilet is stable and leak-free.
Caulking recommendations vary by code and installation method.
Common Toilet Replacement Problems
The Shutoff Valve Will Not Close
Do not continue while water is flowing. Shut off the home’s main water supply and repair or replace the valve, or contact a plumber. A defective valve can turn a controlled project into an indoor water feature.
The New Toilet Rocks
Rocking usually indicates an uneven floor, improper flange height, debris beneath the base, or insufficient shimming. Loosen the nuts, stabilize the bowl with plastic shims, and retighten gently. Do not rely on the closet bolts to pull a severely uneven toilet flat.
The Base Leaks After Flushing
A base leak often means the seal is damaged, misaligned, or inadequately compressed. Remove the toilet, inspect the flange, and install another new seal. Wax rings should not be reused after the bowl has been lifted.
The Tank Leaks
Check the tank bolts, rubber washers, tank-to-bowl gasket, fill-valve connection, and supply line. Tighten hardware gradually and evenly. Persistent leaks may indicate an incorrectly positioned gasket or damaged porcelain.
The Toilet Runs Continuously
Check the tank water level, fill valve, flapper, flush-valve seal, and chain adjustment. A chain that is too short may hold the flapper open, while an incorrect water level can cause water to flow into the overflow tube.
The Flush Is Weak
Verify that the shutoff valve is fully open and the tank fills to the manufacturer’s marked water level. Inspect the flapper operation and make sure packing material was not left inside the tank or trapway.
Real-World Toilet Replacement Experience: Lessons That Save Time
The easiest toilet replacements are usually won before the old fixture is touched. Accurate measurements, complete parts, and a clear workspace matter more than speed. A homeowner who spends 20 minutes checking the rough-in, supply-line length, bowl footprint, and box contents often finishes sooner than someone who begins immediately and later makes two emergency hardware-store trips.
One of the most common practical surprises is the weight of the fixture. A toilet may look manageable while sitting peacefully on the floor, but lifting it over two closet bolts while avoiding a fresh wax ring is another matter. Separating the tank from a two-piece model makes removal easier. A second person is especially helpful when moving a one-piece toilet, navigating a narrow doorway, or working around a vanity.
Another useful lesson is to expect some residual water. Flushing and sponging the bowl removes most of it, but water remains in the internal trap. Tilting the old toilet carelessly can release that water exactly where you hoped it would not go. Keeping the fixture upright and having several towels ready prevents a minor plumbing task from becoming a bathroom-floor cleanup project.
The flange inspection is the moment when optimism should temporarily step aside. Installing a beautiful new toilet over a cracked flange or soft subfloor does not solve the underlying problem. It merely hides it beneath newer porcelain. A few extra minutes spent pressing around the floor, checking flange movement, and cleaning away every trace of old wax can prevent years of slow leakage.
Dry-fitting the bowl is another habit that pays off. It confirms that the toilet clears the wall, door, and nearby cabinets. It also reveals uneven flooring before the seal becomes involved. Once a traditional wax ring has been compressed, lifting and repositioning the bowl may require another ring. A dry fit lets you identify shim locations while corrections are still clean and inexpensive.
During installation, many beginners worry that the toilet will not be tight enough. This often leads to overtightened bolts. Porcelain does not bend like metal; it can crack without much warning. The better technique is to press the bowl into the seal, use shims to eliminate movement, and tighten the nuts evenly until the toilet is stable. More force is not more professional.
Testing should be patient rather than ceremonial. One successful flush is encouraging, but it is not a complete leak test. Let the tank fill several times, flush repeatedly, and inspect every connection with dry paper towels. Check again after 15 minutes and later the same day. A slow seep at a tank bolt or supply connection can be difficult to see but easy to detect with paper.
Finally, keep the installation instructions for the exact toilet. General tutorials explain the process, but tank gaskets, bolt assemblies, fill valves, and tightening requirements vary by manufacturer and model. The included manual should have the final vote whenever its directions differ from general advice.
The practical conclusion is reassuring: replacing a toilet is not complicated, but it rewards preparation and restraint. Measure twice, lift carefully, inspect the flange, use a new seal, tighten gently, and test repeatedly. Follow those principles and the project is likely to end with a working toilet rather than a dramatic story for the plumber.
Final Thoughts
Replacing a toilet is one of the most approachable plumbing upgrades for a capable DIY homeowner. The water connection is simple, the fixture is held by only a few bolts, and modern installation kits make the sealing process easier than ever.
The quality of the result depends on details that are easy to overlook. Confirm the rough-in before buying, protect your back while lifting, repair flange or floor damage before continuing, never reuse a compressed seal, stabilize the bowl with shims, and avoid overtightening porcelain hardware.
Once the tank fills quietly, the bowl remains steady, and several test flushes reveal no leaks, the project is complete. You may now admire your new toilet with the satisfaction normally reserved for more glamorous renovations. It may not be a marble countertop, but it works every day, which is a fairly convincing argument in its favor.
Research synthesis included guidance from the U.S. EPA WaterSense program, Home Depot, Lowe’s, This Old House, Family Handyman, Oatey, Fluidmaster, Danco, American Standard, and manufacturer-oriented installation resources.