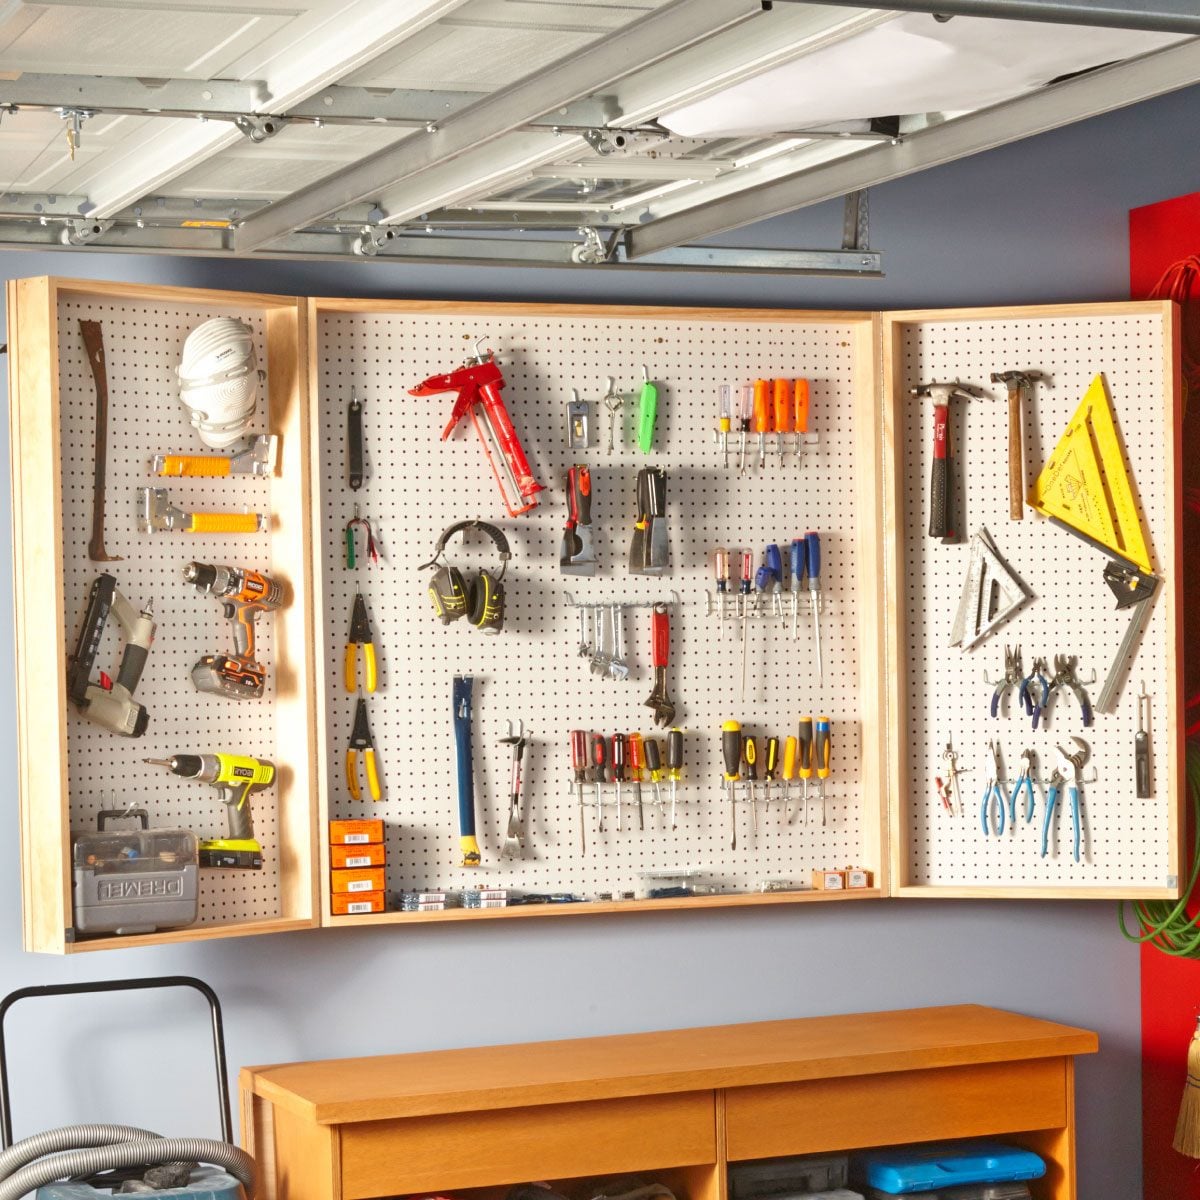
If your garage currently looks like a hardware store sneezed into a camping aisle, you are not alone. Garages have a special talent for collecting paint cans, extension cords, mystery screws, sports gear, half-used sandpaper, and that one tool you bought for a single project in 2017. A DIY garage wall cabinet is one of the smartest ways to reclaim that space without giving up valuable floor area.
This guide walks you through how to build a wall cabinet for your garage using practical materials, beginner-friendly woodworking methods, and common tools. The goal is not to create museum-quality cabinetry with gold-plated hinges and a velvet rope. The goal is a strong, clean, useful garage storage cabinet that holds tools, small supplies, automotive items, gardening gear, and all those “I’ll need this someday” objects that keep multiplying in the dark.
We will cover planning, materials, measurements, cutting, assembly, mounting, doors, shelves, finishing, safety, and real-world tips from actual DIY experience. By the end, you will know how to build a garage wall cabinet that is sturdy, practical, and good-looking enough that you may start casually inviting people to admire your garage. Try to act humble.
Why Build a Garage Wall Cabinet Instead of Buying One?
Buying a ready-made garage cabinet is convenient, but building your own gives you control over size, layout, material, strength, and cost. Many store-bought cabinets are designed for average spaces. Unfortunately, garages are not average. They have weird corners, exposed framing, uneven floors, water heaters, garage-door tracks, mystery outlets, and walls that seem to have been designed by someone holding a sandwich in one hand.
A custom DIY wall cabinet lets you fit your storage exactly where it belongs. You can build it shallow enough to avoid hitting your car door, wide enough to span multiple wall studs, tall enough for tall spray bottles, or strong enough for heavier tool cases. You also get the satisfaction of opening a cabinet you built yourself, which is much better than opening a cabinet you bought and discovering the instructions were translated from ancient furniture goblin.
Project Overview: What You Are Building
This project focuses on a simple plywood wall cabinet with two doors, adjustable or fixed shelves, and a sturdy wall-mounting system. A practical size for many garages is about 36 inches wide, 30 inches tall, and 12 to 16 inches deep. That size offers useful storage while keeping the cabinet manageable for one or two people to lift and install.
You can scale the cabinet up or down depending on your space. For example, a 24-inch-wide cabinet works well between obstacles, while a 48-inch-wide cabinet gives you more storage but becomes heavier and harder to mount. For most DIYers, building two medium cabinets is easier than building one giant cabinet that requires a forklift, three neighbors, and a motivational speech.
Tools and Materials You Will Need
Recommended Tools
- Measuring tape
- Pencil and square
- Circular saw, table saw, or track saw
- Drill and driver
- Stud finder
- Level
- Clamps
- Pocket-hole jig or countersink bit
- Sander or sanding block
- Safety glasses and hearing protection
Recommended Materials
- 3/4-inch plywood for the cabinet sides, top, bottom, shelves, and doors
- 1/4-inch plywood or hardboard for the cabinet back
- 1×2 or 1×3 boards for face frame and mounting cleats
- Wood screws
- Wood glue
- Cabinet hinges
- Door pulls or knobs
- Adjustable shelf pins or shelf support strips
- Paint, primer, polyurethane, or garage-friendly finish
Plywood is a strong choice for a DIY garage cabinet because it resists warping better than many solid boards and is easier to build into large panels. For a clean look, use sanded plywood, birch plywood, or cabinet-grade plywood. For a rugged garage cabinet, construction-grade plywood can work, but expect more sanding and a less polished finish. In other words, it may have “garage personality.”
Step 1: Plan the Cabinet Location
Before cutting wood, decide exactly where the wall cabinet will go. Stand in your garage and think about how you use the space. Keep frequently used tools near your workbench. Store seasonal items higher. Avoid placing cabinets where they interfere with the garage door, vehicle doors, light switches, outlets, or walking paths.
Use a stud finder to locate wall studs. Most residential wall studs are spaced 16 inches on center, though garages can surprise you. Mark the studs clearly with painter’s tape or pencil. A wall cabinet should be fastened into studs, not just drywall. Drywall is great at holding paint and family arguments, but it is not the hero you want supporting a loaded cabinet.
Step 2: Choose Practical Dimensions
A reliable beginner-friendly garage wall cabinet size is:
- Width: 36 inches
- Height: 30 inches
- Depth: 12 to 16 inches
A 12-inch depth is excellent for smaller tools, cleaning supplies, fasteners, and spray cans. A 16-inch depth gives you more storage but sticks farther into the garage. If your cabinet will hang above a workbench, 12 to 14 inches is usually comfortable. If it will hang high on a side wall away from cars, deeper storage may be fine.
Measure twice, then measure again after your coffee kicks in. Garage cabinets need to be functional, but they also need clearance. Leave enough room below the cabinet so you can work comfortably. If the cabinet is near a parked vehicle, open the car door before finalizing the location. Your future self will appreciate not creating a beautiful wooden obstacle course.
Step 3: Create a Cut List
For a 36-inch-wide, 30-inch-tall, 12-inch-deep cabinet, a basic cut list might look like this:
- Two side panels: 30 inches by 12 inches
- Top and bottom panels: 34 1/2 inches by 12 inches
- Back panel: 36 inches by 30 inches, using 1/4-inch plywood or hardboard
- One or two shelves: 34 1/2 inches by 11 1/4 inches
- Two doors: approximately 17 3/4 inches by 29 1/2 inches each
- Face frame rails and stiles: sized to fit the cabinet front
- Wall cleat: 34 to 36 inches long
The exact door size depends on your hinge style and whether you want overlay doors, inset doors, or simple slab doors. For a garage cabinet, overlay slab doors are the easiest. They cover the cabinet opening, hide small mistakes, and do not judge you for being human.
Step 4: Cut the Cabinet Parts
Cut the plywood panels carefully using a circular saw with a straightedge guide, a table saw, or a track saw. Support the plywood fully so the sheet does not sag or pinch the blade. Label each piece as you cut it. A simple pencil mark such as “left side,” “top,” or “shelf” can save you from the classic DIY moment where you stare at six rectangles and question every life choice.
For cleaner plywood cuts, place the good face down when using a circular saw and good face up when using a table saw. Use a fine-tooth blade if possible. Lightly sand cut edges to remove splinters before assembly.
Step 5: Assemble the Cabinet Box
The cabinet box, often called the carcass, is the main structure. Lay one side panel flat on your work surface. Apply wood glue along the edge where the top panel will meet it. Attach the top panel using screws, pocket holes, or countersunk screws. Repeat with the bottom panel, then add the second side panel.
Check for square by measuring diagonally from corner to corner. If both diagonal measurements match, the cabinet is square. If they do not match, gently shift the box until it lines up. A square cabinet makes doors easier to install and shelves easier to fit. A crooked cabinet can still hold stuff, but it will look like it has strong opinions.
Once the box is square, attach the back panel. The back panel adds strength and keeps the cabinet from racking side to side. Use glue and small screws or brad nails around the edges. If you plan to mount the cabinet using an internal hanging rail, make sure the back and top area are strong enough to receive screws.
Step 6: Add a Face Frame or Edge Banding
A face frame is optional, but it makes the cabinet stronger and gives the front a finished look. Use 1×2 boards for the vertical stiles and horizontal rails. Cut them to fit the cabinet front, then assemble them with pocket screws, glue, or simple butt joints. Attach the frame to the plywood box with glue and clamps, then secure it with finish nails or screws from the inside.
If you prefer a modern frameless cabinet, skip the face frame and apply iron-on edge banding to the exposed plywood edges. Edge banding creates a clean finish without adding much thickness. For a garage cabinet, either method works. Face frames are forgiving and sturdy; edge banding is sleek and efficient.
Step 7: Install Shelves
You have two main choices for shelves: fixed shelves or adjustable shelves. Fixed shelves are easier and stronger. Adjustable shelves are more flexible because you can change the spacing later when your collection of oddly shaped containers grows, as it inevitably will.
For fixed shelves, cut plywood shelves to fit between the side panels. Secure them with glue and screws through the cabinet sides. For adjustable shelves, drill evenly spaced shelf-pin holes on both side panels before final assembly, or use shelf standards after assembly. Keep shelves slightly shallower than the cabinet depth so doors close without rubbing.
Step 8: Build and Install the Doors
The simplest garage cabinet doors are plywood slab doors. Cut two doors so they overlap the cabinet opening slightly. Sand the edges smooth. If you want a cleaner look, apply edge banding or narrow trim around the door edges.
Install cabinet hinges according to the manufacturer’s instructions. Basic surface-mount hinges are easy for beginners. Concealed European-style hinges look cleaner but require accurate drilling. Attach the hinges to the doors first, then hold the doors against the cabinet and mark screw locations. A helper is useful here, unless you have three arms, in which case congratulations on your evolutionary advantage.
After the doors are installed, add pulls or knobs. Make a simple cardboard template so both handles line up evenly. Nothing says “I built this at midnight” like two knobs at different heights.
Step 9: Sand and Finish the Cabinet
Garages are rough environments. Dust, moisture, temperature swings, and flying objects all happen. A protective finish helps your DIY garage cabinet last longer. Sand surfaces with medium-grit sandpaper, then follow with a finer grit for a smoother feel.
For a clean finish, apply primer and paint. Semi-gloss or satin paint is a smart choice because it wipes clean more easily than flat paint. For a natural wood look, apply polyurethane or a durable clear coat. If the cabinet will store automotive fluids, garden chemicals, or cleaning supplies, consider lining the bottom shelf with a removable tray or vinyl mat to catch spills.
Step 10: Mount the Cabinet Safely
This is the most important step. A wall cabinet is only as safe as its mounting method. Locate the studs again and mark them clearly. Use a level to draw a reference line where the bottom or top of the cabinet will sit.
A French cleat is one of the best ways to hang a garage wall cabinet. It uses two matching angled boards: one attached securely to the wall studs and one attached to the cabinet. The cabinet cleat hooks over the wall cleat, spreading the load across multiple studs. This method makes alignment easier and allows the cabinet to sit tight against the wall.
To make a wooden French cleat, rip a 1×4 board lengthwise at a 45-degree angle. Attach one half to the wall with the angled edge facing up and away from the wall. Attach the matching half to the back of the cabinet with the angled edge facing down and toward the wall. Lift the cabinet and set the two angled edges together. Then drive additional screws through the cabinet back or lower rail into studs to keep it from shifting.
If you do not use a French cleat, install a strong internal hanging rail inside the cabinet near the top. Drive structural screws through that rail and into at least two wall studs. Do not rely on drywall anchors for a loaded garage cabinet. Anchors have their place, but that place is not supporting your drill collection above your lawn mower.
Garage Wall Cabinet Safety Tips
- Wear eye protection when cutting, drilling, sanding, or driving screws.
- Use hearing protection with loud power tools.
- Clamp workpieces before cutting or drilling.
- Keep hands clear of saw blades and drill bits.
- Ask an experienced adult for help if you are not comfortable using power tools.
- Lift heavy cabinets with a helper.
- Fasten the cabinet into studs, not drywall alone.
- Store heavier items on lower shelves whenever possible.
Safety is not the boring part of the project. Safety is the part that lets you enjoy the cabinet afterward instead of telling an embarrassing story involving a ladder, a loose screw, and a bucket of old tennis balls.
Smart Storage Ideas for Your Finished Cabinet
Once your cabinet is mounted, organize it by category. Use small bins for screws, nails, washers, and anchors. Add labels so you can find things quickly. Store painting supplies together, automotive items together, and woodworking tools together. If you mix everything randomly, your beautiful cabinet becomes a junk drawer with doors.
Consider adding hooks inside the doors for measuring tapes, small levels, or safety glasses. A magnetic strip can hold drill bits or small metal tools. Clear plastic bins help you see what is inside without opening every container like a raccoon searching for treasure.
Common Mistakes to Avoid
Making the Cabinet Too Deep
Deep cabinets hold more, but they also stick into the garage. If the cabinet is near a parking space, keep it shallow enough to avoid bumps and bruised car doors.
Skipping the Studs
A loaded wall cabinet needs real structural support. Always mount into studs or solid blocking. Drywall alone is not enough.
Forgetting Door Clearance
Before mounting, check that the doors can open fully without hitting lights, shelves, garage door tracks, or nearby walls.
Overloading the Shelves
Even a strong cabinet has limits. Heavy cans, power tools, and metal parts add up quickly. Spread weight evenly and keep the heaviest items low.
Estimated Cost and Time
The cost of building a DIY garage wall cabinet depends on material quality, cabinet size, hardware, and finish. A simple plywood cabinet may cost far less than a premium store-bought garage cabinet, especially if you already own basic tools. Expect to spend more if you choose high-grade plywood, soft-close hinges, premium paint, or decorative trim.
For time, a beginner can usually complete this project over a weekend. Day one can include measuring, cutting, and assembling the cabinet box. Day two can include doors, sanding, finishing, and mounting. Paint drying may stretch the timeline, because paint enjoys taking its sweet time while you stare at it.
of Real DIY Experience: What Building a Garage Wall Cabinet Teaches You
Building a garage wall cabinet teaches one important lesson very quickly: the wall is not as flat, square, or cooperative as it looks. On paper, the project seems simple. You cut plywood, build a box, add doors, and hang it up. In real life, you discover that the garage wall has a slight bow, the stud finder has trust issues, and your first plywood cut is somehow 1/8 inch off even though you measured with the confidence of a professional architect.
The best experience-based advice is to slow down during the planning and layout stage. Many beginners want to jump straight into cutting because cutting wood feels like progress. But the real progress happens before the saw starts. Measure the wall, mark the studs, check the height, and imagine actually using the cabinet. Will you be able to reach the top shelf? Will the doors open without hitting anything? Will the cabinet block an outlet? These small questions prevent big regrets.
Another lesson is that plywood quality matters. Cheap plywood can work, especially in a garage, but warped sheets make everything harder. If the plywood is twisted, your cabinet box may fight you during assembly. Spending a little more on flatter panels can save time, sanding, and several dramatic sighs. When selecting plywood, look down the edge of the sheet to check for bowing. Choose the flattest panels available, even if that means being the person in the store carefully inspecting lumber like it is auditioning for a movie role.
Clamps also become your best friends. A cabinet is much easier to assemble when the pieces stay where you put them. Without clamps, panels slide around while you drive screws, and suddenly your nice square cabinet looks like it was built during an earthquake. Even a few basic bar clamps can make the work cleaner and less frustrating.
Door installation is usually the part where patience matters most. A cabinet box can be slightly imperfect and still function well, but doors reveal every tiny alignment problem. Install one door at a time, use spacers for consistent gaps, and avoid fully tightening screws until the alignment looks right. If the doors are slightly uneven, do not panic. Most hinges allow small adjustments, and garage cabinets do not need to pass a royal inspection.
Mounting the cabinet is the moment where you should absolutely get help. Even a medium plywood cabinet can be awkward to lift, hold level, and screw into place at the same time. A temporary support board screwed to the wall can hold the cabinet while you fasten it. A French cleat makes the job much easier because you can hang the cabinet first, then secure it. This one trick can turn a stressful installation into a surprisingly calm victory.
Finally, expect your storage needs to change. The cabinet you build today may hold paint supplies, but next year it might store drill batteries, bike tools, or holiday lights. Adjustable shelves, removable bins, and labeled containers make the cabinet more useful over time. A good garage cabinet is not just a box on the wall. It is a flexible storage zone that helps your garage stay functional instead of slowly returning to chaos like a cluttered jungle with extension cords.
The biggest reward is not just the cabinet itself. It is the confidence you gain. Once you build one wall cabinet, you start seeing other possibilities: a workbench, a matching storage unit, a pegboard wall, maybe even a full garage makeover. That is the wonderful danger of DIY. You begin by organizing screws, and before long you are walking around with a tape measure saying, “You know what would look good here?”
Conclusion
Learning how to build a wall cabinet for your garage is one of the most useful DIY projects you can take on. It improves storage, clears floor space, protects your tools, and makes your garage easier to use every day. With plywood, basic hardware, careful measuring, and safe mounting into wall studs, you can create a cabinet that fits your space better than many store-bought options.
The key is to keep the design simple, build the cabinet square, support it properly, and organize it thoughtfully after installation. Your garage does not need to be perfect. It just needs to stop hiding your tape measure every time you need it.
Note: This article is written for general DIY education and is based on established woodworking, garage organization, cabinet-building, and home safety practices. Always follow tool manufacturer instructions, check fastener ratings, and get qualified help for electrical, structural, or unfamiliar work.