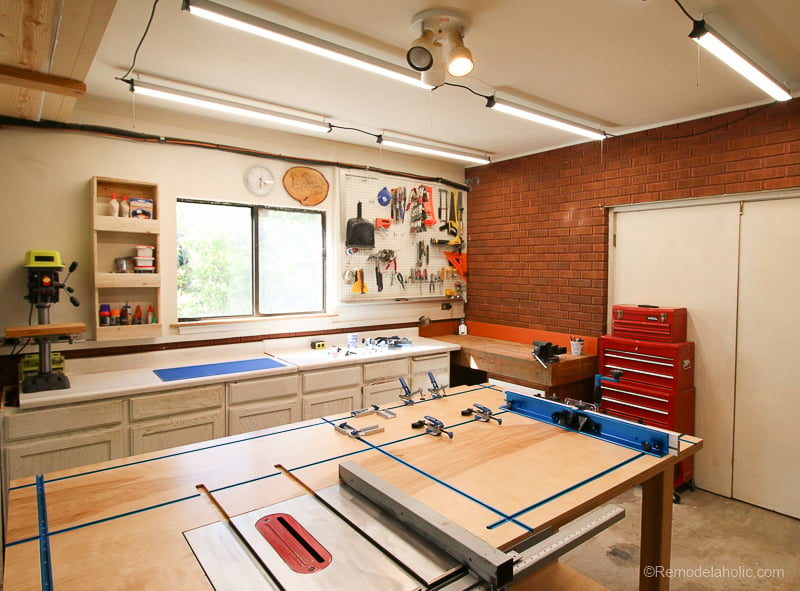
Every workshop has a “before” stage. It is the stage where the tape measure lives inside a paint tray, the drill bits have formed a small metal village under the bench, and the one clamp you need has apparently joined a witness protection program. Starting to organize our workshop is not just about making the space prettier. It is about making every project easier, safer, faster, and a lot less likely to end with someone muttering, “I swear I just had that screwdriver.”
A well-organized workshop gives tools a home, materials a system, and people enough room to work without performing an accidental obstacle-course routine. Whether the space is a garage workshop, basement corner, shed, small woodworking shop, or multipurpose DIY zone, the first step is not buying fifty matching bins. The first step is understanding how the workshop is actually used.
This guide walks through a practical, beginner-friendly approach to workshop organization, from decluttering and layout planning to pegboards, shelves, mobile carts, safety zones, and maintenance habits. The goal is simple: create a workshop that works as hard as you do, minus the chaos.
Why Workshop Organization Matters
Workshop organization affects more than appearance. A cluttered shop wastes time, damages tools, hides supplies, and increases the risk of trips, cuts, fire hazards, and frustration. A clean workshop helps you see what you own, avoid duplicate purchases, protect expensive equipment, and move smoothly from one project step to the next.
Think of organization as workflow design. When sanding supplies are near the sander, clamps are close to the assembly table, and screws are labeled by size, your brain can focus on the project instead of launching a search party. Good organization also makes cleanup less painful. When everything has a clear place to return to, “cleaning the shop” becomes a ten-minute reset instead of an archaeological dig.
Start With a Workshop Audit
Before installing cabinets or ordering storage systems, take inventory. Pull items into broad categories: hand tools, power tools, fasteners, lumber, paints, finishes, electrical supplies, gardening tools, automotive items, safety gear, and random “mystery objects” that may or may not belong to a lawn mower from 2008.
Ask Three Simple Questions
For each item, ask: Do we use it? Is it safe and functional? Does it belong in the workshop? Broken tools, dried-out adhesives, rusty blades, mystery cords, empty containers, and duplicate gadgets should be repaired, recycled, donated, or discarded. Keeping everything “just in case” sounds responsible until the workshop becomes a storage unit with a table saw trapped inside.
Create Keep, Relocate, Donate, and Toss Piles
The fastest way to make progress is to sort with purpose. The keep pile should include tools and supplies that support current projects or likely future work. The relocate pile should include household items, sports gear, seasonal décor, and other things that wandered into the workshop because it had a floor. The donate pile is for usable extras. The toss pile is for unsafe, damaged, expired, or truly useless items.
Define Zones Before Buying Storage
A workshop becomes easier to organize when it is divided into zones. Zones are simple activity areas based on how work happens. A woodworking shop might need zones for cutting, assembly, sanding, finishing, tool storage, and lumber storage. A general garage workshop might need areas for automotive work, household repairs, yard tools, hardware, cleaning supplies, and seasonal items.
The Core Workshop Zones
A strong starter layout usually includes a main workbench, a tool wall, a material storage area, a small-parts station, a power-tool charging area, a cleaning station, and a safety station. If space is tight, zones can overlap. For example, a rolling cart can serve as a portable power-tool station, while a folding workbench can double as an assembly table.
Put Frequently Used Items in the “Golden Zone”
The golden zone is the area between shoulder height and knee height. This is where the most-used tools should live. Hammers, screwdrivers, tape measures, pencils, utility knives, drill bits, hearing protection, and commonly used fasteners should be easy to grab without bending, climbing, or moving three boxes labeled “miscellaneous.” Rarely used items can go higher, lower, or farther away.
Use Vertical Space Like You Mean It
Most messy workshops have one thing in common: the floor is doing too much work. Vertical storage is the secret weapon. Walls, cabinet sides, doors, ceiling areas, and the space above benches can hold a surprising amount when planned well.
Pegboard for Visible Tool Storage
Pegboard is popular because it is inexpensive, flexible, and easy to customize. It works beautifully for hand tools, measuring tools, scissors, pliers, small clamps, paintbrushes, rolls of tape, and frequently used accessories. A smart trick is to trace tool outlines or label hook locations so everything returns to the same spot. It may look a little intense at first, but future-you will appreciate not playing “Where did the wrench go?” every Saturday.
Slatwall and Track Systems for Heavier Gear
For larger or heavier items, slatwall panels and track systems are stronger and more adaptable than basic pegboard. They can hold hooks, baskets, shelves, ladders, hoses, extension cords, and bulky tools. These systems are especially useful in garage workshops because they keep the floor open while allowing the layout to change as tools and projects evolve.
Shelves for Bins, Boxes, and Bulk Supplies
Heavy-duty shelving is one of the most practical upgrades for workshop storage. Place heavy items on lower shelves, medium-weight items at waist height, and lighter seasonal supplies up top. Use clear bins when visibility matters and solid bins when dust protection is more important. Label every container clearly. A bin labeled “hardware” is only slightly better than no label at all; “deck screws,” “cabinet hinges,” or “sandpaper 80-220 grit” is much better.
Organize Tools by Task, Not Just by Type
Many people organize workshops by tool category: all saws together, all drills together, all wrenches together. That can work, but task-based organization is often more efficient. Store items near where they are used. Sandpaper, sanding blocks, dust masks, and the orbital sander should be together. Plumbing repair supplies can share a bin. Electrical testers, wire nuts, electrical tape, and strippers can live in one labeled kit.
Create Grab-and-Go Kits
Project kits save time. A picture-hanging kit might include a level, pencil, anchors, screws, tape measure, stud finder, and small hammer. A painting kit might hold painter’s tape, drop cloths, roller covers, brushes, stir sticks, tray liners, and gloves. A repair kit could include common screwdrivers, pliers, adjustable wrench, utility knife, and flashlight. Kits reduce bench clutter and make it easier to work outside the main shop area.
Give Cordless Tools a Charging Station
Cordless tools are wonderful until chargers and batteries spread across the shop like electronic confetti. A dedicated charging station keeps batteries, chargers, and tool manuals in one spot. Mount it away from sawdust piles, water, and flammable materials. Include a power strip only if it is appropriate for the load, and avoid daisy-chaining extension cords. Organization should not come with bonus sparks.
Control Small Parts Before They Control You
Screws, nails, washers, anchors, nuts, bolts, blades, bits, and fittings are small enough to disappear but important enough to stop a project cold. The best system is visible, labeled, and easy to maintain.
Use Drawer Organizers and Small Bins
Small-parts cabinets with divided drawers are excellent for fasteners. Clear jars can work well for larger quantities, but avoid creating a shelf of identical unlabeled jars unless you enjoy squinting at metal bits like a detective. Label by size and type. For example: “1-1/4 in. wood screws,” “drywall anchors,” “finish nails,” or “1/4 in. washers.”
Keep Consumables Near Their Tools
Saw blades should be near saws, sanding discs near sanders, glue near clamps, and drill bits near drills. This sounds obvious, but workshops often become messy because accessories drift away from the tools they support. Put the family back together. The drill and the drill bits have been through enough.
Make the Workbench a Work Surface Again
The workbench is not a long-term storage shelf. It is where work happens. If the bench is always buried, projects slow down before they begin. Clear the surface and assign homes for everything that normally lands there.
Use a Daily Reset Basket
Place a small basket or tray on the bench for items that need to be put away at the end of a session. This prevents random tools from spreading across the surface while still giving you a realistic place to set things down mid-project. At the end of the day, empty the basket. Yes, actually empty it. The basket is a temporary helper, not a retirement community for hex keys.
Install Under-Bench Storage
The space under a workbench can hold drawers, rolling bins, clamps, jigs, or less-used tools. Keep heavy items low for stability. If the bench is mobile, use locking casters so it stays put while you work and rolls away when you need extra space.
Plan for Dust, Trash, and Cleanup
A workshop that is easy to clean is easier to keep organized. Dust and scraps are not just ugly; they can affect tool performance, air quality, and safety. Set up a simple cleanup system early.
Create a Scrap System
Use separate containers for usable wood scraps, metal offcuts, cardboard, and trash. Be honest about scrap wood. Keeping a few useful pieces is smart. Keeping every triangular chip because “it might become something” is how workshops become hamster nests with extension cords.
Keep Cleaning Tools Visible
A broom, dustpan, shop vacuum, rags, and trash bags should be easy to reach. If cleanup tools are buried, cleanup will not happen. Wall hooks work well for brooms and cords. A rolling shop vacuum can live near the workbench or cutting area.
Build Safety Into the Organization System
Safety is part of workshop organization, not a separate lecture delivered after someone trips over a cord. Store sharp tools safely, keep walkways open, maintain good lighting, and avoid stacking heavy objects overhead unless the storage system is rated for the load.
Make Safety Gear Impossible to Ignore
Eye protection, hearing protection, dust masks or respirators, gloves, and first-aid supplies should be visible and easy to access. If safety gear is hidden in a drawer under old sandpaper, nobody will use it. A small safety station near the entrance or main workbench is a practical solution.
Store Chemicals and Flammables Carefully
Paints, solvents, finishes, fuel, oily rags, and adhesives need thoughtful storage. Keep them away from ignition sources, direct heat, and children or pets. Use original containers when possible, follow label instructions, and consider a proper flammable-liquid storage cabinet for larger quantities. Oily rags should be handled carefully because some finishes can create fire risk as they cure.
Protect Air Quality
Ventilation matters in workshops, especially when sanding, painting, staining, welding, using solvents, or running combustion equipment. Use dust collection where appropriate, open doors or windows when safe, and avoid trapping fumes inside attached garages where they can move into the home. The nose is useful, but it is not a full air-quality monitoring system.
Use Mobile Storage for Flexible Workshops
Not every workshop has room for permanent stations. Mobile storage creates flexibility. Rolling carts, mobile workbenches, and tool cabinets let you move supplies to the project and then tuck them away afterward.
When Mobile Storage Works Best
Mobile storage is ideal for small shops, shared garages, renters, and anyone who needs the workshop to transform from “build mode” to “park the car mode.” A cart can hold sanding supplies, painting tools, cordless drills, or automotive repair gear. Locking casters are important because a rolling bench should roll only when invited.
Label Everything, But Keep It Human
Labels are not just for people who alphabetize soup cans. Labels make a workshop easier for everyone to use. They also reduce the chance that a helper puts the socket set in the gardening bin and calls it “close enough.”
Use Clear, Specific Labels
Good labels are short and specific: “router bits,” “deck screws,” “paint rollers,” “electrical,” “plumbing,” “sanding discs,” “bike tools,” and “car wash.” Avoid vague labels like “stuff,” “random,” or the classic “important,” which usually means “I did not want to decide.”
Design the Workshop for Maintenance
The best organization system is one you can maintain when tired, busy, or halfway through a messy project. If putting something away requires opening four drawers and solving a puzzle, the system will fail. Make the correct behavior easy.
Follow the One-Motion Rule
Whenever possible, store frequently used items so they can be retrieved and returned in one motion. Hang the hammer on a hook. Put the tape measure in an open bin. Place pencils in a cup at the bench. Save closed containers and cabinets for dusty, dangerous, or less-used items.
Schedule Seasonal Decluttering
Workshops collect clutter slowly, then suddenly. A seasonal reset keeps the space functional. Twice a year, review supplies, dispose of expired materials, donate unused duplicates, sweep behind shelves, check cords, sharpen blades, and reorganize zones based on what you actually used.
Common Workshop Organization Mistakes
Buying Storage Before Sorting
Storage products do not create organization by themselves. Buying bins before sorting often leads to beautifully contained chaos. Sort first, then choose storage that fits the items you are keeping.
Ignoring the Floor Plan
If the table saw blocks the lumber rack, the clamp rack is across the room from the assembly table, and the trash can is behind the ladder, the shop will fight you. Arrange the space around movement and project flow.
Making Everything Too Perfect
A workshop is not a museum. It should be tidy, not untouchable. Leave room for real work, temporary mess, and future tools. The goal is a system that recovers quickly, not a showroom that panics when sawdust appears.
A Simple Weekend Plan to Start Organizing Our Workshop
Day One: Clear and Sort
Start by clearing the main work surface and floor. Sort items into categories. Remove trash, broken tools, and anything that does not belong. Sweep the floor and look at the empty zones with fresh eyes. This is the moment when the workshop begins to feel possible again.
Day Two: Install and Assign
Install the first round of storage: a pegboard, shelves, hooks, bins, or a tool chest. Assign homes for the most-used items first. Label containers. Set up a safety station and cleaning station. Do not try to perfect every inch. A working first version beats a perfect plan that never leaves the notebook.
Personal Workshop Experience: What We Learned While Getting Started
When we first started organizing our workshop, we made the classic beginner mistake: we confused movement with progress. We moved boxes from one side of the room to the other, stacked tools into new piles, admired the slightly different piles, and called it “phase one.” It felt productive until the next project began and we still could not find the countersink bit.
The turning point came when we stopped asking, “Where can this fit?” and started asking, “Where will we use this?” That one question changed the entire shop. The drill bits moved next to the drills. Sandpaper moved near the sander. Clamps moved beside the assembly table. Measuring tools moved to the front of the workbench instead of hiding in a drawer full of Allen wrenches from furniture we no longer owned.
We also learned that the workbench needed boundaries. At first, the bench became a landing strip for everything: screws, coffee cups, gloves, receipts, project sketches, and one suspicious bolt that nobody wanted to throw away because it looked “structural.” Once we added a small tray for active-project items and committed to clearing it after each session, the bench became usable again. That single habit made the whole workshop feel calmer.
Another big lesson was that visibility matters. We tried storing everything in closed bins because it looked neat. Unfortunately, neat boxes can hide chaos with impressive confidence. Clear bins and open wall storage worked better for frequently used items. Closed bins still had a role, especially for dusty supplies or rarely used gear, but the daily tools needed to be seen. Out of sight often meant out of mind, then out of patience.
Labels helped more than expected. We started with basic labels, then improved them as we used the shop. “Screws” became “wood screws,” then “wood screws: exterior,” and finally “deck screws 2 in.” That level of detail sounds fussy until you are holding two boards together and need the right fastener before the glue starts judging you.
We also discovered that mobile storage is underrated. A rolling cart became the hero of the workshop. During painting projects, it held brushes, tape, trays, rags, and gloves. During repairs, it carried drills, bits, fasteners, and a flashlight. When the project ended, the cart rolled back to its corner. It was like having a tiny assistant, except it never offered opinions about shelf height.
The safety station was another small change with a big payoff. Instead of leaving safety glasses in random drawers, we placed eye protection, hearing protection, masks, gloves, and a first-aid kit near the entrance. That made safety gear easy to grab before starting work. It also served as a visual reminder that “quick cuts” and “just one hole” still deserve protection.
Most importantly, we learned that organizing a workshop is not a one-time event. It is a living system. Every new project tests the layout. Every new tool needs a home. Every season brings different supplies to the front. The goal is not perfection. The goal is a workshop that can get messy during real work and then return to order without requiring a full weekend and emotional support snacks.
Starting to organize our workshop gave us more than clean shelves. It gave us confidence. Projects felt less intimidating because the tools were ready. Cleanup became faster. Shopping became smarter because we knew what we already had. Even small tasks felt better in a space that made sense. And yes, we eventually found the missing clamp. It was behind a box labeled “miscellaneous,” because of course it was.
Conclusion
Starting to organize our workshop is less about creating a perfect magazine-worthy space and more about building a system that supports real projects. Begin with an honest audit, remove what does not belong, create clear zones, use vertical storage, label supplies, protect safety gear, and keep the workbench ready for actual work. The best workshop organization ideas are practical, flexible, and easy to maintain.
A great workshop does not need to be huge or expensive. It needs smart storage, clear pathways, safe habits, and tools that return to the same place after every project. Start small, improve as you go, and let the space evolve. Before long, the workshop will feel less like a cluttered cave of forgotten hardware and more like a place where ideas can become shelves, repairs, gifts, furniture, garden projects, and maybe even a few heroic weekend victories.