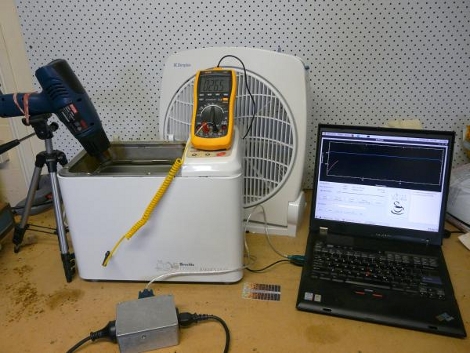
Roasting coffee beans sounds like something that should require a lab coat, a clipboard, and at least one person saying, “We’re losing thermal momentum!” But at its heart, coffee roasting is beautifully simple: apply heat to green coffee beans, guide them through a series of physical and chemical changes, stop before they taste like campfire regrets, and let them rest long enough to become drinkable magic.
This is another take on roasting those beansnot a rigid rulebook, not a manifesto written by someone who alphabetizes their thermocouples, but a practical, flavor-first guide for curious coffee lovers. Whether you use a small home coffee roaster, a popcorn popper, a stovetop pan, or a serious drum roaster that looks like it could power a submarine, the core ideas remain the same. Roast level, heat control, timing, airflow, bean movement, cooling, and rest all shape what ends up in your cup.
The goal is not to chase the darkest bean on the block or imitate a café bag with poetic tasting notes like “moonlit plum and philosophical caramel.” The goal is to understand how roasting coffee beans works, how roast profiles change flavor, and how to make better decisions batch after batch.
What Actually Happens When Coffee Beans Roast?
Green coffee beans are not very exciting at first glance. They are dense, pale green to yellowish seeds with grassy, raw aromas. If brewed as-is, they would taste less like your favorite morning ritual and more like boiled yard work. Roasting transforms those hard seeds into fragrant, brittle, brown coffee beans through heat-driven changes.
During the coffee roasting process, beans lose moisture, expand in size, change color, release carbon dioxide, and develop hundreds of aromatic compounds. Sugars and amino acids react during the Maillard reaction, creating roasted, nutty, chocolatey, bready, and caramel-like flavors. Acids shift, sweetness becomes more noticeable, bitterness increases as roasting goes darker, and volatile aroma compounds begin doing their tiny jazz-hands routine.
In simple terms, roasting is the bridge between agricultural potential and brewed flavor. The farm gives the bean its raw ingredients. The roast decides whether those ingredients become bright and fruity, round and chocolatey, smoky and bold, or sadly, “oops, all ash.”
The Three Big Stages of Coffee Roasting
Most coffee roasters describe the roast in three broad stages: drying, browning, and development. These are not separate rooms the beans walk into wearing little badges, but overlapping phases that help you understand what the roast is doing.
1. The Drying Stage
Green coffee contains moisture, and the first part of roasting is largely about removing it. The beans warm up, steam forms inside them, and the color slowly shifts from green to yellow. Aromas may smell like grass, hay, cereal, or warm bread dough. At this point, nobody is yelling, “I detect blueberry jam!” unless they are trying very hard to impress a date.
If the drying stage moves too slowly, the coffee may taste dull, flat, or baked. If it moves too fast, the outside of the bean can scorch before the inside has caught up. Good roasting is not just about heat; it is about heat arriving in a way the bean can actually use.
2. The Browning or Maillard Stage
Once the beans yellow, browning reactions become more obvious. This is where the Maillard reaction takes center stage. The beans deepen from yellow to tan to light brown, and the aroma shifts from grainy to toasted, nutty, and sweet. This phase has a major influence on perceived sweetness, body, complexity, and balance.
A shorter browning phase may preserve more brightness and origin character. A longer one can build deeper sweetness, rounder body, and flavors such as caramel, cocoa, toast, or roasted nuts. Neither approach is automatically superior. A delicate Ethiopian coffee might shine with a lighter touch, while a dense Colombian or Brazilian coffee may welcome more development and sweetness.
3. The Development Stage
Development begins around first crack, the famous moment when beans audibly pop as pressure, steam, and gases force structural changes inside the seed. First crack sounds a little like popcorn, though usually less dramatic and without the movie theater butter situation. From here, the roaster decides how far to continue.
Stop soon after first crack, and you may have a light roast with bright acidity, floral notes, fruit character, and a lighter body. Continue longer, and sweetness, body, chocolate notes, and roast flavors become more prominent. Push toward or into second crack, and the coffee moves into darker roast territory with lower perceived acidity, heavier body, surface oils, bittersweet notes, smoke, spice, and eventually carbon if you keep going like a caffeinated villain.
First Crack and Second Crack: The Coffee Roaster’s Soundtrack
If coffee roasting had a drum solo, it would be first crack. It is one of the most important landmarks in the roast because it signals that the beans have expanded, released pressure, and entered a stage where flavor development accelerates.
First crack usually begins when the beans are light to medium brown. The sounds may start slowly, then become more frequent. Many roasters reduce heat before or during first crack to avoid racing through development too quickly. Others adjust airflow to manage smoke and chaff while keeping the roast progressing smoothly.
Second crack is quieter, sharper, and more crackly. It indicates a deeper breakdown of the bean structure and is associated with darker roasts. Some people love the bittersweet intensity that comes near second crack. Others prefer to stop earlier to preserve the bean’s original character. The key is intention. A dark roast should be dark because you chose richness and roast depth, not because you were distracted by a text message and returned to a pan full of bean-shaped charcoal.
Light, Medium, and Dark Roast: What Changes in the Cup?
Roast level has a huge effect on coffee flavor, but the labels can be confusing because there is no single universal standard. One roaster’s medium may be another roaster’s medium-dark. Still, the general flavor patterns are useful.
Light Roast Coffee
Light roast coffee tends to highlight origin character. You may taste citrus, berries, florals, tea-like qualities, honey, or crisp acidity. The body is often lighter, and the bean surface usually remains dry. Light roasts can be excellent for pour-over, drip coffee, and cupping because those methods showcase nuance.
The challenge is development. A coffee can be light without being underdeveloped, but if the roast is stopped too early, it may taste grassy, sour, peanut-like, or harsh. A good light roast is lively. A bad light roast tastes like someone brewed trail mix in a rainstorm.
Medium Roast Coffee
Medium roast coffee is the great crowd-pleaser. It often balances acidity, sweetness, aroma, and body. Chocolate, caramel, toasted nuts, dried fruit, brown sugar, and gentle spice are common flavor impressions. Medium roasts work beautifully across brewing methods: drip machines, pour-over, AeroPress, French press, and many espresso blends.
If you are new to roasting coffee beans at home, medium roast is a forgiving target. It gives you enough development to avoid raw flavors while still preserving some personality from the bean’s origin.
Dark Roast Coffee
Dark roast coffee emphasizes roast character over origin character. Expect heavier body, lower perceived acidity, bittersweet chocolate, smoke, roasted nuts, and sometimes spice. Surface oils may appear as the roast approaches deeper stages. Dark roasts can be satisfying for espresso, milk drinks, French press, and drinkers who enjoy bold flavors.
The danger zone is over-roasting. Dark and delicious is one thing. Burned and bitter is another. Once coffee loses its sweetness and becomes flat, ashy, or acrid, no amount of oat milk can fully rescue it. Oat milk is heroic, but it is not a miracle worker.
A Flavor-First Approach to Roast Profiles
A roast profile is the path your beans take from green to finished. It includes time, temperature, heat changes, airflow, rate of rise, color, smell, sound, and final drop point. Professional roasters often track these details with software and probes. Home roasters can still learn a lot with a notebook, a timer, a scale, and honest tasting.
Instead of asking, “What exact temperature should I hit?” ask better questions:
- When did the beans turn yellow?
- When did first crack begin?
- How long did development last after first crack?
- How did the coffee taste the next day?
- Was it sour, sweet, smoky, thin, bitter, or balanced?
- What one variable should I change next time?
This is where roasting becomes less like following a recipe and more like learning an instrument. You do not become good by staring at the guitar. You become good by playing, listening, adjusting, and occasionally making sounds that frighten the dog.
Choosing Green Coffee Beans for Home Roasting
Good roasting starts with good green coffee beans. Look for reputable suppliers that provide origin, variety, processing method, harvest information, and tasting notes. You do not need to buy the most expensive coffee in the warehouse. In fact, beginners should start with approachable, moderately priced beans so each mistake does not feel like setting fire to a small savings account.
Washed coffees often taste cleaner and brighter, making them great for learning how roast level affects acidity and sweetness. Natural processed coffees can bring fruitier, heavier, more fermented flavors and may roast a little differently. Honey processed coffees often sit between the two, with sweetness and moderate fruit character.
Density matters too. High-grown, dense beans may tolerate more heat and need a more careful roast approach. Lower-density beans may scorch more easily. Bean size, moisture content, and processing style can all affect how heat moves through the batch.
Home Coffee Roasting Methods: From Simple to Serious
You can roast coffee beans at home using several methods, each with strengths and quirks.
Stovetop Pan Roasting
Pan roasting is affordable and hands-on. It teaches you color, smell, movement, and heat control quickly. The downside is unevenness. You must stir constantly, manage smoke, and accept that your first batches may look like a family reunion of beans that all chose different outfits.
Popcorn Popper Roasting
Air popcorn poppers are popular among beginners because they agitate beans automatically and roast quickly. They are inexpensive, compact, and fun. However, they can roast very fast, which may limit control over development. Use proper ventilation and avoid models that are unsafe for this purpose.
Dedicated Home Coffee Roasters
Small electric roasters offer better control over time, heat, airflow, and cooling. Some are fluid-bed roasters, which use hot air. Others are drum-style roasters, which use a rotating chamber and conductive heat. These machines cost more, but they make repeatable results easier.
Drum Roasters
Drum roasters are common in professional settings. They allow nuanced roast profiling and larger batch sizes. They also require more attention, maintenance, ventilation, and skill. In other words, they are wonderful tools, but they are not magical flavor vending machines.
Cooling, Resting, and Storing Roasted Coffee
Once the roast is finished, cooling matters. Beans continue to roast from internal heat if left in a hot pile. Cool them quickly using a cooling tray, colander, fan, or the built-in cooling cycle of your roaster. Fast cooling helps lock in the roast level you intended.
Freshly roasted coffee releases carbon dioxide for hours or days after roasting. This is called degassing. Brewing too soon can produce uneven extraction and foamy, unstable results, especially for espresso. Many coffees taste better after resting 24 to 72 hours, while espresso roasts may benefit from several days of rest.
Store roasted coffee in an airtight container away from heat, light, moisture, and strong odors. Do not store it next to spices unless you want your morning cup to whisper “cumin” for reasons nobody requested. Buy or roast amounts you can use while fresh, and grind just before brewing whenever possible.
Common Coffee Roasting Mistakes
Roasting Too Fast
A roast that races too quickly may scorch the outside while leaving the inside underdeveloped. The coffee can taste sharp, grassy, or hollow. Fast roasts are not always bad, but uncontrolled speed often creates imbalance.
Roasting Too Slowly
Dragging the roast can flatten flavor. The coffee may taste baked, papery, dull, or lifeless. If your beans spend too long in low-energy heat, you may preserve color while losing sparkle.
Ignoring the Senses
Temperature readings are helpful, but smell, sound, color, and smoke are just as important. Your machine’s probe does not drink the coffee. You do. Use data, but do not become a hostage to numbers.
Changing Too Many Variables
If one batch tastes sour and the next batch changes the charge temperature, batch size, airflow, development time, and bean origin, you will have no idea what helped. Change one major variable at a time. Your future self will thank you and maybe buy you a cookie.
How to Taste Your Roasts Like a Practical Human
After roasting, taste intentionally. Brew the coffee the same way each time when comparing batches. Note aroma, acidity, sweetness, body, bitterness, aftertaste, and balance. You do not need fancy vocabulary. “Too sour,” “nice caramel,” “thin,” “smoky,” and “better than last time” are perfectly useful notes.
If the coffee tastes sour and grassy, try slightly more development after first crack or a gentler heat approach earlier in the roast. If it tastes bitter and smoky, stop sooner or reduce heat later in the roast. If it tastes flat, examine whether the roast took too long or whether the beans rested too long after roasting. If it tastes amazing, write down exactly what happened before your memory turns into espresso fog.
Another Take: Roast for the Cup, Not the Color
One of the biggest beginner traps is roasting by color alone. Color matters, but it does not tell the whole story. Two beans can look similar and taste completely different depending on how they reached that color. A medium-looking roast can taste underdeveloped if it moved too quickly through key stages. A darker-looking roast can still taste sweet and balanced if heat was managed carefully.
Instead of chasing a shade of brown, chase the cup experience. Want a juicy pour-over? Preserve acidity and aromatics while ensuring enough development for sweetness. Want a comforting daily brew? Aim for medium roast balance with caramel and chocolate notes. Want espresso that holds up in milk? Develop enough body and sweetness without burning away all character.
Roasting coffee beans is not about proving you are the smartest person in the kitchen. It is about making coffee that tastes good. Radical, I know.
Experience Notes: Lessons From Roasting Those Beans the Real-World Way
The first thing roasting teaches you is humility. You can read every coffee roasting guide, memorize roast levels, learn the difference between first crack and second crack, and still produce a batch that smells like toasted cardboard wearing perfume. That is normal. Coffee is agricultural, heat is moody, and home equipment has personality. Sometimes that personality is “tiny dragon with a thermostat problem.”
One of the most useful experiences is roasting the same green coffee three different ways. Try a light roast stopped shortly after first crack, a medium roast with more development, and a darker roast approaching second crack. Brew them side by side. The light roast may show citrus, floral, or tea-like notes. The medium roast may bring sweetness, chocolate, and better balance. The darker roast may offer body, bitterness, and roast intensity. Suddenly, roast level stops being an abstract label and becomes something you can smell and taste.
Another helpful habit is keeping a roast log. It does not need to look like a spaceship control panel. Record the bean, batch size, start time, yellowing time, first crack time, drop time, cooling method, rest time, and tasting notes. Add simple observations: “too fast,” “smelled smoky early,” “best at day three,” or “do not roast while answering emails.” Over time, these notes become your personal roasting map.
Ventilation is another lesson people learn quickly, usually when a family member enters the kitchen waving a towel under the smoke alarm. Coffee roasting creates smoke, chaff, and strong aromas. Some smells are wonderful. Others are less “artisan café” and more “did someone toast a squirrel?” Roast near a window, use a fan, clean chaff, and do not ignore smoke buildup.
Cooling also becomes more important with experience. A batch can look perfect when dropped, then continue cooking if it sits hot too long. Quick cooling keeps the roast from drifting darker than planned. This is especially important for small-batch home roasting because a few extra minutes of retained heat can change the final cup.
Resting is where patience earns its mug. Brewing immediately after roasting can be fun, but many coffees taste sharper, gassier, or less integrated right away. After a day or two, flavors often settle. Espresso especially tends to behave better after more rest because excess carbon dioxide can disrupt extraction. The waiting period is annoying, yes, but so is drinking a cup that tastes like carbonated lemon bark.
Finally, experience teaches that perfection is less important than repeatability. A single lucky roast is exciting, but the real win is knowing how to get close again. The best home roasters are not necessarily the ones with the most expensive equipment. They are the ones who taste carefully, adjust calmly, and avoid blaming the beans for every mistake. Sometimes the bean is innocent. Sometimes the roast profile did the crime.
So here is the practical takeaway: roast small batches, take notes, taste everything, and let your preferences guide you. Coffee roasting is a craft, but it is also dinner-table friendly. It rewards curiosity more than ego. And when you finally brew a cup from beans you roasted yourselfsweet, aromatic, balanced, aliveyou will understand why people fall down this rabbit hole with a cooling tray in one hand and a notebook in the other.
Conclusion
Roasting coffee beans is part science, part sensory craft, and part controlled chaos with a delicious ending. By understanding drying, Maillard reactions, development time, first crack, second crack, roast levels, cooling, resting, and storage, you can make better coffee at home or simply appreciate your favorite roaster more deeply.
The best approach is not to worship light roasts, fear dark roasts, or chase numbers without tasting. The best approach is to roast with intention. Start with quality green coffee beans, keep the batch moving, manage heat carefully, cool quickly, rest patiently, and taste honestly. Your first roast may not be perfect. Your fifth may surprise you. Your fiftieth may make you wonder why you ever bought stale supermarket beans in the first place.
Note: This article is an original, rewritten synthesis based on established coffee roasting principles, practical home-roasting guidance, and real specialty coffee knowledge.