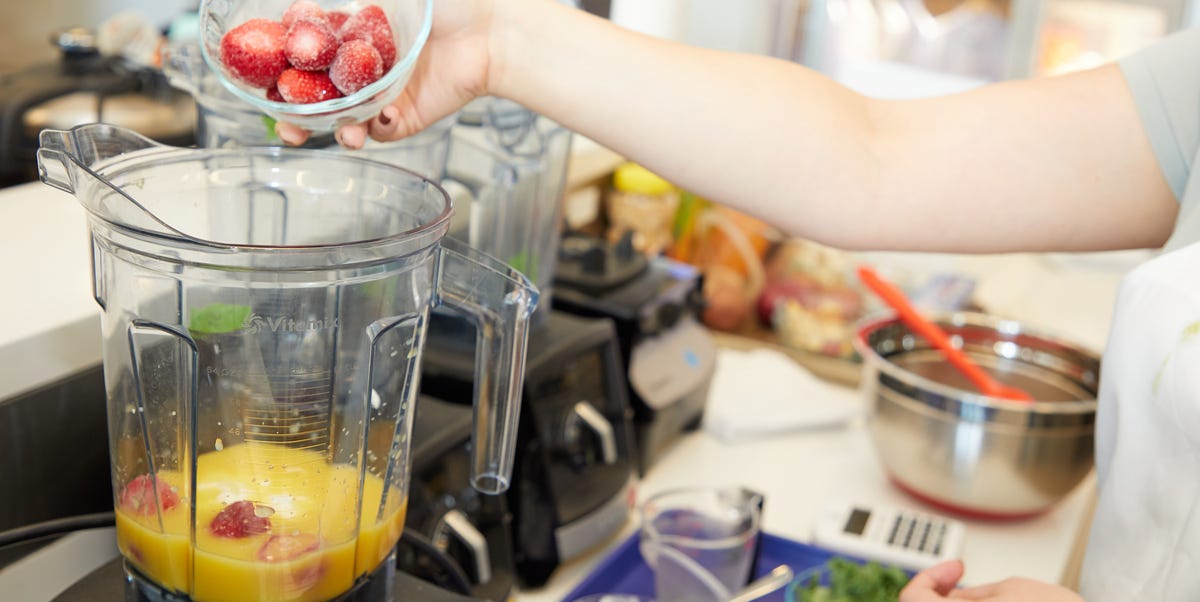
A great smoothie should be silky, cold, balanced, and easy to sipnot a mysterious swamp of spinach ropes, protein powder boulders, and one heroic frozen strawberry refusing to surrender. The good news? Most smoothie problems are not caused by “bad recipes.” They are caused by small blending mistakes: the wrong ingredient order, too little liquid, too much ice, overloaded jars, dull routines, and the classic blender crime of pressing “high” immediately and hoping physics has had its coffee.
After reviewing expert kitchen appliance testing, blender manufacturer guidance, food-safety advice, and nutrition recommendations, one thing is clear: the best smoothies come from technique as much as ingredients. Whether you use a high-performance countertop blender, a compact personal blender, or a budget model that sounds like a lawn mower with ambition, the right method can make your smoothie smoother, tastier, and easier on your machine.
This guide breaks down the top-tested smoothie blending tips from a kitchen appliance expert’s point of view, with practical examples you can use tomorrow morningpreferably before your banana turns into modern art on the counter.
Why Smoothie Technique Matters More Than You Think
Many people assume that a powerful blender fixes everything. Power helps, of course, especially with frozen fruit, ice, fibrous greens, and thick smoothie bowls. But even a premium blender can struggle when ingredients are packed in the wrong order or when there is not enough liquid to create movement around the blades.
A blender works best when it creates a vortex. That swirling motion pulls ingredients down toward the blade, chops them evenly, and circulates them back through the jar. When the vortex fails, you get cavitation, air pockets, blade stalls, overheating, or a smoothie with the texture of wet confetti. Not ideal unless your breakfast theme is “garden mulch.”
The goal is simple: help the blender help you. Use smart layering, proper liquid ratios, strategic ingredient sizes, and the right speed progression. The result is a smoothie that tastes like a café treat instead of a kitchen appliance negotiation.
The Best Smoothie Ingredient Order for Countertop Blenders
For most full-size countertop blenders, the best ingredient order is:
- Liquids
- Yogurt, soft fruits, or other soft ingredients
- Powders, seeds, and nut butters
- Leafy greens
- Fresh fruits and vegetables
- Frozen fruit and ice on top
This order places liquid closest to the blades, helping them move freely at startup. Soft ingredients blend quickly and help create a base. Powders get pulled into the liquid instead of flying up to the lid like edible drywall dust. Greens sit in the middle where they can be pressed downward, and frozen items on top add weight, pushing lighter ingredients into the blade path.
Example: A Classic Berry Green Smoothie
For a 24- to 32-ounce blender jar, try this order: 1 cup milk or unsweetened almond milk, 1/2 cup Greek yogurt, 1 tablespoon chia seeds, 1 handful spinach, 1/2 banana, 1 cup frozen mixed berries. Start low, then increase speed gradually. In about 45 to 60 seconds, you should have a smoothie that is cold, creamy, and free of leafy surprises.
Reverse the Order for Personal Blenders
Personal blenders are different because many of them blend upside down. You load the cup, screw on the blade lid, flip it, and place it on the motor base. That means the ingredient closest to the blade after flipping is whatever you loaded last.
For personal blenders, use the reverse order: frozen fruit and ice first, then greens, fresh fruit, powders, soft ingredients, and liquid last. Once flipped, the liquid will be near the blades, exactly where it needs to be.
This simple adjustment prevents jammed blades and helps compact blenders perform better. It also reduces the need to stop, shake the cup, apologize to the blender, and restart.
Use Enough Liquid, But Don’t Drown the Smoothie
Liquid is the traffic controller of smoothie blending. Too little liquid and ingredients sit around like they are waiting for a bus. Too much liquid and your smoothie becomes fruit soup. The right amount depends on your blender, ingredients, and preferred thickness, but a good starting point is 3/4 to 1 cup of liquid for every 2 cups of solid ingredients.
For a drinkable smoothie, use more liquid. For a thick smoothie bowl, use less liquid and rely on frozen banana, yogurt, avocado, or frozen mango for creaminess. If your blender is struggling, add liquid 1 tablespoon at a time through the lid opening if your model allows it. Small adjustments are better than panic-pouring half a carton of oat milk into the jar.
Best Liquids for Smoothies
Water works, but it does not add much flavor or creaminess. Unsweetened dairy milk, soy milk, almond milk, oat milk, coconut water, kefir, and cold brewed tea can all work depending on the flavor profile. For a protein-rich smoothie, dairy milk, soy milk, kefir, or Greek yogurt can help. For a lighter post-workout blend, coconut water and fruit can taste refreshing without making the smoothie heavy.
Cut Ingredients Smaller Before Blending
Yes, your blender has blades. No, it is not a wood chipper. Large chunks of apple, whole frozen bananas, giant carrot pieces, and oversized ice cubes make blending harder and less consistent. Cut firm fruits and vegetables into smaller pieces, especially when using a personal or lower-watt blender.
Bananas should be sliced before freezing. Mango and pineapple should be frozen in chunks, not in one icy brick. Dates should be pitted and chopped or soaked briefly. If you are adding raw carrots, beets, or apples, cut them into small pieces and add enough liquid to keep everything moving.
Smaller pieces blend faster, protect the motor, reduce heat buildup, and create a smoother texture. They also reduce the odds of your blender producing the noise of a washing machine full of sneakers.
Start Low, Then Increase Speed
One of the most common smoothie mistakes is starting on the highest setting right away. It feels efficient, but it can fling ingredients upward, trap air around the blades, and create uneven blending. Instead, start on low speed for a few seconds, then gradually increase to medium and high.
This gradual ramp-up gives the blades time to grab the liquid and soft ingredients first. Once the vortex forms, higher speed can finish the job. For thick smoothies, use the tamper if your blender has one. A tamper is not a decoration. It is the blender’s tiny traffic cop, guiding frozen fruit and greens toward the blades without risking a spoon-meets-blade disaster.
Balance Your Smoothie Like a Meal, Not a Milkshake in Disguise
A smoothie can be a nutrient-packed breakfast or a sugar-heavy dessert wearing athletic clothes. The difference is balance. A satisfying smoothie usually includes fiber, protein, healthy fat, and flavor.
Fruit brings natural sweetness and fiber. Vegetables add volume and nutrients. Protein can come from Greek yogurt, kefir, tofu, milk, soy milk, protein powder, or nut butter. Healthy fats can come from avocado, chia seeds, flaxseed, walnuts, almond butter, or peanut butter.
A Simple Smoothie Formula
Use this easy structure: 1 liquid + 1 fruit + 1 vegetable + 1 protein + 1 healthy fat + optional flavor booster. For example, blend unsweetened soy milk, frozen berries, spinach, Greek yogurt, ground flaxseed, and a pinch of cinnamon. It tastes good, keeps you fuller, and does not require adding three tablespoons of honey while pretending the banana was not already sweet.
Go Easy on Ice
Ice can make smoothies colder and thicker, but too much ice waters down flavor and can make the texture gritty. Frozen fruit is often the better option because it chills and thickens while adding taste. Frozen banana, mango, pineapple, peaches, blueberries, cherries, and strawberries are smoothie MVPs.
If you do use ice, add it last in a countertop blender and first in a personal blender. Start with a small amount, such as 1/2 cup, then add more if needed. If your blender is not designed for heavy ice crushing, use smaller cubes or skip ice and rely on frozen fruit instead.
Handle Greens the Smart Way
Spinach is the beginner-friendly green because it blends easily and has a mild flavor. Kale is more fibrous and may need a stronger blender, smaller pieces, or a longer blend time. Swiss chard, romaine, and baby greens can also work well.
To avoid green confetti, place leafy greens after the liquid and soft ingredients in a standard blender. In a personal blender, place greens before the liquid so they end up above the liquid after flipping. If your blender struggles, blend the liquid and greens first for 15 to 20 seconds, then add the remaining ingredients.
For flavor, pair greens with sweet or bright ingredients. Spinach disappears nicely with berries, banana, mango, pineapple, citrus, or vanilla. Kale behaves better with pineapple, apple, ginger, lemon, or creamy banana. Kale does not “disappear” as politely as spinach; it prefers to make a statement.
Use Powders Without Creating Clumps
Protein powder, cocoa powder, collagen powder, matcha, powdered peanut butter, and greens powders can clump if added incorrectly. Do not dump powder on top of frozen fruit and expect magic. Add powders after the liquid and soft ingredients, before the heavy frozen items.
This placement lets the powder hydrate before the frozen ingredients press everything down. If your powder still clumps, blend the liquid and powder first for a few seconds, then add the rest. This is especially useful for thicker protein powders or powdered supplements that behave like they signed a non-cooperation agreement.
Don’t Overload the Blender Jar
Every blender jar has a maximum fill line for a reason. Smoothies expand as they blend, especially when they include foamy ingredients, protein powder, or lots of frozen fruit. Overfilling can cause leaks, poor circulation, and lid drama. Nobody wants blueberry smoothie on the cabinets unless the kitchen is auditioning for abstract art.
For best results, leave headspace at the top. If you are making multiple servings, blend in batches rather than forcing everything into one jar. A less crowded jar allows ingredients to circulate properly and produces a smoother drink.
Clean the Blender Immediately
The best time to clean a blender is right after pouring the smoothie. The worst time is three hours later, when chia seeds have turned into edible cement. Rinse the jar, add warm water and a drop of dish soap, then blend for 20 to 30 seconds. Rinse again and air-dry.
For sticky nut butter, cocoa, turmeric, or berry stains, use warm water and a soft sponge. Avoid abrasive scrubbers that can scratch plastic jars. If your blender has removable blades, follow the manufacturer’s cleaning instructions carefully. Some parts may be dishwasher-safe, while others may not be. When in doubt, hand-washing is the gentle route.
Wash Produce Properly Before Blending
Smoothies often use raw fruits and vegetables, so food safety matters. Rinse produce under running water before cutting, peeling, or blending. Firm produce such as cucumbers, apples, and melons can be scrubbed with a clean produce brush. Do not wash fruits and vegetables with soap, detergent, or bleach. Produce is porous, and those products are not meant to become secret smoothie ingredients.
Also, cut away bruised or damaged areas. Wash hands, knives, and cutting boards before prep. If you are using pre-washed packaged greens, check the label. If it says ready-to-eat, you generally do not need to wash it again, but you should still handle it with clean hands and keep it cold.
Store Smoothies Safely
Smoothies are best right after blending, when the texture is cold and bright. But if you need to store one, pour it into a clean, airtight container and refrigerate it promptly. Perishable foods and drinks should not sit at room temperature for more than two hours. If the room is hot, the safe window is shorter.
Most homemade smoothies taste best within 24 hours. Separation is normal; just shake or stir before drinking. If the smoothie smells off, tastes fizzy when it should not, or looks questionable, do not negotiate with it. Toss it.
Common Smoothie Problems and Quick Fixes
Problem: The Smoothie Is Too Thick
Add liquid slowly, 1 or 2 tablespoons at a time. Blend between additions. This keeps the smoothie creamy instead of turning it into juice with ambition.
Problem: The Smoothie Is Too Thin
Add frozen banana, frozen mango, Greek yogurt, avocado, chia seeds, oats, or more frozen fruit. Blend briefly until thickened.
Problem: The Smoothie Tastes Flat
Add a pinch of salt, a splash of lemon or lime juice, cinnamon, vanilla extract, ginger, mint, or unsweetened cocoa powder. Acid and aromatics can wake up flavor without adding lots of sugar.
Problem: The Smoothie Is Bitter
Reduce strong greens, add naturally sweet fruit, or include creamy ingredients like banana, yogurt, or nut butter. Kale, beet greens, and some protein powders can taste bitter if not balanced.
Problem: The Blender Stalls
Stop the machine, unplug if needed, and check whether an air pocket has formed. Add a splash of liquid, use the tamper if available, or remove some frozen ingredients and blend in stages.
Best Expert Tips for Better Smoothie Texture
For a creamier smoothie, freeze ripe bananas in slices. Use yogurt or kefir instead of only water. Add avocado for silkiness without strong flavor. Soak chia seeds or dates before blending if your blender is not high-powered. Use frozen fruit instead of too much ice. Blend long enough for fibrous ingredients to break down, but not so long that the smoothie warms up.
Texture also depends on ingredient pairing. Berries can be seedy. Pineapple can be fibrous. Kale can be chewy. Apples can become foamy. That does not mean you cannot use them. It means they may need enough liquid, smaller pieces, and a stronger supporting cast, such as banana, yogurt, mango, or nut butter.
of Real-World Smoothie Blending Experience
After testing smoothie methods in real kitchens, one pattern becomes obvious: people usually blame the blender before they blame the loading order. But the order is often the culprit. A midrange blender with the right ingredient sequence can outperform an expensive machine that has been packed like a suitcase five minutes before the airport ride arrives.
The most reliable routine starts before the blender is even plugged in. I like to prep ingredients in zones: liquid, soft ingredients, powders, greens, frozen items. That way, I do not accidentally bury protein powder under a glacier of frozen mango. When powder hits liquid early, it blends smoothly. When it sits on top, it often sticks to the lid or creates chalky pockets. This is especially noticeable with chocolate protein powder, which has a magical ability to find the only dry corner inside a spinning blender.
Frozen bananas are another major lesson. Whole frozen bananas are trouble. They clunk, spin, jam, and make small blenders question their career choices. Sliced frozen bananas, on the other hand, blend beautifully and create that thick, milkshake-like texture people want. The same goes for frozen fruit bags. If the fruit has frozen into one solid block, break it apart before adding it. Your blender should not have to solve an ice sculpture.
Greens also taught me humility. Spinach is forgiving. Kale is not. If you are new to green smoothies, start with baby spinach and build confidence. Once you move to kale, remove tough stems, tear leaves into smaller pieces, and blend greens with liquid first if your machine struggles. This two-step method feels fussy until you taste the difference. No one misses chewing their smoothie.
Another practical discovery: flavor needs contrast. A smoothie made only from sweet fruit can taste heavy or dull. A small splash of lemon juice, a pinch of cinnamon, a bit of ginger, or a tiny pinch of salt can make the whole drink taste brighter. This is the same logic used in cooking. Smoothies are not just “stuff in a blender.” They are mini recipes, and mini recipes still need balance.
Cleaning habits matter, too. The easiest blender to clean is the one you rinse immediately. Add warm water and one drop of dish soap, blend, rinse, and you are done. Wait until later, and oats, chia, banana, and peanut butter become a breakfast-themed construction adhesive. A clean blender also smells better, performs better, and does not pass yesterday’s garlic sauce into today’s strawberry smoothie. That is not fusion cuisine. That is a cry for help.
The final experience-based tip is to make smoothie packs, but not carelessly. Combine frozen fruit and greens in freezer bags or containers, but leave out liquid, yogurt, powders, and nut butter until blending day. This keeps texture better and prevents powders from clumping. Label packs with flavor ideas, such as “berry spinach,” “mango ginger,” or “peanut butter banana cocoa.” Morning-you will appreciate Night-before-you. They rarely get along, so consider it a peace treaty.
Conclusion: Blend Smarter, Sip Happier
The best smoothie blending tips are not complicated. Add ingredients in the right order, use enough liquid, cut ingredients smaller, start on low speed, balance nutrition, avoid overloading the jar, and clean the blender right away. These small habits can transform your smoothie from chunky chaos into a creamy, reliable breakfast or snack.
A great smoothie is part recipe, part technique, and part knowing when your blender is quietly begging for more liquid. Once you understand how ingredients move in the jar, you can troubleshoot almost any problem. Your reward is a smoother drink, a happier motor, and fewer surprise spinach strings in your straw. That is what experts call progressand what the rest of us call breakfast without drama.