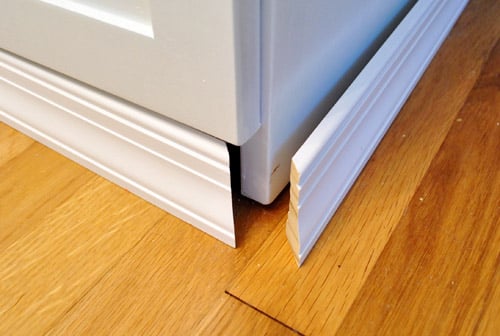
Adding molding to the top of your cabinets is one of those home upgrades that looks expensive, sounds fancy, and yet does not require you to sell a kidney to pay a custom cabinetmaker. With the right measurements, a good miter saw, a steady hand, and a little patience, you can turn ordinary upper cabinets into something that looks built-in, polished, and intentionally designed.
Cabinet crown molding is the trim installed along the top edge of wall cabinets. It hides gaps, softens boxy cabinet lines, draws the eye upward, and gives your kitchen, laundry room, pantry, or built-in storage wall a finished look. Think of it as the haircut your cabinets did not know they needed.
This guide explains how to add molding to the top of your cabinets step by step, including how to choose the right molding, measure accurately, cut corners, attach nailing strips, install trim, and finish everything so it looks clean instead of “I tried my best and the caulk is emotionally supporting me.”
Why Add Molding To The Top Of Cabinets?
Cabinets are basically boxes with doors. Useful? Absolutely. Exciting? Not always. Molding changes that by adding dimension and architectural detail. It can make stock cabinets look custom, help bridge the visual gap between cabinets and ceiling, and create a more cohesive kitchen design.
Cabinet molding is especially helpful when upper cabinets stop several inches below the ceiling. Without trim, that space can become a shadowy shelf for dust, cereal boxes, and the mysterious fondue pot nobody has used since 2008. With crown molding or riser molding, the cabinets look taller and more intentional.
Types Of Molding For Cabinet Tops
Crown Molding
Crown molding is the classic angled trim that sits between a vertical surface and a horizontal surface. On cabinets, it is usually attached to the top face frame, a riser board, or a hidden nailing strip. It is the most popular choice for a traditional, transitional, or high-end kitchen look.
Riser Molding
Riser molding, sometimes called starter molding, is a vertical trim piece installed above the cabinet before crown molding. It raises the overall trim height and gives the crown a solid place to attach. Riser molding is useful when cabinets do not reach the ceiling or when the ceiling is uneven.
Scribe Molding
Scribe molding is thin, flexible trim used to hide small gaps between cabinets and uneven walls or ceilings. It is not usually the main decorative feature, but it is excellent for making imperfect spaces look professionally fitted.
Flat Trim Or Contemporary Molding
If your kitchen leans modern, you may not want ornate crown molding. A simple flat board, square trim, or slim cabinet topper can give a clean, custom look without turning your kitchen into a miniature courthouse.
Tools And Materials You Will Need
Before you start, gather everything you need. Cabinet molding installation goes much more smoothly when you are not balancing on a ladder wondering where your pencil went. Spoiler: it is behind your ear.
- Crown molding, riser molding, or cabinet trim
- Wood nailing strips, such as 1×2 or 3/4-inch stock
- Tape measure
- Pencil
- Miter saw or compound miter saw
- Brad nailer or finish nailer
- 1-inch to 1 1/4-inch brad nails, depending on your trim thickness
- Wood glue or construction adhesive
- Clamps or painter’s tape for holding corners
- Caulk
- Wood filler or color-matched wax pencil
- Sandpaper or sanding sponge
- Paint, stain, or touch-up kit
- Safety glasses and hearing protection
Step 1: Study Your Cabinets And Ceiling
Start by looking carefully at the cabinet layout. Are the cabinets level? Do they meet a side wall? Are there outside corners? Is there a gap between the cabinet tops and the ceiling? Is the ceiling straight, or does it wave like it is auditioning for a dance competition?
This inspection matters because cabinet molding has to work with the space you actually have, not the perfectly square kitchen that exists only in home improvement brochures. If your ceiling is uneven, you may need riser molding, scribe molding, or a small reveal instead of forcing crown molding tight to the ceiling.
Step 2: Choose The Right Molding Style
The best molding for the top of your cabinets should match the cabinet style, ceiling height, and overall design of the room. For shaker cabinets, a clean crown profile or flat stacked molding often looks best. For raised-panel cabinets, traditional crown molding with a more detailed profile can feel natural. For slab cabinets, keep it sleek and simple.
Also consider scale. A huge, dramatic crown on short cabinets can look top-heavy, while tiny trim on tall cabinets may disappear. As a general rule, the taller the ceiling and cabinet run, the more visual weight the molding can handle.
Step 3: Plan The Molding Layout
Before cutting anything, draw a simple layout. Mark where each piece of molding will go: front runs, side returns, inside corners, outside corners, and end caps. This helps you avoid cutting a left-side return when you needed a right-side return, which is a classic DIY moment followed by deep sighing.
For cabinets that stop before a wall, you will usually need a return piece that wraps the molding back toward the cabinet side. For cabinet runs that meet at a corner, you will need inside or outside miter joints. If the cabinets are different depths, plan transition pieces carefully so the molding does not look like it got lost halfway across the kitchen.
Step 4: Install Nailing Strips
Most cabinet crown molding needs a solid surface to attach to. Cabinet tops are often thin, hollow, or awkwardly positioned, so a nailing strip makes installation much easier. Cut wood strips to fit along the top front edge and sides of the cabinets. Attach them with wood glue and screws or brad nails, keeping them set back so they will not be visible once the molding is installed.
The nailing strip gives the crown molding something sturdy to grab. It also helps keep the trim straight. This is one of the most important steps, so do not skip it unless you enjoy chasing loose molding while standing on a ladder.
Step 5: Measure Carefully
Measure each cabinet run separately. Do not assume both sides of the kitchen are the same length. Houses shift, walls bow, cabinets vary, and tape measures do not care about your feelings. Measure the front edge from corner to corner, then measure side returns and any smaller sections.
Write every measurement down clearly. For mitered pieces, mark whether the measurement is from long point to long point, short point to short point, or straight end to miter point. This prevents confusion at the saw, where one wrong mark can turn a perfect 96-inch piece of molding into expensive firewood.
Step 6: Make Test Cuts First
Crown molding can be cut in two common ways: nested against the miter saw fence or lying flat with compound miter and bevel angles. For many standard 90-degree corners, nested cuts are easier for beginners because the molding sits on the saw the same way it sits on the cabinet, just upside down.
Make a few short test pieces before cutting your real molding. Label them “inside left,” “inside right,” “outside left,” and “outside right.” These sample blocks become your cheat sheet. Professional trim carpenters use setup blocks and templates because guessing is not a carpentry strategy; it is a shortcut to buying more molding.
Step 7: Cut The Molding
Cut long pieces slightly oversized when possible, then sneak up on the final fit. It is always easier to trim off another 1/16 inch than to stretch a board that is too short. Sadly, wood does not respond to motivational speeches.
Use a sharp, fine-tooth blade for cleaner cuts. Support long molding pieces so they do not sag during cutting. Keep your hands clear of the blade, wear safety glasses, and let the saw come to a complete stop before lifting it. Clean cuts make tight joints, and tight joints make the finished project look far more professional.
Step 8: Dry-Fit Every Piece
Before nailing anything, dry-fit the molding on top of the cabinets. Hold each section in place and check the corners. Look for gaps, twisted pieces, uneven reveals, and places where the ceiling or wall pushes the molding out of alignment.
Use painter’s tape or clamps to hold mitered corners together during dry fitting. If a joint is slightly open, adjust the cut angle or shave the back side carefully. If the ceiling is uneven, decide whether to leave a consistent reveal, use scribe molding, or caulk a small gap after installation.
Step 9: Nail The Molding In Place
Once everything fits, apply a thin bead of wood glue to miter joints and position the first molding piece. Nail through the molding into the hidden nailing strip, not into empty air. Space nails evenly, usually every 12 to 16 inches, and add nails near corners without getting so close that the wood splits.
Do not over-nail. Too many nails can create more holes to fill and increase the chance of visible damage. The goal is secure, not armored. If you are using prefinished molding, be extra careful with the nailer angle so you do not dent the visible face.
Step 10: Handle Inside And Outside Corners
Inside corners are where two pieces meet in an inward angle, such as the corner of an L-shaped cabinet run. Outside corners wrap around an exposed corner. Both require careful miter cuts, and both should be glued at the joint for strength.
For painted molding, tiny gaps can be caulked. For stained molding, gaps are far less forgiving because caulk does not disappear into stain the way it does into paint. If you are staining, spend extra time getting the cuts tight and use color-matched filler sparingly.
Step 11: Fill Nail Holes And Caulk Gaps
After the molding is installed, fill nail holes with wood filler, putty, or a matching wax pencil. For painted trim, caulk the seam where the molding meets the cabinet, wall, or ceiling. Use a small bead and smooth it with a damp finger or caulk tool.
Caulk is not meant to rebuild bad carpentry, but it is excellent for hiding hairline gaps. Think of it as makeup, not a structural beam.
Step 12: Paint Or Touch Up The Finish
If your molding is unfinished, sand it lightly, prime it, and paint or stain it to match the cabinets. If it is prefinished, use the manufacturer’s touch-up kit for nail holes, scuffs, and cut ends. Pay special attention to mitered corners, because raw cut edges can stand out if they are not painted or stained.
For the cleanest look, use a small angled brush and take your time. A careful finish is what turns a decent installation into one that makes visitors say, “Wait, were these cabinets custom?” You may smile mysteriously. You have earned that.
Common Mistakes To Avoid
Skipping The Nailing Strip
Without a secure backing strip, molding can be difficult to attach and may loosen over time. A hidden strip gives the trim a stable base and makes the whole project easier.
Cutting Before Planning
Crown molding has orientation. Upside down, backward, left, rightit can feel like a geometry exam wearing a wooden hat. Plan the layout and label each piece before cutting.
Assuming Corners Are Perfectly Square
Many corners are not exactly 90 degrees. Make test cuts and adjust as needed. A slightly altered miter angle can make a big difference.
Using The Wrong Size Molding
Oversized molding can overwhelm small cabinets. Undersized molding can look flimsy. Choose trim that matches the cabinet scale and room style.
Ignoring Ceiling Problems
If the ceiling is wavy, forcing crown molding tight against it may make the unevenness more obvious. A riser, reveal, or scribe trim can create a cleaner result.
How Much Does Cabinet Molding Cost?
The cost depends on the molding material, cabinet layout, and whether you hire a professional. Basic painted MDF or pine molding is usually more budget-friendly, while hardwood, custom profiles, and prefinished cabinet-brand molding cost more. You should also budget for nailing strips, adhesive, caulk, filler, paint, and extra material for mistakes and miter cuts.
A smart rule is to buy at least 10 to 15 percent more molding than your exact measurements require. Corners, test cuts, damaged pieces, and “oops” moments are part of the game. Extra trim is cheaper than stopping halfway through the project and discovering your store is out of the matching profile.
Best Materials For Cabinet Top Molding
MDF is smooth, affordable, and excellent for painted cabinets. Pine is easy to cut and widely available. Hardwood is stronger and beautiful for stained finishes, but it costs more and requires more careful finishing. PVC or polyurethane molding can work in moisture-prone areas, though it may not match wood cabinets as naturally.
If your cabinets are from a specific manufacturer, check whether matching crown molding is available. Factory-matched trim can save time and produce a cleaner color match, especially with painted finishes like white, gray, navy, or espresso.
When To Call A Professional
Adding molding to the top of cabinets is a manageable DIY project for confident homeowners, but some situations are worth professional help. Call a trim carpenter if your kitchen has complex angles, stacked molding, very high ceilings, uneven cabinet installation, expensive stained cabinetry, or no room for error.
There is no shame in hiring help. The goal is a beautiful kitchen, not proving you can defeat crown molding in single combat.
Real-World Experience: What It Feels Like To Add Cabinet Molding
The first thing most DIYers learn when adding molding to the top of cabinets is that measuring is not a step; it is a lifestyle. You measure the cabinet. Then you measure it again. Then you walk to the saw, forget which side was the long point, walk back, measure again, and question every life choice that led you to this ladder. That is normal. In fact, careful double-checking is one of the reasons the final project looks good.
A practical experience many homeowners share is that the job looks intimidating until the first piece goes up. Once the nailing strip is installed and the first front section of crown molding is dry-fitted, the whole process starts to make sense. You can suddenly see how the trim transforms the cabinet line. The cabinets look taller. The room feels more finished. The dusty gap above the cabinets starts looking less like wasted space and more like a design opportunity.
The trickiest part is almost always the corners. Even people who are comfortable with tools can get confused by crown molding orientation. The molding sits at an angle, but it is often cut upside down on the saw. Inside corners and outside corners look similar until they are not. This is where scrap pieces become heroes. Keeping labeled test blocks nearby can save time, money, and several dramatic sighs.
Another common lesson is that ceilings are rarely as straight as they appear. From the floor, everything may look level. Up close, you may find small dips, waves, or gaps. Instead of panicking, treat those imperfections as normal. A small reveal, a bead of caulk, or a scribe molding can solve many of these issues. The goal is not mathematical perfection; the goal is a clean, balanced look that feels intentional from normal viewing distance.
Painting and touch-up also take longer than expected. The installation may be done, but nail holes, seams, caulk lines, and cut edges need attention. This finishing stage is where the project becomes polished. Rushing it can make good carpentry look sloppy. Taking an extra hour to sand, caulk neatly, and touch up paint can make basic trim look like custom cabinetry.
One of the most satisfying parts of this project is the return on effort. Cabinet molding is not usually the most expensive kitchen upgrade, but it has a big visual impact. It frames the upper cabinets, connects them to the architecture of the room, and makes the kitchen feel more complete. Guests may not immediately say, “Nice crown molding,” but they will often notice that the kitchen feels upgraded, cleaner, and more expensive.
The best advice from hands-on experience is simple: buy extra molding, make test cuts, install a solid nailing base, dry-fit everything, and do not let tiny mistakes bully you. Crown molding has a reputation for being fussy because, frankly, it is. But with patience and a sense of humor, you can absolutely add molding to the top of your cabinets and end up with a result that looks sharp, custom, and proudly DIY.
Conclusion
Learning how to add molding to the top of your cabinets is one of the best ways to upgrade a kitchen without replacing the cabinets themselves. With thoughtful planning, accurate measurements, solid nailing strips, clean miter cuts, and careful finishing, ordinary cabinets can gain the kind of detail usually associated with custom work.
The project does require patience, especially around corners and uneven ceilings, but it is very doable for a careful DIYer. Choose molding that matches your cabinet style, use test pieces before cutting expensive trim, and give the finishing work the attention it deserves. Your cabinets will look taller, cleaner, and more polishedand you may never look at that awkward gap above the uppers the same way again.
Note: This article is based on real-world cabinet trim installation practices, including common recommendations used by professional carpenters, cabinet manufacturers, and major home improvement resources.