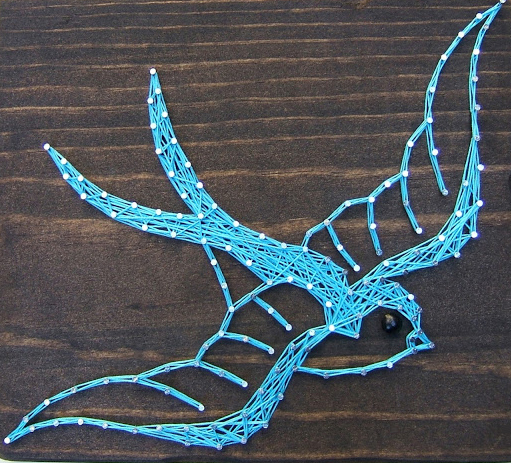
String art is one of those DIY trends that looks impressively complicated from across the room and surprisingly doable once you sit down with a board, a handful of nails, and a spool of thread. It has that magical craft-room quality: part geometry, part home décor, part “I swear I only meant to spend 20 minutes on this.” Before you know it, you are comparing shades of embroidery floss like a person with strong opinions about “warm coral” versus “sunset peach.” Welcome to the club.
The DIY string art trend has stuck around because it is affordable, flexible, beginner-friendly, and easy to customize. You can make a sweet heart design for a bedroom, a bold mountain landscape for a living room, a monogram for a nursery, a seasonal pumpkin for fall, or a minimalist word sign for an entryway. The basic process is simple: outline a shape with nails or pins, then wrap string around them to create color, texture, and pattern. The result can be rustic, modern, playful, elegant, or wonderfully weirddepending on your taste and how much coffee you had before starting.
Below are five creative ways to try DIY string art, along with practical tips, material suggestions, design ideas, and beginner-friendly advice to help your project look intentional rather than like a spider got hired as an interior decorator.
Why DIY String Art Is Trending Again
DIY string art fits perfectly into today’s love of handmade home décor. It is personal, budget-conscious, and easy to adapt to almost any style. Unlike some craft trends that require specialty tools, a string art project usually needs only a wood board, small nails, a hammer, string, scissors, and a printed pattern. That makes it approachable for beginners, teens, families, and weekend crafters who want a satisfying project without turning the kitchen into a full construction zone.
It also checks a few major décor boxes. String art adds texture to a wall, introduces color without needing paint, and gives you a custom piece that does not look like every mass-produced print in a big-box store. In a world full of smooth screens and flat images, the raised lines and shadows of string art feel refreshingly tactile. Plus, the repetitive wrapping process can be calming. It is basically meditation, but with more knots.
Essential Supplies for DIY String Art
Before trying the five ideas below, gather a few basic materials. You do not need expensive supplies, but choosing the right ones makes the process smoother.
Basic Materials
A typical string art project uses a wood board or cork backing, small finishing nails or pins, embroidery floss, crochet thread, thin yarn, or craft string. You will also need a printed template, painter’s tape, scissors, a hammer, and optional paint or stain for the background. For beginners, soft pine boards are easier to nail into than dense hardwood. If you are crafting with younger makers, foam board or cork with push pins can be a gentler alternative.
Smart Safety Tips
Because many string art projects involve sharp nails and hammering, work on a stable surface and keep fingers away from the nail head. Wear eye protection if nails are tiny or if the wood is likely to splinter. Children should be supervised closely when using nails, push pins, hammers, hot glue, or scissors. A beautiful craft project is fun; an emergency room field trip is not part of the aesthetic.
1. Start With a Classic Heart String Art Design
If you are new to DIY string art, the heart design is the perfect place to start. It is simple, recognizable, forgiving, and charming enough to use as wall décor, a handmade gift, or a Valentine’s Day project. The shape has smooth curves, so you get practice spacing nails evenly without needing to manage complicated corners or tiny details.
How to Make It
Begin with a small wood board, around 8 by 10 inches. Paint or stain the board if you want a finished look. Print or draw a heart template, place it on the board, and tape it down so it does not slide around. Hammer small nails around the outline, spacing them about half an inch apart. Once the nails are secure, tear away the paper template carefully.
Next, tie your string to one nail with a firm knot. Wrap the string from nail to nail in a random zigzag pattern, crossing the center until the heart looks full. You can outline the heart first for definition, then fill the inside with crisscrossing lines. When you are satisfied, tie off the string and trim the tail.
Style Ideas
For a farmhouse look, use white string on stained wood. For a playful room, try rainbow threads. For a modern design, use black string on a natural board. You can also create negative-space string art by wrapping around the outside of the heart instead of filling the inside. That version looks more advanced but still uses beginner-friendly steps.
2. Make a Monogram or Word Art Piece
Monogram string art is a great way to personalize a room. It works especially well for nursery décor, dorm rooms, craft rooms, offices, and gallery walls. You can use a single initial, a family name, a short word like “home,” or a cheerful phrase such as “hello,” “dream,” or “create.” Just be warned: once you make one monogram, everyone in your house may suddenly request custom signage like they are launching boutique hotels.
How to Design Letter-Based String Art
Choose a bold, simple font with thick lines. Thin script fonts can look elegant, but they are harder to nail and wrap cleanly. Print the letter or word at the size you want, tape it to your board, and place nails around the outside edges. For letters with holes, like A, D, O, P, or R, add nails around the inner openings too.
After removing the paper, start wrapping the string. For readable letters, keep the outline crisp. You can wrap one color around the border and use a second color inside the shape. If you are making a word, treat each letter as its own section so the design does not become visually muddy.
Best Uses for Word String Art
Monogram string art makes a thoughtful handmade gift for weddings, birthdays, housewarmings, and baby showers. It is also a smart project for renters because it gives a room personality without requiring paint, wallpaper, or major changes. A small word sign near an entryway can add warmth, while a large initial over a desk can make a workspace feel more personal.
3. Try Mountain, Cactus, or Nature-Inspired String Art
Nature-inspired string art is ideal if you like earthy, boho, outdoor, or cabin-style décor. Mountains, trees, leaves, suns, moons, cacti, waves, and flowers all translate beautifully into string. These designs let you play with layers, color blocking, and negative space, giving your finished piece more movement and depth.
Mountain String Art
A mountain design is one of the easiest ways to make string art look modern. Draw or print a simple mountain range made from triangles. Hammer nails along the peaks and base lines, then wrap yarn or thread between the peak nails and lower nails to create triangular slopes. Use white thread near the top for snowy peaks, gray or navy for shadows, and green for the lower mountain areas.
Cactus String Art
Cactus string art works wonderfully for bright rooms and Southwestern-inspired décor. Trace a cactus outline, place nails along the edges, and wrap green embroidery floss around the shape. Add small pink, yellow, or white flower details near the top if you want a cheerful finish. A cactus design is also great for beginners because the shape is bold and does not require perfect symmetry.
Botanical and Floral Designs
Leaves and flowers require slightly more patience, but they can look stunning. Keep the template simple. Instead of trying to recreate every vein in a leaf, use one outer outline and a few interior guide nails. For flowers, try daisies, tulips, or sunflowers with separate colors for petals and centers. When in doubt, simplify the shape. String art rewards clean outlines more than tiny details.
4. Create Seasonal String Art for Holidays and Parties
Seasonal string art is a fun way to decorate without buying another plastic bin of holiday décor that will mysteriously multiply in the closet. You can make small pieces for mantels, shelves, party tables, or front-entry displays. Because the materials are inexpensive, seasonal projects are also great for craft nights and family activities.
Popular Seasonal Ideas
For Valentine’s Day, try hearts, love notes, or XOXO designs. For spring, make flowers, butterflies, or rainbows. Summer string art can feature suns, beach waves, anchors, lemons, or simple tropical leaves. Fall is perfect for pumpkins, apples, leaves, and cozy word signs. Winter designs can include snowflakes, evergreen trees, ornaments, stars, or simple holiday messages.
Tips for Holiday Colors
Color choices make seasonal string art instantly recognizable. Red, pink, and white work for Valentine’s Day. Green, yellow, and floral pastels feel like spring. Orange, rust, brown, and cream create a fall mood. For winter, try white, silver, deep green, navy, or gold. If you prefer décor that lasts longer than one holiday, use softer colors and more subtle shapes. A white snowflake on natural wood can stay up all winter without screaming “I forgot to undecorate.”
Party-Friendly Mini String Art
Mini string art projects make great party activities, but preparation is key. Pre-cut the boards, pre-print the templates, and consider starting the nails in advance for younger participants. Guests can choose their string colors and wrap their own designs. Small stars, hearts, initials, and simple animals work best because they are quick and satisfying.
5. Use String Art as Functional Home Décor
String art does not have to sit quietly on a wall looking cute. It can also be functional. With a little planning, you can turn string art techniques into card holders, photo displays, jewelry organizers, memo boards, and creative wall hangings. This is where the trend becomes especially useful for small spaces.
String Art Photo Display
Instead of filling a shape completely, stretch string across an open frame or board in a loose web pattern. Use mini clothespins to attach photos, postcards, notes, or small prints. This style works well above a desk, in a teen room, or near a family command center. It gives you a flexible display that can change as often as your mood, your photos, or your obsession with rearranging things at midnight.
Jewelry Organizer
A wood board with decorative nail patterns can become a necklace or bracelet organizer. Place nails in a geometric design, wrap a few sections with string for decoration, and leave some nails exposed for hanging jewelry. This project is practical, pretty, and helpful if your necklaces currently live in a tangled pile that resembles modern art but performs poorly as storage.
Memo Board or Inspiration Board
For a workspace, create a string grid on a framed cork board or wood panel. Use the strings to tuck notes, reminders, small sketches, fabric swatches, or inspirational quotes. Keep the wrapping loose enough to slide paper underneath. This version blends the handmade charm of string art with the usefulness of a bulletin board.
How to Choose the Right String Art Pattern
The best pattern depends on your skill level, patience, and how much detail you want in the finished piece. Beginners should start with bold shapes like hearts, stars, mountains, simple animals, initials, or geometric designs. Intermediate crafters can try words, flowers, maps, layered landscapes, or designs with multiple colors. Advanced makers may enjoy portraits, detailed skylines, or complex mandala-inspired layouts.
When choosing a template, look at the outline first. If the shape has too many tiny curves or narrow points, it may be frustrating to nail and wrap. A clean silhouette usually creates a stronger result. Also consider the size of your board. Small boards are cute, but they leave less room for detail. Larger boards require more nails and time, but they make wrapping easier and give the design more breathing room.
Common DIY String Art Mistakes and How to Fix Them
Uneven Nail Spacing
If your nails are uneven, the final shape may look lumpy. To avoid this, mark dots on your template before hammering. If one nail is noticeably out of place, pull it gently with pliers and reposition it. Most boards are forgiving, especially if you paint or stain them before starting.
Loose String
Loose string can make the design sag. Keep steady tension as you wrap, but do not pull so hard that the nails bend. If a section looks loose, unwind a few passes and rewrap that area. Tying a secure knot at the beginning and end is essential.
Overcrowded Colors
Too many colors can make a design look chaotic. Choose two to four colors for most projects. If you want a rainbow effect, assign each color to a clear section instead of wrapping every shade everywhere. Your finished piece should say “creative,” not “the thread drawer exploded.”
Complicated First Project
It is tempting to start with a detailed portrait of your dog, but maybe do not begin there unless your dog is emotionally prepared to look like a potato with ears. Start simple. Build confidence. Then try more detailed patterns once you understand spacing, tension, and wrapping direction.
Extra Experience: What It Is Really Like to Try the DIY String Art Trend
The first thing you notice when making DIY string art is that it feels more like building than crafting. You are not just coloring or gluing; you are creating a little structure. The board becomes a base, the nails become anchor points, and the string becomes the linework. That makes the project feel satisfyingly hands-on. It is a craft with a tiny bit of carpentry energy, but without needing to own a garage full of tools or say things like “load-bearing” with confidence.
One of the best experiences is choosing the design. A simple shape can look surprisingly stylish once it is translated into string. A heart becomes graphic and dimensional. A mountain range feels modern and outdoorsy. A monogram suddenly looks like something from a boutique craft market. The planning stage is also where you learn an important lesson: not every image makes a good string art pattern. Designs with clean outlines work best. Tiny details may look beautiful on paper, but after adding nails and thread, they can turn into visual soup.
Hammering the nails is usually the slowest part, especially if you care about even spacing. At first, it may feel repetitive. Then, weirdly, it becomes relaxing. Tap, tap, tap. Adjust. Tap again. You begin to understand why people enjoy crafts that require patience. There is a rhythm to it. Still, it helps to take breaks. If your hand gets tired, stop for a few minutes. Rushing this stage can lead to crooked nails, dented boards, and dramatic sighing.
The wrapping stage is where the project comes alive. This is also where beginners often worry that they are doing it “wrong.” The good news is that string art allows a lot of freedom. Random wrapping can look beautiful as long as you keep tension consistent and distribute the string evenly. Move around the shape instead of filling one tiny section too heavily. Step back every few minutes to see the whole design. Up close, the strings may look messy. From a normal viewing distance, they often blend into a rich, textured pattern.
Another enjoyable part is experimenting with color. Embroidery floss gives a crisp, polished look. Thin yarn feels softer and more casual. Metallic thread can add sparkle, though it may be trickier to control. Neutral string on dark wood looks sophisticated, while bright string on white paint feels cheerful and modern. The background matters just as much as the string. A stained board adds rustic warmth. A painted board creates a cleaner, more graphic effect. Even leftover scrap wood can look intentional with the right design.
The most common surprise is how giftable string art is. Handmade gifts can sometimes feel risky, but string art has enough structure and polish to look finished. A small initial, a house outline, a favorite state shape, or a simple flower can feel personal without being overly complicated. It is the kind of gift that says, “I made this for you,” not “I panicked at 11 p.m. and found glue.”
String art is also a great group project. Friends can work on different designs at the same table, sharing thread colors and laughing at the occasional crooked nail. Families can make seasonal pieces together. Teens can customize designs for bedrooms or lockers. Adults can use it as a relaxing weekend project that does not require staring at another screen. The finished piece becomes a reminder of the process, not just the final image.
Perhaps the biggest takeaway is that DIY string art is forgiving. A slightly uneven nail, a knot that looks bulky, or a color choice that was more exciting in theory than reality will not ruin the project. You can adjust, repaint, rewrap, or simply call it “handmade character,” which is the crafter’s legal right. The trend works because it invites creativity without demanding perfection. It gives you something dimensional, personal, and display-worthy from simple materials. That is a pretty good deal for a board, nails, and string.
Conclusion
The DIY string art trend is popular for a reason: it is creative, affordable, customizable, and much easier than it looks. Whether you start with a classic heart, a modern monogram, a mountain landscape, a seasonal design, or a functional photo display, string art gives you a hands-on way to make décor that feels personal. The best projects begin with simple shapes, steady nail spacing, good string tension, and a willingness to experiment.
You do not need to be a professional artist to enjoy this craft. You just need a clear template, a few basic supplies, and enough patience to wrap string without turning yourself into part of the project. Start small, choose colors you love, and let the process be part of the fun. In the end, DIY string art is not just about filling a blank wall. It is about making something with your own handsand maybe discovering that you are exactly one craft project away from becoming the person who owns seven kinds of twine.