Note: This article is for practical planning and general home-improvement guidance. Before finishing or modifying a basement, always check local building codes, permit rules, electrical requirements, and safety recommendations in your area.
Turning a basement into an art room sounds romantic until you meet the three villains of the underground kingdom: moisture, bad lighting, and that mysterious corner where every spider seems to hold a board meeting. But with the right plan, your basement can become a dry, bright, organized, inspiring art studio instead of a chilly storage cave with glitter on the floor.
Learning how to build a basement art room is really about balancing creativity with practicality. Yes, you need space for easels, paints, clay, paper, fabric, photography gear, craft tools, and the occasional “this project will definitely only take one afternoon” lie. But you also need proper ventilation, moisture control, safe electrical access, durable flooring, useful storage, and lighting that does not turn every blue into a suspicious gray-green soup.
This guide walks you through the full process, from planning the layout to choosing basement art studio lighting, flooring, storage, work surfaces, ventilation, and finishing touches. Whether you paint, draw, sculpt, sew, make jewelry, scrapbook, or simply need a creative room where nobody moves your scissors, here is how to build a basement art room that works beautifully.
Start With the Big Question: Is Your Basement Ready?
Before buying pegboards, paintbrush jars, or a dramatic apron that says “serious artist,” inspect the basement itself. A basement art room must be dry, safe, comfortable, and easy to clean. If the room smells musty, shows water stains, has condensation on pipes, or feels damp in summer, pause the decorating fantasy and fix the building problem first.
Art supplies do not love moisture. Paper warps, canvas loosens, wooden frames swell, metal tools rust, and stored fabric can develop that unfortunate “forgotten gym sock in a swamp” aroma. Worse, moisture can encourage mold growth, which is bad for both your artwork and your indoor air quality.
Check for Water Problems
Look carefully at the floor, walls, corners, window wells, and around plumbing lines. Signs of moisture trouble include peeling paint, white powdery deposits on concrete, dark staining, bubbling drywall, mildew odor, or damp cardboard boxes. If you see active leaks, fix them before building anything permanent.
Common solutions may include cleaning gutters, extending downspouts away from the foundation, improving soil grading, sealing small cracks, repairing plumbing leaks, installing or maintaining a sump pump, and using a dehumidifier. If the basement floods or has recurring seepage, bring in a qualified waterproofing contractor before turning it into a studio. A finished art room should not double as an indoor pond.
Control Humidity
A good basement art studio should stay comfortably dry. Use a hygrometer to monitor relative humidity. For most homes, keeping humidity roughly between 30% and 50% is a smart target, especially for basements where cool surfaces can collect condensation.
A dehumidifier with a drain hose is one of the best investments for a basement art room. Choose a unit sized for your square footage, empty it regularly if it does not drain automatically, and keep air moving with fans or your HVAC system. Dry air protects art supplies, finished pieces, wood furniture, paper, and your nose from that classic basement smell.
Plan the Basement Art Room Layout
A great art room layout starts with how you actually create. A painter needs different zones than a potter. A sewing enthusiast needs cutting tables and fabric storage. A mixed-media artist needs storage for approximately 900 tiny things, all of which are “absolutely necessary.”
Before installing furniture, divide the room into work zones. Even a small basement craft room becomes more functional when each activity has a home.
Create Four Main Zones
1. The main work zone: This is where the magic, mess, and occasional muttering happen. It may include an easel, drafting table, sewing table, pottery bench, or large standing worktable.
2. The wet or messy zone: If you use paint, glue, resin, dyes, ink, plaster, or clay, create a surface that can handle spills. Put this area near ventilation and, if possible, near a utility sink.
3. The clean storage zone: Paper, canvases, fabric, finished pieces, sketchbooks, and electronics should stay away from moisture, splashes, and dust.
4. The display and drying zone: Art needs a place to dry, cure, rest, or simply be admired while you decide whether it is brilliant or “still in progress.” Use drying racks, wall ledges, wire grids, shelves, or a dedicated display wall.
Measure Before You Buy
Measure ceiling height, wall lengths, doors, stairs, posts, ducts, and awkward corners. Basement layouts often include support columns, mechanical systems, low ceilings, and mystery pipes that refuse to be decorative. Plan around them instead of pretending they do not exist.
Leave clear walking paths. A basement art room should feel open enough to move around with a canvas, chair, storage bin, or cup of coffee. If you have to turn sideways like a crab to reach your paintbrushes, the layout needs help.
Choose Flooring That Can Handle Creative Chaos
Basement art room flooring should be durable, moisture-resistant, and easy to clean. This is not the place for precious hardwood or high-maintenance flooring that panics when it meets water, acrylic paint, or glitter. Glitter, as science has proven, is legally immortal.
Best Flooring Options
Luxury vinyl plank or tile: This is one of the most practical options for a finished basement art room. It is water-resistant, comfortable underfoot, available in many styles, and easier to clean than carpet.
Sealed concrete: If your concrete floor is in good condition, sealing or painting it can create a modern studio look. Add anti-fatigue mats near standing workstations.
Rubber flooring: Rubber tiles or rolls work well for craft rooms, kids’ art spaces, and areas where you stand for long periods. They add comfort and help protect dropped tools.
Basement subfloor panels: If the floor feels cold or slightly uneven, a basement subfloor system can add a moisture break and make the space more comfortable. This is especially useful if you plan to spend long hours creating.
Flooring to Avoid
Avoid wall-to-wall carpet in messy art areas. It traps dust, fumes, fibers, and spills. If you want softness, use washable area rugs in clean zones only. Also be careful with untreated wood floors in below-grade spaces, where moisture can be unpredictable.
Design Art Studio Lighting That Actually Helps
Basements rarely win awards for natural light. Many have tiny windows, low ceilings, or no windows at all. That means lighting is not an afterthought; it is one of the most important parts of building a basement art room.
Good art studio lighting should be bright, even, adjustable, and color accurate. Poor lighting can distort colors, create harsh shadows, strain your eyes, and make your masterpiece look different when it leaves the basement. That is a rude surprise nobody needs.
Use Layered Lighting
Ambient lighting: This is the overall room lighting. Recessed LED lights, flush-mount fixtures, or LED panels work well for low basement ceilings.
Task lighting: Add focused light at your worktable, easel, sewing station, or desk. Adjustable arm lamps are excellent because they can move with the project.
Accent lighting: Use wall lights, picture lights, or track lighting to highlight finished work, inspiration boards, or display shelves.
Pick the Right Bulbs
For color-sensitive work, choose high-CRI bulbs. CRI stands for Color Rendering Index, and it measures how accurately a light source shows color. Artists often prefer lighting in the daylight range, around 5000K to 5500K, with a CRI of 90 or higher. That combination helps colors appear clearer and more reliable.
If you work at night, consider dimmable lighting. Bright daylight-balanced bulbs are great for painting, but they can feel intense when you are calmly labeling beads at 10:30 p.m. A dimmer lets the room shift from “professional studio” to “peaceful creative hideout.”
Paint the Walls for Brightness and Focus
Wall color matters in a basement art room because the walls influence how light bounces around the space. Dark colors can feel cozy, but in a windowless basement they may absorb too much light. Very bright colors can also reflect onto your artwork and affect how you judge color.
For most basement art studios, soft white, warm white, pale gray, greige, or muted neutral walls work best. These colors help reflect light without competing with your artwork. If you want personality, add it through one accent wall, storage bins, rugs, curtains, or display boards.
Think About Light Reflectance
Paint companies often list a color’s Light Reflectance Value, or LRV. Higher LRV colors reflect more light, which can help a basement feel brighter. In a dark basement, choosing a warm light neutral with a higher LRV can make the room feel less like a bunker and more like a real creative studio.
Use washable paint in an eggshell, satin, or scrubbable matte finish. Art rooms get fingerprints, smudges, splatters, and the occasional accidental brush swipe. Flat paint may look elegant for about 11 minutes, then reality arrives.
Build Smart Storage for Art Supplies
The secret to an inspiring art room is not owning fewer supplies. Let us be realistic. The secret is knowing where everything lives. A basement art room needs storage that is visible, flexible, and protected from moisture.
Use Vertical Space
Basements often have limited square footage, so use walls wisely. Install pegboards for tools, shelves for jars and bins, wall-mounted racks for rolls of paper, and magnetic strips for metal tools. Clear containers make supplies easy to find. Labels save your future self from opening twelve bins to find one glue stick.
Protect Paper and Fabric
Store paper, prints, canvases, and fabric in closed containers or cabinets. Use flat files for drawings and large sheets. Keep valuable paper off the floor and away from exterior walls, where temperature and moisture swings may be greater.
Create a Grab-and-Go Cart
A rolling cart is a basement art room hero. Use one for everyday supplies: pencils, brushes, scissors, tape, glue, rulers, sketchbooks, and cleaning cloths. When you change projects, roll the cart to the right zone. When guests come over, roll it into a corner and pretend you are naturally organized.
Add Ventilation and Indoor Air Safety
Ventilation is essential when building a basement art room, especially if you use paint, solvents, adhesives, sprays, varnishes, resin, or strong cleaners. Many art materials release odors or airborne chemicals. A basement, with fewer windows and less natural airflow, can trap those pollutants.
Choose Safer Materials When Possible
Use low-VOC or zero-VOC paints, water-based finishes, and less-toxic adhesives when they fit your project. Read product labels and follow safety instructions. Store chemicals in original containers with tight lids, away from heat sources and children.
Move Air the Right Way
If your basement has windows, use them. Add a fan that moves stale air out and fresh air in. For stronger materials, consider a dedicated exhaust fan vented outdoors. Do not simply blow fumes into another room. That just relocates the problem, like moving laundry from the bed to the chair and calling it cleaning.
If you regularly work with solvents, resin, aerosols, or dusty materials, consider professional advice on ventilation. Some creative hobbies need more than a box fan and optimism.
Plan Electrical Outlets and Safety
Art rooms use more electricity than people expect. You may need power for lamps, sewing machines, pottery wheels, computers, printers, chargers, air purifiers, dehumidifiers, heat tools, projectors, or cutting machines.
Do not rely on a tangled kingdom of extension cords. Extension cords should be temporary, not permanent wiring. If your basement art room needs more power, hire a licensed electrician to add outlets where you need them.
Place Outlets Where Work Happens
Put outlets near the main worktable, computer desk, display wall, storage area, and ventilation equipment. If you use water in the room, such as a utility sink or wet-cleaning station, ask an electrician about proper GFCI protection and local code requirements.
Avoid Overloading Circuits
High-draw tools and appliances should be used carefully. Do not plug multiple heavy devices into one power strip. Keep cords out of walkways, away from wet areas, and off the floor when possible.
Install Practical Work Surfaces
Your work surfaces should match your creative habits. A watercolor painter may need a tilting table and drying space. A crafter may need a large flat table. A sculptor may need a heavy-duty bench. A digital artist may need a clean desk with cable management and good lighting.
Best Worktable Features
Look for sturdy legs, a wipeable top, enough depth for large projects, and a comfortable height. Standing-height tables are excellent for cutting, wrapping, gluing, and assembling. Seated desks are better for detailed work like drawing, jewelry making, and digital design.
If your budget is tight, build a simple table using cabinets or drawer units as bases with a solid countertop or plywood top. Seal the surface so it resists spills. Add a cutting mat, silicone mat, or replaceable craft paper on top to protect it.
Make Cleanup Easy
The easier cleanup is, the more likely you will actually do it. Design the room so messes have nowhere to hide.
Keep trash, recycling, and rag bins within reach. Use washable mats under messy stations. Store cleaning cloths, paper towels, mild soap, gloves, and a small broom nearby. If possible, add a utility sink. A basement sink is extremely useful for rinsing brushes, cleaning palettes, washing hands, and dealing with creative disasters before they migrate upstairs.
Never pour paint, solvents, plaster, or resin down the drain unless the product label and local disposal rules say it is safe. Many materials require special handling. Your plumbing is not an art supply disposal system, no matter how confidently the sink stares at you.
Make the Basement Art Room Comfortable
A creative room should invite you in. Comfort matters because the best art room is the one you actually use. Basements can feel cold, echoey, or disconnected from the rest of the home, so add warmth and personality.
Control Temperature
If the basement is too cold in winter or too humid in summer, you will avoid it. Make sure the room has proper heating, cooling, and airflow. Insulation and air sealing can make a dramatic difference, but they must be done with moisture control in mind.
Add Sound and Softness
Use washable rugs, curtains, acoustic panels, cork boards, or upholstered seating to reduce echo. Add a speaker for music, a comfortable chair for breaks, and a small inspiration shelf. A basement art room should feel like a studio, not a punishment chamber for unfinished hobbies.
Bring in Visual Inspiration
Create a mood board, gallery wall, or rotating display rail. Use clipboards, wire grids, cork tiles, or magnetic boards to show sketches and reference images. Seeing your work in progress keeps momentum alive.
Budget-Friendly Basement Art Room Ideas
You do not need a luxury remodel to build a basement art room. Start with the essentials: dry space, safe power, good lighting, sturdy work surfaces, and storage. Upgrade in phases.
Low-Cost Wins
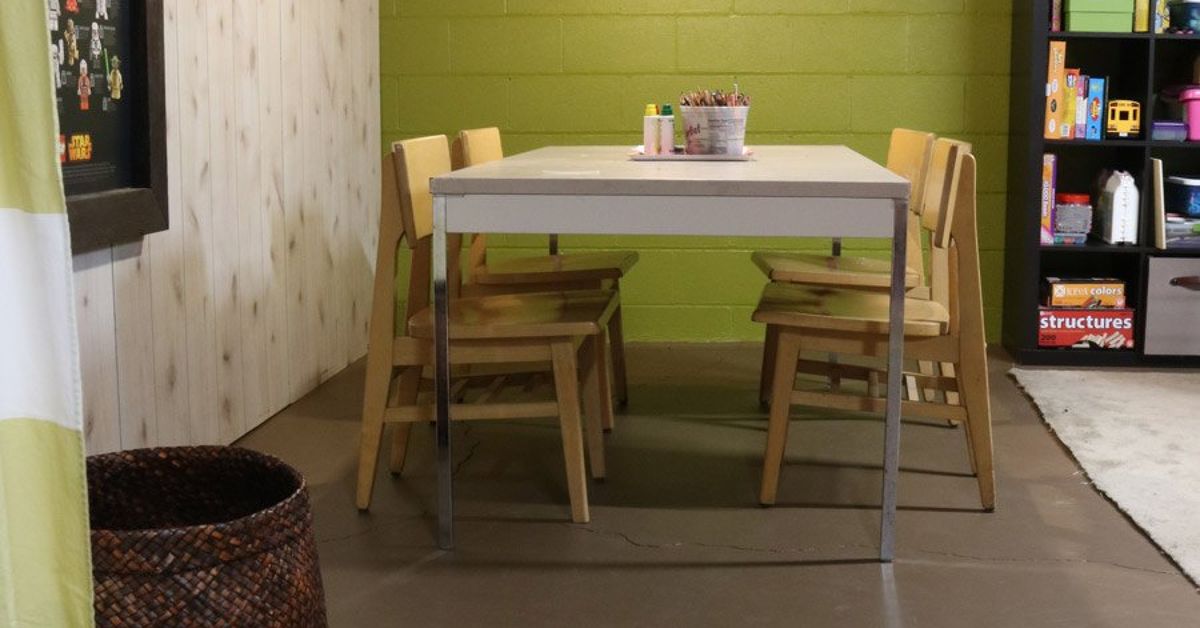
Paint the walls a light neutral. Add LED shop lights or high-CRI bulbs. Install pegboard. Use secondhand cabinets. Repurpose an old dining table. Add clear bins and labels. Use shower curtains or washable drop cloths to protect walls and floors during messy projects.
Even a small corner can become a basement art studio if it has good lighting, a work surface, supply storage, and a cleanup plan. Creativity does not require 1,000 square feet. It does, however, appreciate knowing where the good scissors are.
Common Mistakes to Avoid
Finishing before fixing moisture: Never hide water problems behind drywall or flooring. They will return, and they will bring friends.
Using only one ceiling light: One sad bulb in the middle of the room is not studio lighting. Layer your lighting.
Ignoring ventilation: If you use strong-smelling materials, plan airflow from day one.
Buying storage before sorting supplies: Organize first, then buy containers that fit what you actually own.
Making the room too precious: An art room should handle mess. Choose finishes you can wipe, scrub, and forgive.
Real-World Experience: What Actually Works in a Basement Art Room
After planning several basement creative spaces, one lesson becomes obvious: the best basement art room is not the fanciest one. It is the one that removes friction. If it takes 20 minutes to set up, you will create less. If your brushes are hidden in a bin behind holiday decorations, your motivation will quietly leave the building. A good studio makes starting easy.
One practical experience is to set up a “default project station.” Keep your most-used supplies out and ready, not buried in perfect storage. For example, if you paint often, keep a small set of brushes, a palette, tape, pencils, paper towels, and your favorite paints on a rolling cart. The full collection can live in cabinets, but the daily tools should be within arm’s reach. This small change can turn a basement room from “storage for art supplies” into a real working studio.
Another experience: lighting always needs more attention than expected. Many people install bright overhead fixtures and think they are done. Then they sit down to draw and discover shadows from their own hand. Task lighting solves this. Place adjustable lights on both sides of the main work surface if possible, especially for detailed work. If you paint or choose colors, test your lighting with actual artwork, not just an empty room. A room can look bright and still be bad for color accuracy.
Storage also works best when it matches behavior. Open shelves are great for supplies you use weekly. Closed cabinets are better for backups, seasonal materials, and anything vulnerable to dust. Clear bins help, but only if they are not stacked six deep. If you must unstack five bins to reach watercolor paper, that paper has effectively moved to another dimension.
Moisture control is another real-world priority. A basement may feel dry in winter and turn humid in July. Keep a hygrometer in the room year-round. If the reading climbs, run the dehumidifier before the room smells musty. This habit protects canvases, paper, wood frames, fabric, adhesives, and finished pieces. It also makes the studio more pleasant to use.
Finally, leave room for unfinished work. Many art rooms fail because every surface becomes storage. Reserve one shelf, rack, or wall area for works in progress. Art needs breathing room. So does the artist. When the room supports the messy middle of creativity, not just the polished final result, it becomes a place you want to return to again and again.
Conclusion
Building a basement art room is part home-improvement project, part creative self-rescue mission. The goal is to create a space that is dry, bright, safe, organized, and inspiring enough to pull you downstairs even when the couch is making a very persuasive argument.
Start with the basics: solve moisture problems, control humidity, improve ventilation, and plan safe electrical access. Then build your creative zones with durable flooring, color-accurate lighting, washable surfaces, smart storage, and comfortable work areas. Add personality last, after the room works properly. Cute baskets are lovely, but they cannot fix condensation.
When done well, a basement art studio gives you something incredibly valuable: a dedicated place to make, experiment, fail, improve, and make again. Whether you are painting landscapes, sewing costumes, sculpting clay, designing prints, or crafting gifts that suspiciously take over every table in the house, a basement art room can become the creative headquarters you have always wanted.