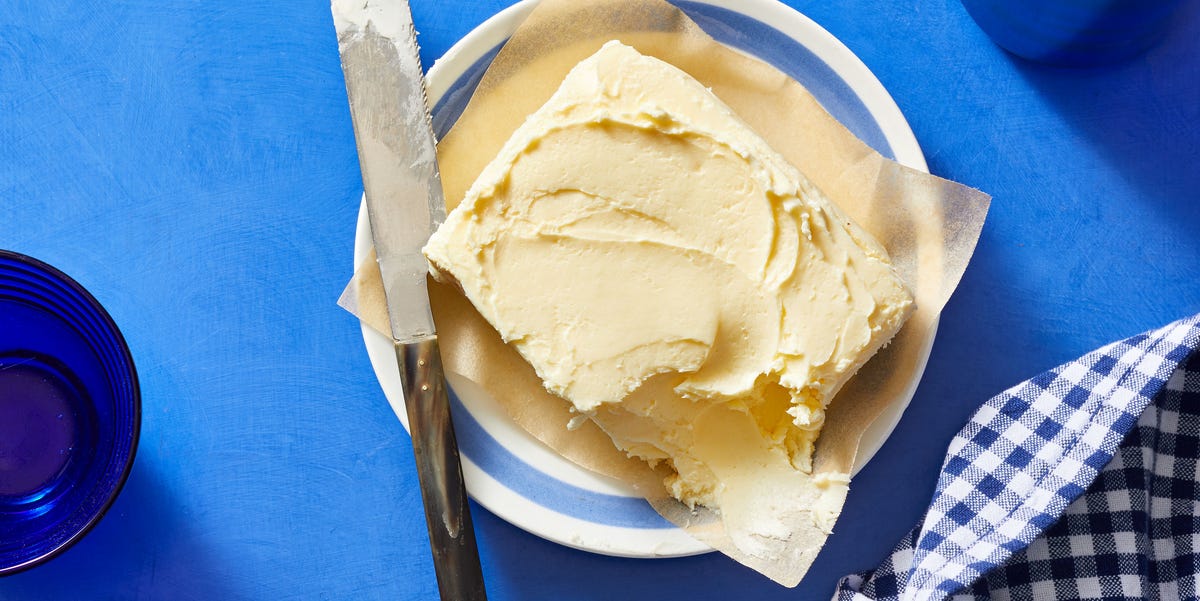
Homemade butter sounds like something your great-grandmother made while wearing an apron and calmly judging everyone’s biscuits. But here is the delicious truth: learning how to make homemade butter is surprisingly easy, deeply satisfying, and just a little bit magical. You start with heavy cream, beat it past the whipped cream stage, and suddenly the cream separates into golden butterfat and fresh buttermilk. That is not cooking. That is kitchen wizardry with a dairy aisle receipt.
This best homemade butter recipe is designed for real home cooks, not people who own a wooden butter churn as casual living room decor. You can make it with a stand mixer, hand mixer, food processor, blender, or even a Mason jar if you are feeling energetic and possibly trying to avoid arm day at the gym. The result is fresh, creamy, spreadable butter with a clean dairy flavor that makes toast taste like it got promoted.
In this guide, you will learn the easiest homemade butter method, how to rinse and salt it properly, how to store it, what to do with the leftover buttermilk, and how to turn one basic recipe into sweet, savory, and restaurant-worthy compound butters.
Why Make Homemade Butter?
Store-bought butter is convenient, reliable, and excellent for everyday cooking. So why make butter at home? Because homemade butter has a fresh, sweet cream flavor that feels more alive than the average wrapped stick from the supermarket. It is softer, richer-tasting, and endlessly customizable. You control the cream, the salt level, the texture, and every add-in.
Making butter at home is also a smart way to understand an ingredient most of us use without thinking. Butter is basically the fat from cream, separated from the liquid buttermilk. When you whip cream long enough, the fat globules clump together and break away from the liquid. That is why the process moves through stages: liquid cream, whipped cream, grainy whipped cream, separated butterfat, and buttermilk.
It is also an excellent kitchen project for families. Kids love watching cream transform, adults love eating the result, and everyone gets to say, “We made butter,” with the confidence of pioneers who also have Wi-Fi.
Best Ingredients for Homemade Butter
Heavy Cream or Heavy Whipping Cream
The best homemade butter starts with good cream. Use heavy cream or heavy whipping cream with a high fat content. The higher the butterfat, the better the yield and the richer the flavor. A pint of cream generally makes about one cup of butter, though the exact amount depends on the cream’s fat percentage and how thoroughly you drain it.
For the cleanest flavor, choose fresh cream that tastes good on its own. If possible, avoid ultra-pasteurized cream when you have another option. Ultra-pasteurized cream can still work, but regular pasteurized cream often churns more easily and may offer a fresher dairy flavor.
Salt
Salt is optional, but it makes homemade butter taste complete. For spreading butter, use fine sea salt or kosher salt. Start small, then add more after tasting. A good range is 1/4 to 1/2 teaspoon salt per cup of finished butter. For baking, keep the butter unsalted so you can control the salt in your recipe.
Ice Water
Ice water is essential for washing the butter. Once the butter separates from the buttermilk, rinsing it with very cold water helps remove leftover liquid. This step improves flavor, texture, and storage life. If buttermilk remains trapped in the butter, the butter can spoil faster and taste sour sooner.
Best Homemade Butter Recipe
Ingredients
- 2 cups cold heavy cream or heavy whipping cream
- 1/4 teaspoon fine sea salt, optional
- 2 to 3 cups ice water, for rinsing
Equipment
- Stand mixer with paddle or whisk attachment, food processor, blender, or hand mixer
- Fine-mesh strainer
- Large bowl
- Spatula or wooden spoon
- Cheesecloth or clean kitchen towel, optional
- Airtight container or parchment paper for storage
Instructions
- Pour in the cream. Add cold heavy cream to the bowl of a stand mixer or food processor. If using a stand mixer, cover the bowl with a clean towel or splash guard because once the cream separates, it can splatter like it has personal issues.
- Whip the cream. Beat on medium speed until the cream thickens into whipped cream. Continue mixing. The whipped cream will become denser, then grainy, then suddenly separate into yellow butter clumps and thin buttermilk.
- Drain the buttermilk. Pour the mixture through a fine-mesh strainer set over a bowl. Save the buttermilk for pancakes, biscuits, cornbread, marinades, or quick breads.
- Rinse the butter. Place the butter solids in a bowl and pour ice water over them. Press and fold the butter with a spatula or clean hands. The water will turn cloudy as leftover buttermilk comes out.
- Repeat until clear. Drain the cloudy water and add fresh ice water. Continue rinsing and pressing until the water stays mostly clear.
- Season if desired. Sprinkle in salt and knead gently until evenly mixed. Taste and adjust carefully.
- Shape and store. Press the butter into a ramekin, roll it into a log with parchment paper, or pack it into an airtight container. Refrigerate until firm.
How Long Does It Take to Make Homemade Butter?
In a stand mixer, homemade butter usually takes 8 to 15 minutes, depending on the cream temperature, mixer speed, and fat content. A food processor can do the job faster, often in 3 to 7 minutes. A blender may work quickly too, but you need to stop and scrape or pulse carefully so the butter does not overheat. A Mason jar method can take 10 to 20 minutes of shaking, which is either charmingly old-fashioned or a reminder that modern appliances deserve applause.
Do not stop at whipped cream. That is the most common mistake. The cream must go beyond fluffy peaks and into the broken, grainy stage. When you see yellowish clumps swimming in thin liquid, congratulations: you have crossed the dairy finish line.
Stand Mixer, Food Processor, Blender, or Mason Jar?
Stand Mixer Method
The stand mixer is the best all-around method for homemade butter. It is hands-free, easy to watch, and ideal for making a full pint or quart of cream. Use medium speed at first, then increase slightly once the cream thickens. Keep the bowl covered when separation begins.
Food Processor Method
The food processor is fast and efficient. Add cream, process until butter solids form, drain, rinse, and season. This method is excellent when you want butter quickly and do not mind a little extra cleanup.
Blender Method
A blender works, especially a powerful one, but use short pulses near the end. If the butter warms too much, it can become greasy. Add a splash of ice water during rinsing and handle the butter gently.
Mason Jar Method
The Mason jar method is simple: fill a jar halfway with cold cream, seal it tightly, and shake until the cream separates. It is fun for kids and small batches. It is less fun after minute twelve, when everyone realizes butter has a cardio component.
How to Wash Homemade Butter the Right Way
Washing butter is not optional if you want good homemade butter. It removes extra buttermilk, firms the butter, and helps the flavor stay clean. Use ice-cold water, not warm water. Warm water softens the butter too much and can turn your beautiful golden mound into a slippery dairy puddle.
Press the butter gently against the side of the bowl with a spatula. Drain cloudy water and repeat. The goal is not to punish the butter; it has done nothing wrong. You simply want to remove trapped liquid. When the rinse water is nearly clear, the butter is ready for salting and shaping.
How to Salt Homemade Butter
For lightly salted homemade butter, start with 1/4 teaspoon fine sea salt per cup of butter. For a more classic salted butter taste, increase to 1/2 teaspoon. Always mix salt after rinsing and draining, not before. If you add salt too early, some of it may wash away with the buttermilk.
If you plan to use the butter for toast, baked potatoes, pancakes, or vegetables, salted butter is usually best. If you plan to bake cookies, cakes, pie crusts, or pastries, unsalted homemade butter gives you better control. Homemade butter can contain slightly more moisture than commercial butter, so for precision baking, use it in forgiving recipes first, such as muffins, quick breads, biscuits, or cornbread.
What to Do With Fresh Buttermilk
Do not throw away the leftover liquid. Fresh buttermilk from homemade butter is thinner and sweeter than cultured buttermilk from the store, but it is still useful. Add it to pancakes, waffles, biscuits, scones, muffins, cornbread, or creamy salad dressings. It can also be used in marinades for chicken or as part of a smoothie.
Because homemade buttermilk is not always as tangy as commercial cultured buttermilk, recipes that rely heavily on acidity may need a little help. If a baking recipe depends on buttermilk to react with baking soda, add a small squeeze of lemon juice or use store-bought cultured buttermilk for the most predictable rise.
Homemade Butter Flavor Ideas
Garlic Herb Butter
Mix one cup softened homemade butter with one minced garlic clove, one tablespoon chopped parsley, one teaspoon chopped chives, a pinch of salt, and a little lemon zest. Spread it on bread, melt it over steak, or toss it with roasted potatoes.
Honey Cinnamon Butter
Blend one cup softened butter with two tablespoons honey, 1/2 teaspoon cinnamon, and a small pinch of salt. This is excellent on biscuits, toast, pancakes, waffles, and sweet potatoes.
Lemon Dill Butter
Combine one cup butter with one tablespoon chopped dill, one teaspoon lemon zest, a squeeze of lemon juice, and a pinch of salt. It is especially good with fish, steamed vegetables, and warm dinner rolls.
Maple Sea Salt Butter
Stir one tablespoon maple syrup and a pinch of flaky sea salt into one cup softened butter. Serve it with cornbread, roasted carrots, pancakes, or warm banana bread.
How to Store Homemade Butter
Store homemade butter in an airtight container in the refrigerator. For best flavor, use it within one to two weeks. If you made a large batch, wrap portions tightly in parchment paper and place them in a freezer-safe bag. Homemade butter can be frozen for longer storage, and smaller portions thaw faster.
Because homemade butter has no commercial preservatives and may contain more moisture than store-bought butter, refrigeration is the safest everyday storage choice. Keep it covered so it does not absorb refrigerator odors. Butter that smells sour, rancid, or unpleasant should be discarded. Butter should smell creamy, fresh, and inviting, not like it has been making bad decisions in the back of the fridge.
Troubleshooting Homemade Butter
My Cream Will Not Turn Into Butter
Keep mixing. Most people stop too soon. If your cream is still whipped and fluffy, it has not broken yet. Increase the speed slightly and continue until liquid separates from butter solids.
My Butter Is Too Soft
The cream may have become too warm. Rinse with ice water and chill the butter before shaping. Next time, start with cold cream and avoid overworking it after separation.
My Butter Tastes Sour
Either the cream was not fresh, or the butter was not rinsed thoroughly. Use fresh cream and rinse until the water runs almost clear.
My Butter Is Watery
Press out more liquid during the rinsing stage. You can also wrap the butter in cheesecloth and squeeze gently. The goal is firm, smooth butter, not butter soup.
Is Homemade Butter Cheaper?
Sometimes yes, sometimes no. The cost depends on the price of heavy cream in your area. Homemade butter is often not cheaper than basic supermarket butter, but it can be less expensive than premium European-style or small-batch cultured butter. The real value is freshness, flavor, customization, and the bonus buttermilk.
Think of homemade butter the way you think of homemade bread. You may not make it every single week, but when you do, the kitchen smells happier and everyone suddenly appears near the counter holding a knife and a suspiciously empty piece of toast.
Extra Experience: What Making Homemade Butter Teaches You
The first time you make homemade butter, the most surprising part is how dramatic the transformation feels. For several minutes, nothing seems to happen. The cream becomes whipped cream, then extra-thick whipped cream, and you may start wondering if the recipe is playing a prank. Then, almost all at once, the mixture breaks. The sound changes, the texture changes, and little golden pieces of butter appear in a pool of buttermilk. It is one of those kitchen moments that makes you understand food differently.
From experience, the quality of the cream matters more than fancy equipment. A basic hand mixer with good heavy cream can make better butter than an expensive machine using dull-tasting cream. If the cream tastes sweet and fresh, the butter will taste sweet and fresh. If the cream tastes flat, the butter will not magically become luxurious. Homemade butter is simple, which means there is nowhere for weak ingredients to hide.
Another lesson: rinsing takes patience. Many beginners drain the butter once, give it a quick splash of water, and call it done. The butter may taste fine on day one, but by day three it can develop a sharper flavor because leftover buttermilk remains inside. Pressing and rinsing several times makes a real difference. The water does not need to be perfectly crystal clear, but it should no longer look milky. This small step separates “cute weekend project” butter from “I would proudly serve this at brunch” butter.
Salting is also personal. Some people love a bold, salty butter that wakes up toast immediately. Others prefer a softer salt level so the sweet cream flavor stays in front. The best method is to add less salt than you think you need, mix well, taste, and adjust. Once salt is in, it is difficult to remove. Butter is forgiving, but it is not a time machine.
For serving, homemade butter shines brightest when it is used simply. Spread it on warm sourdough, melt it over corn on the cob, tuck it into a baked potato, or let it slide over pancakes. It is especially good with foods that allow the butter itself to be noticed. In baked goods, it works beautifully in rustic recipes, but for highly technical pastry, commercial butter may provide more consistent water and fat ratios.
One of the best habits is making small flavored batches. Divide fresh butter into three portions: one salted plain, one sweet, and one savory. Add honey and cinnamon to the sweet batch, garlic and herbs to the savory batch, and keep the plain butter for toast or cooking. In about five extra minutes, you have a breakfast butter, a dinner butter, and an everyday butter. That is the kind of kitchen efficiency that makes you feel organized even if there are three spoons in the sink and nobody knows why.
Homemade butter also makes a thoughtful edible gift. Roll it into a parchment log, twist the ends, add a label, and pair it with a loaf of bread or a jar of jam. It looks charming, tastes special, and requires far less effort than most homemade gifts. Nobody needs to know your mixer did the hard work.
The biggest takeaway is this: homemade butter is not difficult, but it rewards attention. Use good cream, beat it long enough, rinse it well, salt it carefully, and store it properly. Do that, and you get butter that tastes fresh, clean, and proudly homemade. It is a tiny kitchen victory, and honestly, we could all use more of those.
Conclusion
The best homemade butter recipe is also one of the simplest: heavy cream, a little patience, ice water, and salt if you like it. Once you understand the basic process, you can make butter in a stand mixer, food processor, blender, or Mason jar. You can keep it plain, turn it into garlic herb butter, sweeten it with honey, or shape it into a beautiful compound butter for dinner guests.
Homemade butter is fresh, customizable, and fun to make. It teaches you how cream becomes butter, gives you real buttermilk as a bonus, and makes even ordinary toast feel like a small celebration. Try it once, and you may never look at a carton of heavy cream the same way again.