If your patio is feeling less “outdoor oasis” and more “sad slab behind the house,” good news: you do not need a designer budget, a contractor cousin, or a suspiciously expensive lantern from a boutique shop. Sometimes all you need is a cheap flowerpot, a little creativity, and the confidence of someone who has watched exactly three DIY videos and now says things like, “I can totally make that.”
A hanging patio light from a $2 pot is the kind of project that makes people stop mid-sip and ask, “Wait… you made that?” It looks charming, costs very little, and adds the kind of warm glow that makes even weeknight leftovers feel like al fresco dining in a tiny Italian village. Or at least in the corner of your backyard next to the grill. Close enough.
The basic idea is simple: use an inexpensive terra-cotta or terracotta-style pot as the decorative shade for a hanging outdoor light. You can make it rustic, modern, farmhouse, cottagecore, or “I had spray paint and feelings.” The smartest version uses a low-heat LED bulb or an outdoor-rated solar or plug-in light kit, so you get style without turning your flowerpot into a tiny clay sauna.
Why This Budget Patio Light Idea Actually Works
There is a reason affordable patio lighting projects are so popular: light changes everything. A plain deck suddenly feels cozy. A small balcony feels intentional. A patio table goes from “place where I dump mail” to “place where I dramatically serve lemonade.”
Using a flowerpot as a hanging patio light works especially well because pots already have qualities you want in outdoor decor. They are simple, sturdy-looking, easy to paint, and naturally at home on a porch, patio, or garden edge. Terra-cotta also brings warmth and texture, which plays nicely with wood furniture, black metal accents, wicker seating, and lush container plants.
It also solves a classic outdoor decorating problem: finding lighting that feels charming instead of harsh. Patio lighting works best when it adds mood first and brightness second. You want glow, not interrogation-room energy. A pot shade softens the look, helps the light feel more grounded, and gives a handmade touch that store-bought fixtures often lack.
What You Need for a Hanging Patio Light From a Pot
You can keep this project very simple or dress it up depending on your patio style. For a basic version, gather:
Core materials
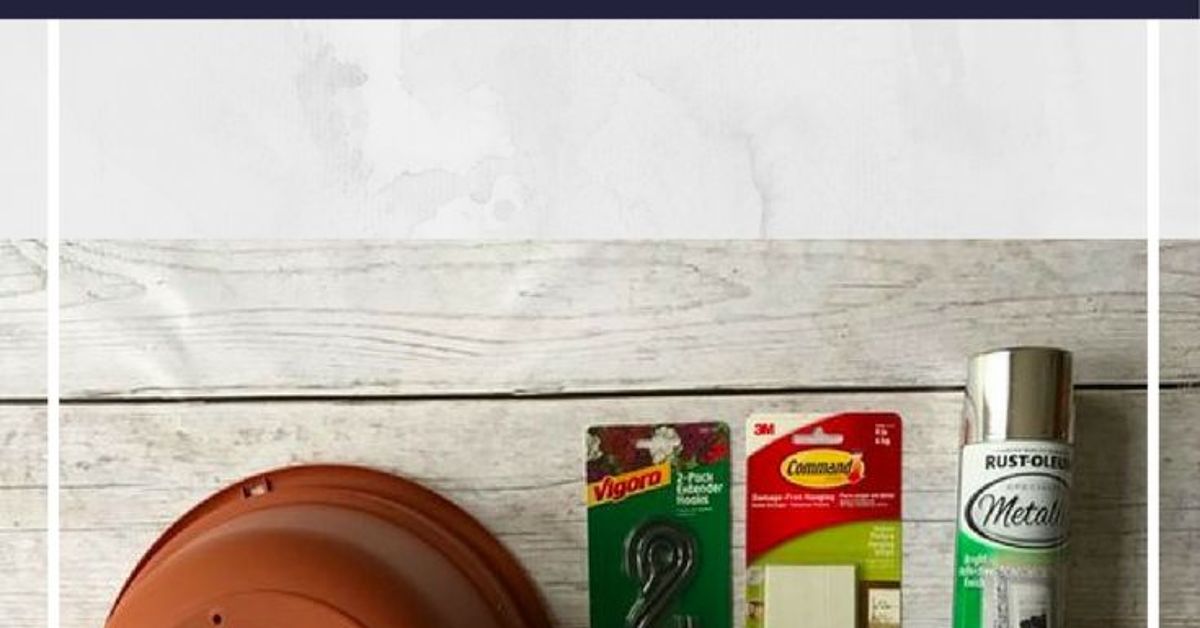
A small inexpensive terra-cotta pot, usually 4 to 8 inches wide, is the star of the show. You will also need an outdoor-rated pendant cord kit, or a battery-powered or solar light insert if you want a no-wiring approach. Add a low-watt LED bulb if your setup uses a socket. A ceiling hook, pergola hook, or sturdy hanging bracket will support the fixture. You may also want outdoor paint, clear sealer, decorative chain or rope, and a washer or grommet to help the cord sit neatly through the pot’s drainage hole.
Helpful tools
A drill, pliers, screwdriver, measuring tape, and ladder are usually enough. If your pot does not have a large enough drainage hole, a masonry bit may help enlarge it. Go slowly here. Terra-cotta is many wonderful things, but emotionally resilient is not one of them.
Choose the Safest Light Setup First
Before you start painting, distressing, stenciling, whitewashing, or otherwise giving your $2 pot a glow-up worthy of social media, start with the most important decision: what kind of light goes inside.
For most DIYers, the safest and easiest choice is one of these:
1. Solar puck or hanging solar light
This is the easiest low-stress route. Tuck a solar light inside the pot or attach one beneath it so the pot acts like a decorative shade. It is ideal if you want soft evening light and do not want to run cords across the patio.
2. Battery-operated LED puck light
Great for renters, balconies, and small covered patios. No outlet required, and no need to modify electrical hardware. The trade-off is battery replacement and usually less brightness.
3. Outdoor-rated pendant cord kit with LED bulb
This option gives you the most polished “real light fixture” look. Use only outdoor-rated components and a cool-running LED bulb. If your patio is exposed to weather, make sure the setup is meant for damp or wet locations as appropriate.
If you are tempted to improvise with indoor cords, random lamp parts, or an old fixture from the garage that “still looks fine,” resist the urge. Outdoor lighting should be designed for outdoor use. Your future self would prefer charm without sparks.
How to Make a Hanging Patio Light From a $2 Pot
Step 1: Pick the right pot
Choose a lightweight pot that looks substantial but is not too heavy for your hanging point. A small clay pot works beautifully for a cozy patio nook, while a medium pot creates more visual impact over a dining table. If you plan to hang it from a pergola beam or ceiling hook, remember that lighter is easier.
If the pot already has a drainage hole in the center, congratulations: the universe wants this project to succeed. That hole can become the pathway for your cord or hardware.
Step 2: Clean and customize
Wipe down the pot and let it dry completely. Then decide on the look. You can leave terra-cotta natural for a warm Mediterranean feel, paint it matte black for a modern patio light, dry-brush it white for cottage style, or use a faux aged finish if you want it to look like it came from a charming estate sale instead of a discount shelf.
If the pot will live outside full-time, an outdoor sealer can help preserve the finish. This matters even more if you paint it.
Step 3: Prep the center hole
Thread the light cord through the drainage hole if you are using a pendant-style setup. If the edge feels rough, add a rubber grommet or protective washer so the cord is not rubbing against raw clay. For battery or solar versions, this hole can still be useful for hanging wire or chain.
The pot will hang upside down like a shade, with the wider opening facing downward. That is where the light glow spills out and creates the patio magic.
Step 4: Install the bulb or light insert
If you are using a pendant kit, attach the socket and LED bulb according to the product instructions. Keep the bulb size in proportion to the pot. A giant globe bulb in a tiny pot can look less “designer” and more “garage science fair.”
If you are using a battery puck or solar insert, test it in the dark before hanging everything. You want enough light to be inviting, but not so much that your patio looks like it is preparing for emergency surgery.
Step 5: Hang it from a secure support
A hanging patio light should be attached to a beam, pergola rafter, porch ceiling, wall bracket, or another solid support. Not a flimsy decorative branch. Not a mystery screw left by the previous homeowner. Not hope.
If you are placing the light over an outdoor dining table, hanging it roughly 30 to 36 inches above the tabletop creates a cozy pendant effect. In walking areas, hang it higher so nobody stands up and meets your craft project face-first.
Step 6: Manage the cord neatly
Use outdoor clips, hooks, or ties to keep the cord tidy. A clean line makes the whole thing look intentional. A dangling cord that whips around in the wind makes it look like the patio is haunted by bad decisions.
Where This DIY Light Looks Best
This budget patio lighting idea is surprisingly flexible. You can use it in several ways depending on your space:
Over a bistro table
One hanging pot light over a small table creates instant intimacy. Add two chairs, a striped cushion, and a basil plant, and suddenly you are a person who definitely remembers to water herbs.
In a pergola corner
Tuck one light into the corner above a lounge chair or bench for a reading nook vibe. It makes a small patio feel layered and finished.
As part of mixed patio lighting
Combine the pot light with string lights, lanterns, or solar path lights. Good outdoor lighting often works best in layers. One light sets a mood. Several lights create depth.
Above a potted-plant grouping
This looks especially charming if you already have terra-cotta planters on the patio. The hanging light echoes the pots below, which makes the whole setup feel coordinated instead of random.
Design Tips to Make It Look More Expensive Than It Is
The secret to making a $2-pot light look stylish is not hiding the fact that it is simple. It is using that simplicity well.
Stick with a limited color palette. Black, white, clay, olive, sage, cream, and warm wood tones all work beautifully together outdoors. Choose warm white lighting rather than cold blue-white bulbs. Warm light is flattering, cozy, and far kinder to both patios and people.
You can also upgrade the look with small details: braided rope instead of plain chain, a brushed finish instead of glossy paint, or matching pots around the patio. Even a humble flowerpot starts acting fancy when the styling is consistent.
Common Mistakes to Avoid
Using the wrong bulb
Skip hot incandescent bulbs for this kind of project. A cool-running LED is the smart move for safety, efficiency, and bulb life.
Hanging it too low
What feels “charming and intimate” in your head can become “ow, my forehead” in real life. Always check clearance.
Using indoor-only parts outside
This is one of those shortcuts that feels harmless right up until weather shows up. Patio lighting needs outdoor-rated parts.
Ignoring the support point
A pretty light is only as good as the hook holding it. Use hardware rated for the load and anchor it to something solid.
Over-decorating the shade
A little paint? Great. A tasteful stencil? Sure. Six charms, three tassels, and beads swinging in every direction? Your patio light has become costume jewelry.
Is a Patio Light From a Pot Actually Safe?
Yes, it can be safe when built sensibly. The key is treating it like outdoor lighting, not like a craft project that happens to glow. Use components intended for outdoor conditions. Keep electrical connections protected. Choose LED lighting. Secure the fixture firmly. And if you want a permanently wired hanging light on a porch ceiling, bring in a licensed electrician instead of winging it with confidence and a tutorial tab still open.
If your patio gets full rain, strong wind, or extreme seasonal changes, inspect the fixture now and then. Look for cracks in the pot, wear on the cord, loose hooks, or paint peeling around the hole. Outdoor decor has a rougher life than indoor pieces, and a five-minute check can prevent a headache later.
Conclusion
A hanging patio light from a $2 pot is proof that good outdoor decorating is not about spending more. It is about seeing potential in ordinary things and knowing how to use them well. With the right pot, the right light source, and a little attention to safety, you can create a patio fixture that feels warm, personal, and genuinely stylish.
It is affordable, beginner-friendly, and easy to customize. Best of all, it adds the kind of soft patio glow that makes outdoor spaces feel lived in and loved. And that is the real magic here. Not the pot. Not the hook. Not even the bulb. It is the moment your backyard starts feeling like a place you actually want to be after sunset.
Experience: What This DIY Patio Light Is Like in Real Life
The funniest thing about making a hanging patio light from a cheap flowerpot is that the project rarely looks impressive while you are doing it. At some point, you are standing there with a pot, a cord, a hook, and a face that says, “I am either creating backyard magic or inventing a very decorative mistake.” Then you hang it up, wait for dusk, flip the switch, and suddenly the whole patio changes.
That first evening is the part people remember. During the day, the pot just looks like a clever little piece of decor. But at night, it starts doing emotional heavy lifting. The light softens the corners of the patio. The chairs look more inviting. The table looks less like outdoor furniture and more like a destination. Even if you are just eating takeout noodles in flip-flops, the mood says, “Tonight, we dine under custom lighting.”
One of the best experiences with this project is how personal it feels. Store-bought patio lights can look beautiful, but a DIY pot light carries a bit of your own style in it. Maybe you painted it matte black to match your modern outdoor chairs. Maybe you left the terra-cotta raw because you like that earthy, sun-baked look. Maybe you whitewashed it because your patio aesthetic lives somewhere between coastal grandma and “I have definitely pinned too many porch photos.” Whatever you choose, the light ends up feeling like it belongs there.
It also changes how you use the space. A patio that used to go dark and silent after sunset suddenly becomes useful again. You stay outside longer. You notice the evening breeze more. You actually sit in that chair you bought months ago “for relaxing.” Friends linger. Kids think it is magical. Even neighbors start giving the project the sideways look that clearly means they are mentally pricing flowerpots.
There is also a quiet satisfaction in knowing the whole thing did not cost much. That matters. Not every home project needs to become a financial event. Sometimes the joy comes from making something attractive out of ordinary, inexpensive materials. A $2 pot becoming a patio pendant feels like a tiny act of rebellion against overpriced decor.
Of course, the real-life experience also includes a few lessons. Wind matters more than you think. Hanging height matters a lot if your family contains tall people. Warm bulbs look better than cold ones. And once you create one nice pool of light, the rest of the patio suddenly starts making demands. The chair wants a cushion. The table wants a tray. The sad corner wants a plant. The patio, once ignored, becomes dramatic and full of opinions.
Still, that is part of the charm. This little project has a ripple effect. It makes the patio feel worth styling, worth using, and worth enjoying. And unlike complicated renovations, it gives you fast results. You can go from “Why is this space so bland?” to “Why does this feel like a boutique hotel courtyard?” in a weekend.
In the end, the experience is not really about a flowerpot or even the light itself. It is about atmosphere. A simple hanging patio light creates a pause in the day. It invites dinner outside, another cup of coffee, one more conversation, ten more minutes under the evening sky. That is a pretty strong return on investment for something that started in the garden aisle for two bucks.